


Getting your DTF heat press settings wrong can cost you hundreds of dollars in wasted transfers, ruined garments, and frustrated customers. Unlike some traditional heat transfer methods, DTF (Direct-to-Film) depends on a powder adhesive that needs the right conditions to bond properly with fabric fibers. If temperature, time, or pressure is off, the transfer may look fine at first, then peel, crack, or fade after the first wash.
At Joto Imaging Supplies, we’ve spent more than 35 years supporting heat transfer workflows and helping customers improve print consistency. After testing DTF transfers across a wide range of fabrics (from cotton tees to performance polyester), we’ve compiled this practical guide based on what works in production, not what sounds good in theory.
This article focuses on the three variables that matter most:
- Temperature
- Time (dwell time)
- Pressure
You’ll also learn the professional step many tutorials skip: the “second press” method, which can noticeably improve durability, reduce shine, and increase stretch resistance when done correctly.
Use this guide to cut waste, avoid repeat jobs, and deliver transfers that hold up the way customers expect.
Why Heat Press Settings Matter in DTF Printing
DTF printing relies on three factors working together: heat, time, and pressure. If you get any one of them wrong, transfers can fail immediately or degrade quickly after washing.
Adhesive activation
DTF powder adhesive typically performs best when it reaches a target range around 320–350°F. In that zone, the adhesive can melt and flow into the fabric structure, creating a stronger mechanical bond. Below that range, the adhesive may melt on the surface but won’t fully integrate with the fibers. Above that range, you increase the risk of scorching the garment or degrading color appearance.
Durability and wash resistance
The difference between a transfer that lasts 5 washes and one that lasts 50+ washes often comes down to how well the adhesive penetrates the fabric weave and how consistently it cures. Insufficient heat, inconsistent pressure, or skipping key steps can create “surface-level adhesion” that looks good but peels after minimal wear.
Stretch resistance
Athletic wear, fitted tees, and hoodies stretch constantly in real use. If the adhesive bond is incomplete or brittle, the print can crack when the fabric flexes. Correct settings help the transfer move with the garment.
Avoiding common problems
Ghosting, scorching, patchy adhesion, edge lift, and premature peeling almost always trace back to temperature, time, pressure, peel timing, or a missing process step like pre-pressing or a second press.
The goal is repeatable results. DTF becomes profitable when you can produce consistent transfers without “trial and error” on every batch.
DTF Heat Press Settings Chart - (Master Reference Table)
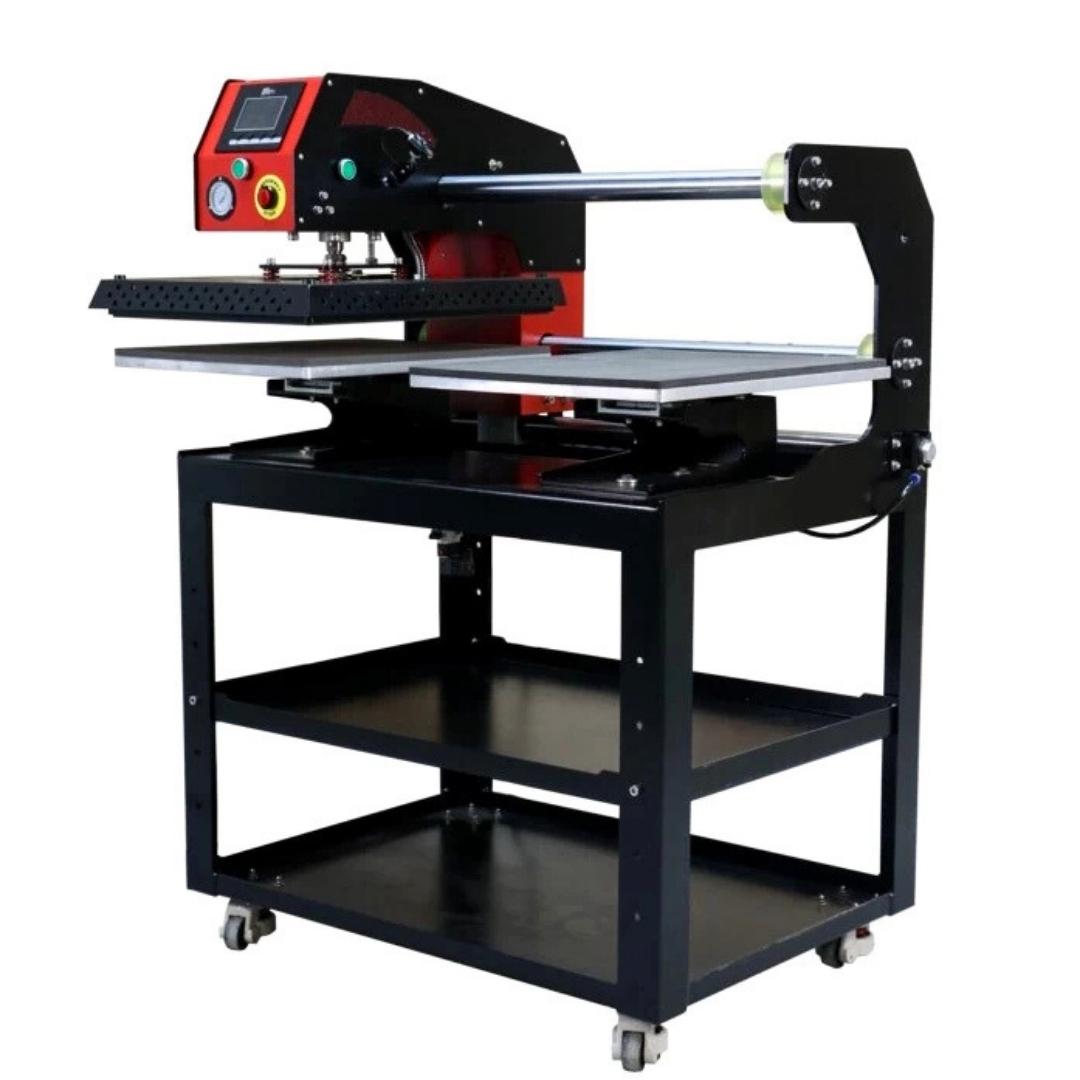
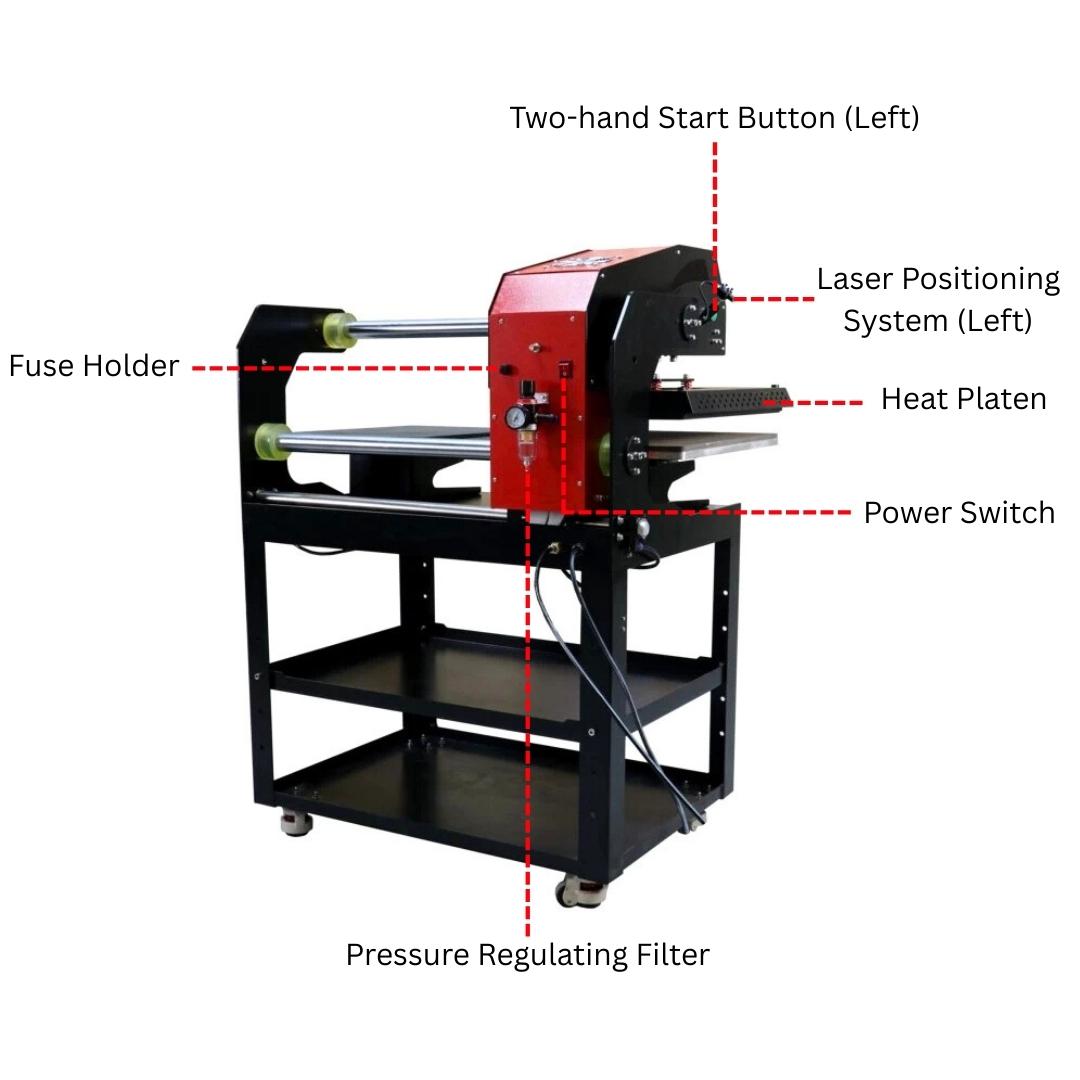
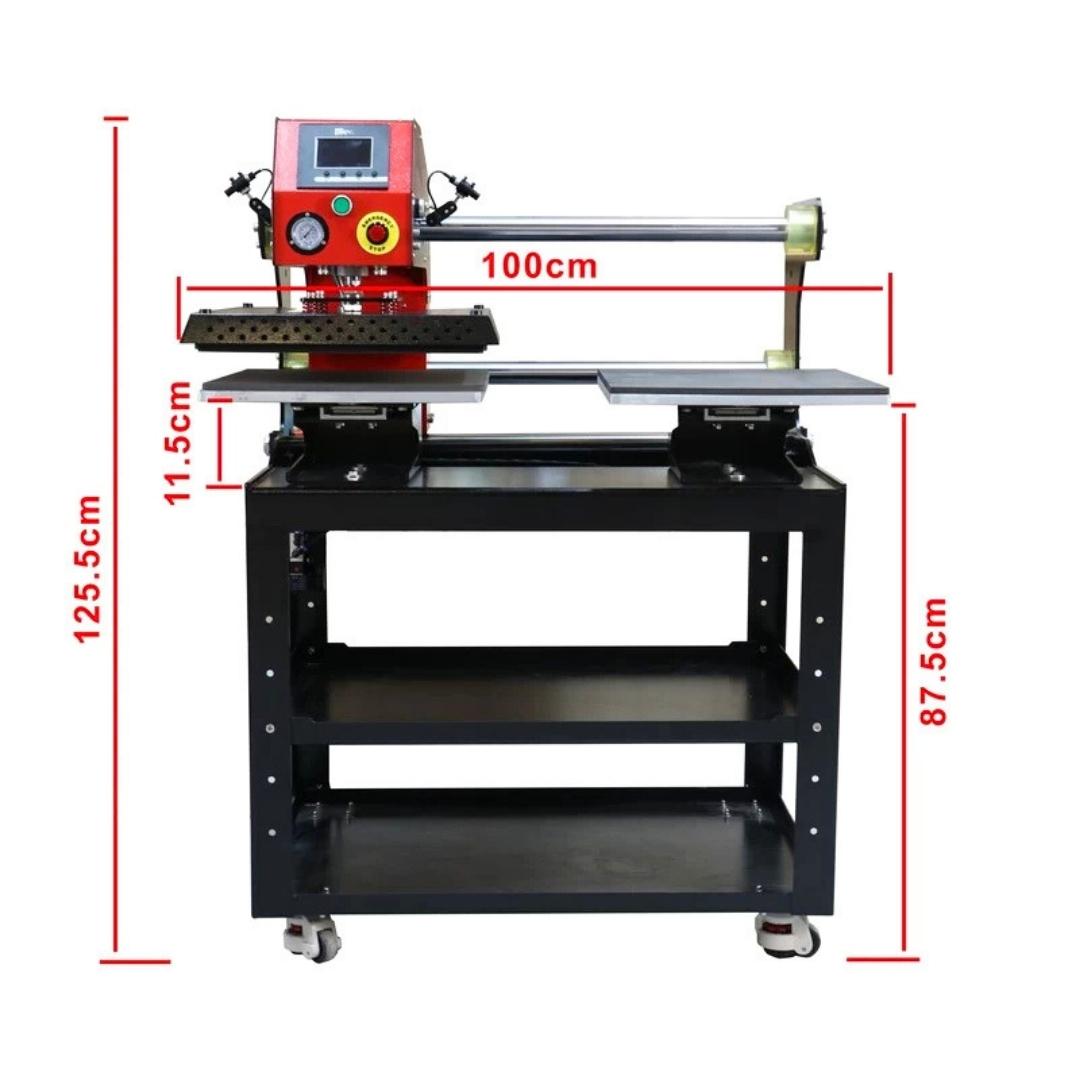
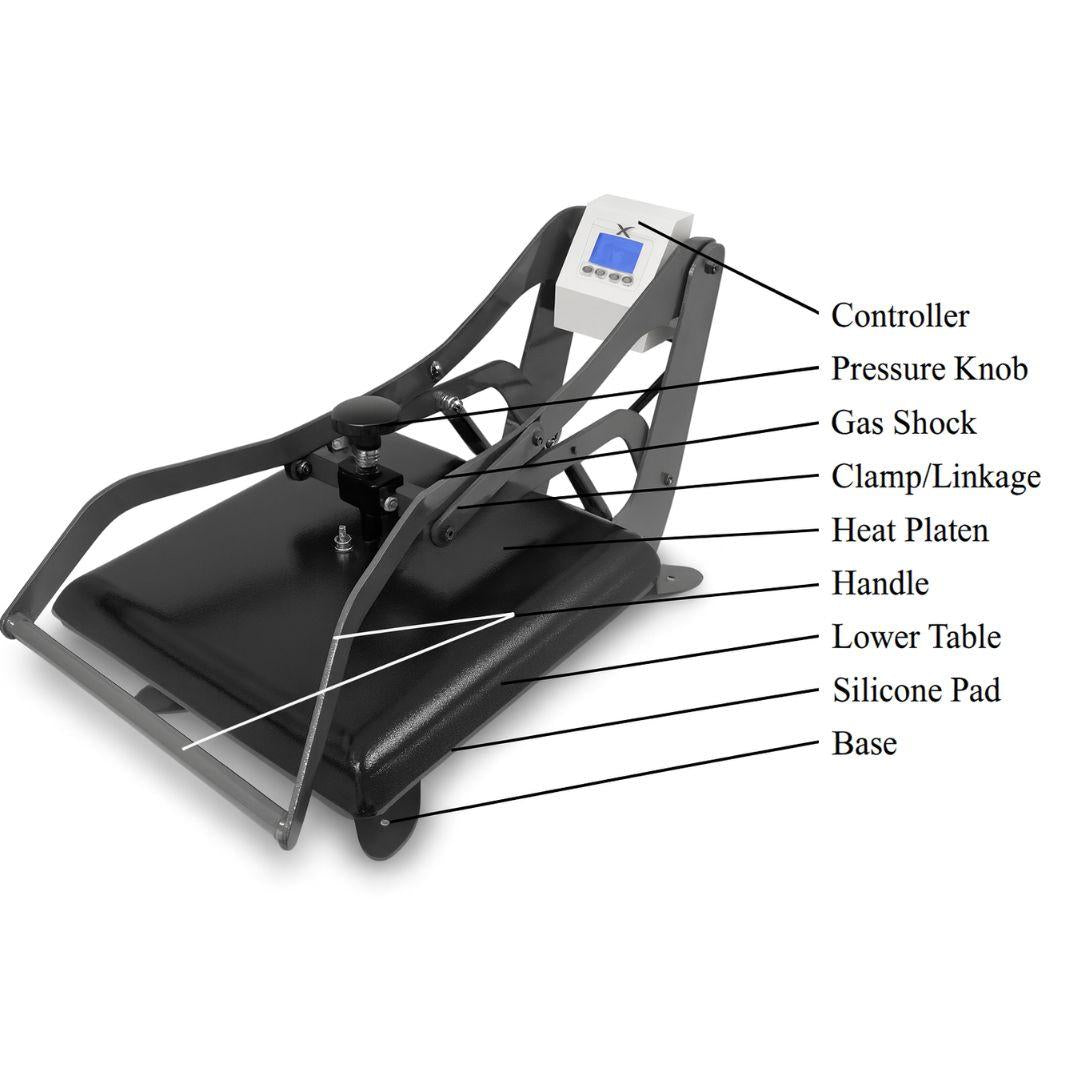
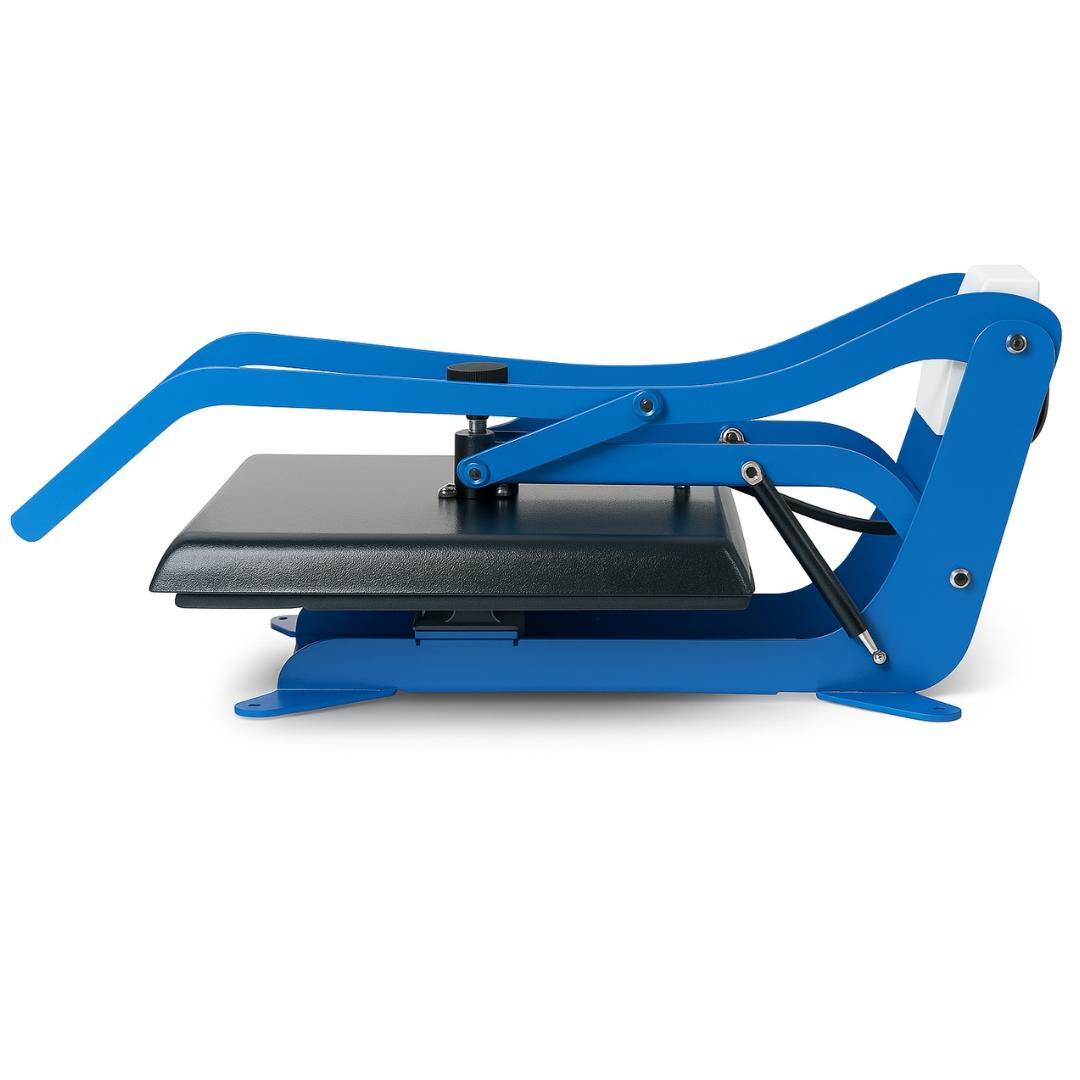
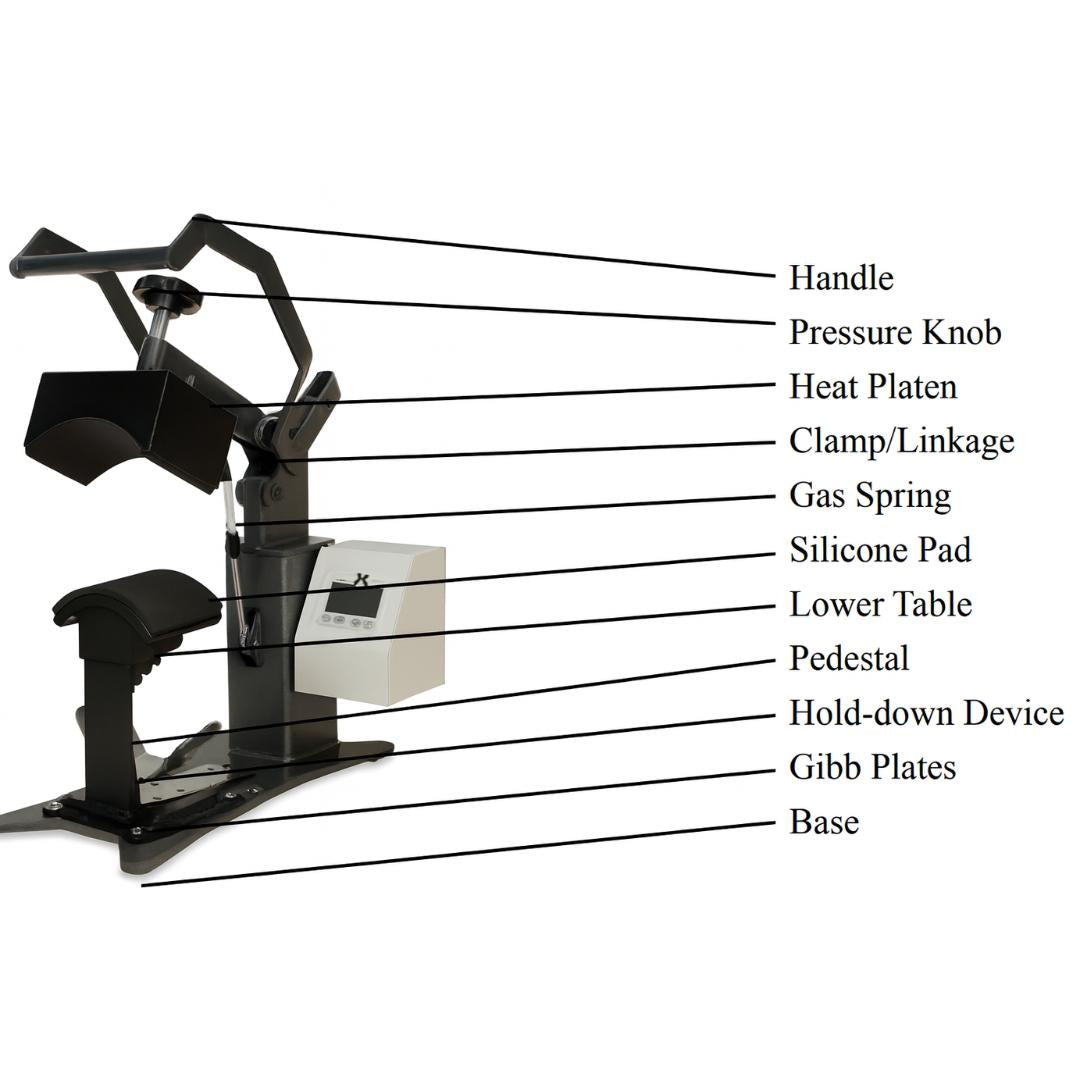
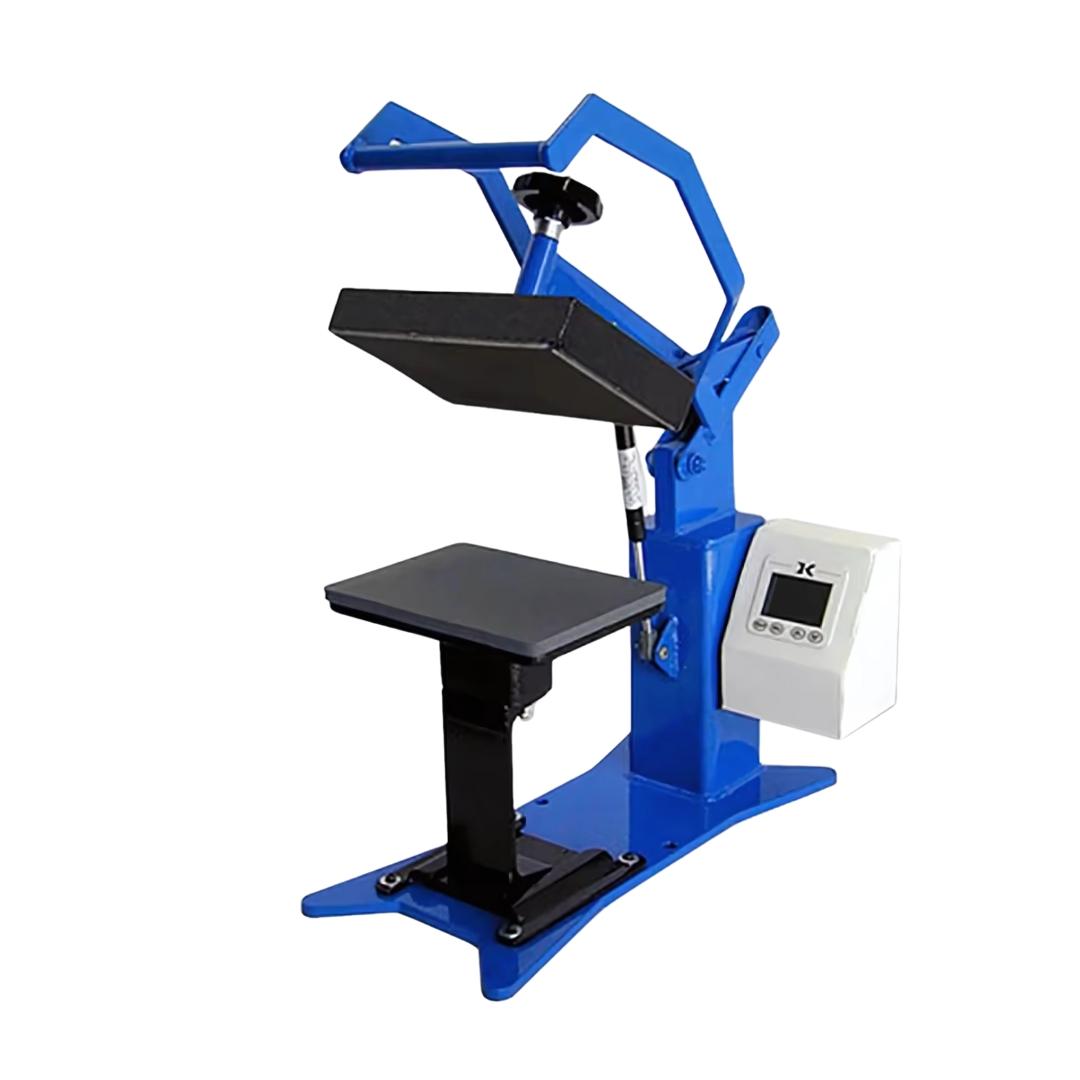
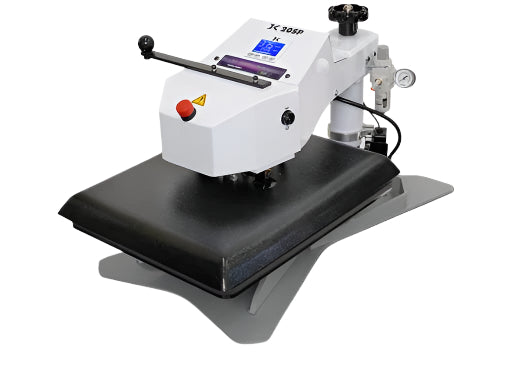
Use this chart as a starting point. These settings assume a clamshell heat press in good working condition. Swing-away presses often apply pressure more evenly and may require slightly different dwell times depending on the platen and heat retention. Always run a test when you change film brands, garment blanks, or press types.
| Fabric Type | Temperature | Time | Pressure | Peel Type | Second Press |
|---|---|---|---|---|---|
| 100% Cotton | 340°F (171°C) | 12–15 sec | Medium | Hot or warm | Yes (5–8 sec) |
| 100% Polyester | 320°F (160°C) | 10–12 sec | Medium–firm | Warm or cold | Yes (5 sec) |
| 50/50 Cotton/Poly | 330°F (166°C) | 12–14 sec | Medium | Warm | Yes (5–8 sec) |
| Tri-blend | 320°F (160°C) | 10–12 sec | Medium | Warm | Yes (5 sec) |
| Nylon | 310°F (154°C) | 8–10 sec | Firm | Cold only | Yes (5 sec) |
| Performance fabrics | 300°F (149°C) | 8–10 sec | Medium | Cold only | Optional |
| Hoodies (fleece) | 320°F (160°C) | 12–15 sec | Medium | Warm | Yes (8 sec) |
| Canvas | 350°F (177°C) | 15 sec | Firm | Hot | Yes (8 sec) |
| Denim | 340°F (171°C) | 15 sec | Firm | Hot or warm | Yes (8 sec) |
Important notes:
- Always pre-press garments 3–5 seconds to remove moisture and wrinkles.
- Use parchment paper or a Teflon sheet during the second press.
- Test on scrap fabric when switching to a new fabric type or DTF film brand.
- Heat press displays can be inaccurate; verify platen temperature with an infrared thermometer and calibrate regularly.
Recommended Temperature for DTF Transfers
Temperature is the most critical variable in DTF pressing because the adhesive needs a specific thermal range to melt and bond correctly.
Why 320–350°F is the sweet spot
In most cases, this range triggers the adhesive to melt, flow, and penetrate into fabric fibers. Think of it like cooking: you’re not just warming the surface, you’re trying to achieve consistent heat through the adhesive layer so it can integrate with the fabric weave.
DTF adhesives are often TPU-based (thermoplastic polyurethane) formulations. These adhesives have an optimal melting and flow window. Too cool and the adhesive can’t flow into the weave; too hot and you can cause fabric damage, color shifts, and potentially weaken the bond by over-heating the adhesive.
What happens below 300°F
Pressing below 300°F is one of the most common beginner mistakes because the transfer can appear acceptable at first. The adhesive may look melted on the surface, which gives a false sense of success. But the bond is incomplete.
Common results of insufficient temperature:
- Transfer looks fine initially, then peels after the first wash
- Edges lift before the center
- The print feels thick and “plasticky” instead of integrated
- Powder residue may remain visible
- Poor stretch resistance (cracks appear when fabric is pulled)
If transfers peel after washing, the first troubleshooting step is usually to increase temperature slightly (often 5–10°F) and retest with the same film and garment.
What happens above 360°F
Too much heat causes multiple problems:
- Fabric damage: polyester can scorch or glaze, cotton can yellow, blends can distort
- Color degradation: DTF inks can look faded or washed out
- Adhesive brittleness: over-heating can lead to a bond that looks good at first but fails under stress or washing
- Hard hand feel: excessive heat can create a stiff, plastic-like finish
If your prints feel overly stiff or colors look dull, temperature is one of the first variables to inspect.
Film manufacturer differences
DTF film brands and adhesive coatings vary. Some films perform better at lower temperatures (around 310–330°F), others prefer the higher end (330–350°F). Always check any included technical data from the film supplier.
When switching film brands, test at 320°F, 330°F, and 340°F on the same garment type. Evaluate:
- Adhesion (especially edges)
- Color vibrancy
- Hand feel
- Wash durability
Document the best performing temperature for that film and keep it consistent.
Temperature testing method
Your heat press display may not match actual platen temperature. To find the true “sweet spot” on your machine:
- Verify platen temperature using an infrared thermometer.
- Start at 320°F on a scrap garment.
- Increase by 5°F increments (325, 330, 335, etc.).
- Press identical test transfers at each temperature.
- Evaluate adhesion, color quality, and hand feel.
- Wash test the best samples.
The temperature that yields strong adhesion and passes wash testing becomes your baseline for that fabric type on your specific press.
Understanding Pressure in DTF Heat Pressing
Pressure is the least understood part of DTF heat pressing because many guides say “medium pressure” without explaining what that means. But pressure matters just as much as heat and time.
Pressure’s job is simple: create complete, even contact between the transfer and the fabric surface so the adhesive can bond across the entire design.
What “medium pressure” actually means
If we translate it into practical terms:
- Too light: the press closes easily, and the transfer doesn’t fully contact the fabric everywhere
- Medium: you feel moderate resistance when closing; the garment compresses slightly
- Firm: strong resistance; the garment compresses noticeably
Insufficient pressure can cause:
- Edge lift
- Patchy adhesion
- Corners peeling after wash
Excessive pressure can cause:
- Shine marks
- Fabric press lines
- Adhesive squeeze-out beyond edges
- A stiff hand feel
The goal is consistent contact, not maximum force.
The paper test for pressure
This simple method helps you verify pressure consistency:
- Place a regular sheet of printer paper on the platen.
- Close the press completely.
- Try to slide the paper out.
Interpretation:
- Paper slides out easily: pressure too light
- Paper tears immediately: pressure too firm
- Paper resists but slides out intact: pressure is close to ideal
Run this test monthly or any time you see sudden changes in adhesion quality.
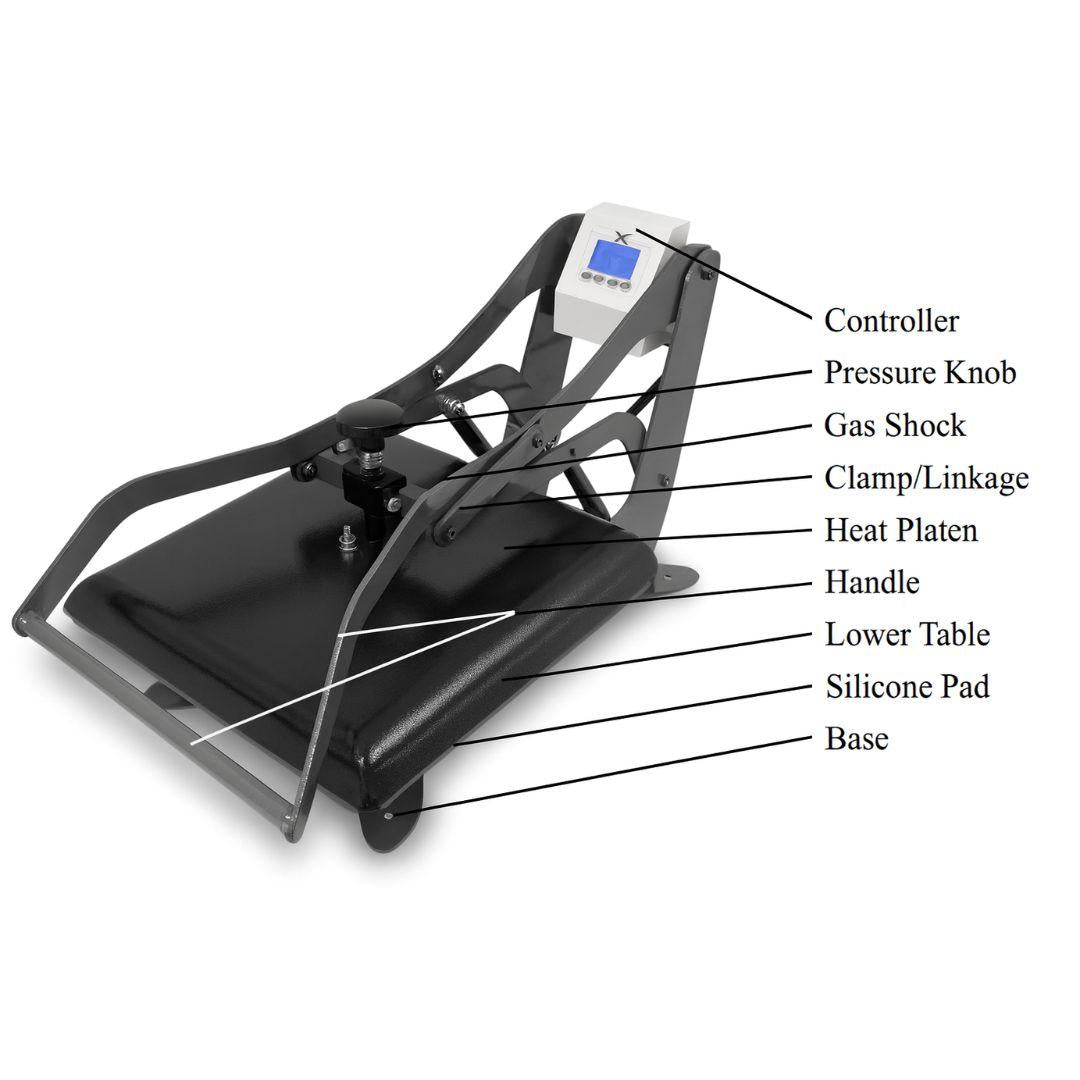
Clamshell vs swing-away pressure differences
Clamshell presses can apply uneven pressure because of the hinge design. Often the back receives more pressure than the front. This can show up as:
- Back half adheres well
- Front half peels or lifts
To compensate, operators may slightly increase dwell time or adjust placement closer to the center/back of the platen.
Swing-away presses tend to apply pressure more evenly because the platen closes straight down. If you struggle with large transfers on a clamshell, a swing-away press can improve consistency.
Pressure by fabric weight
Heavier and textured fabrics typically need more pressure to ensure proper contact:
- Lightweight tees and performance wear: medium pressure
- Standard tees and hoodies: medium to medium-firm
- Thick canvas or denim: firm pressure
Always test when switching garment types. A setting that works on a lightweight cotton tee may fail on a thick hoodie.
DTF Dwell Time: How Long to Press
Time works with temperature to ensure heat penetrates through the film to the adhesive and fabric surface.
Why 10–15 seconds is standard
For most fabrics, 10–15 seconds provides enough time for:
- Heat to penetrate to the adhesive layer
- Adhesive to melt and flow
- Adhesive to embed into fabric fibers
- The bond to begin curing (full curing continues during cooling)
Pressing under 10 seconds often leads to incomplete activation. Pressing much longer than 15 seconds usually adds risk without adding benefits (scorching, color dulling, excessive shine).
Thick garments require extended time
Hoodies, heavy fleece, and thick fabrics act as insulation. Heat needs extra time to reach the adhesive layer. Pre-pressing becomes extra important here because it compresses the fleece and flattens the surface.
A practical hoodie workflow:
- Pre-press 5 seconds to compress fleece
- Press transfer 15 seconds
- Warm peel
- Second press 8 seconds with barrier sheet
Oversized prints and hot/cold spots
Large designs may benefit from the higher end of the time range, especially if your press has minor hot and cold zones. Extra time can help even out minor temperature variation across the platen.
Be cautious with polyester: stay conservative on time and temperature to avoid scorch or glaze.
Heat press age and recovery
Older presses can lose thermal efficiency. If your press struggles to recover to set temperature between jobs, you may see inconsistent results in high-volume runs. If necessary:
- Slow the pace slightly
- Monitor platen temperature
- Add 1–2 seconds to dwell time when the press is cooling under production load
Fabric-Specific DTF Settings: Practical Guidance
Below are real-world adjustments that help you dial in results.
100% Cotton
Cotton is forgiving and bonds well.
- 340°F
- 12–15 seconds
- Medium pressure
- Hot or warm peel
- Second press 5–8 seconds
Always pre-press to remove moisture. If cotton yellows, reduce temperature slightly and verify actual platen temp.
Polyester
Polyester is heat-sensitive.
- 320°F
- 10–12 seconds
- Medium–firm pressure
- Warm or cold peel
- Second press 5 seconds
Avoid hot peel on polyester. Dye migration and glazing risks increase at higher temperatures.
50/50 Blends
A stable middle ground.
- 330°F
- 12–14 seconds
- Medium pressure
- Warm peel
- Second press 5–8 seconds
Warm peel usually improves reliability compared to hot peel.
Tri-blends
Rayon content is heat-sensitive.
- 320°F
- 10–12 seconds
- Medium pressure
- Warm peel
- Second press 5 seconds
If adhesion is weak, increase pressure slightly rather than increasing heat.
Nylon and performance fabrics
Proceed carefully and test first.
- Nylon: ~310°F, 8–10 sec, firm pressure, cold peel
- Performance: ~300°F, 8–10 sec, medium pressure, cold peel
Many performance fabrics have coatings that can reduce adhesion. Test on scrap or a hidden area and wash test before committing to a run.
Hoodies and heavy fleece
Heat penetration is the challenge.
- 320°F
- 12–15 seconds
- Medium pressure
- Warm peel
- Second press 8 seconds
Pre-pressing is mandatory on fleece.
Canvas and denim
Dense weave needs more pressure and time.
- Canvas: 350°F, 15 sec, firm pressure
- Denim: 340°F, 15 sec, firm pressure
Second press improves hand feel and durability.
Hot Peel vs Warm Peel vs Cold Peel
Peel timing changes durability and finish.
- Hot peel: faster workflow, often more matte
- Warm peel: most versatile and reliable
- Cold peel: safer for heat-sensitive synthetics, often glossier
If the transfer lifts during peel, it can mean:
- Peeling too soon for that film/fabric
- Insufficient temperature or pressure
- Film type mismatch (hot peel film being cold peeled, etc.)
Follow your film manufacturer’s peel guidance, then refine based on results.
The Second Press: The Professional Move
This is the single most overlooked step in DTF tutorials.
After you peel the film, you press again briefly with a barrier sheet.
Second press setup:
- Same temperature as first press
- 5–8 seconds (not the full dwell time)
- Medium pressure
- Barrier sheet required (parchment or Teflon)
Why it works:
- Helps complete curing and settle the adhesive
- Reduces surface shine
- Improves stretch resistance
- Can significantly improve wash durability when compared to skipping this step
If you’re dealing with cracking, lifting edges, or inconsistent finish, add the second press before changing film brands or blaming the printer.
Troubleshooting: Fast Fixes for Common Problems
Problem: Transfer peeling after first wash
- Likely causes: temperature too low, pressure too light, skipped second press
- Fix: increase temperature 5–10°F, verify pressure, always second press
Problem: Colors look faded or washed out
- Likely causes: temperature too high or dwell time too long
- Fix: reduce temperature 5–10°F, shorten time, verify actual platen temp
Problem: Powder residue visible
- Likely causes: insufficient heat/time or inaccurate heat press display
- Fix: increase temperature slightly, verify with IR thermometer
Problem: Fabric scorching or yellowing
- Likely causes: too much heat, wrong settings for polyester/blends
- Fix: reduce temperature immediately, confirm fabric content, use barrier sheet
Problem: Shine marks on garment
- Likely causes: excessive pressure or second press without proper barrier
- Fix: reduce pressure slightly, use clean parchment/Teflon, shorten second press
Problem: Patchy adhesion / incomplete transfer
- Likely causes: uneven pressure, wrinkles, moisture, platen hot spots
- Fix: pre-press, paper-test pressure, verify platen temp across surface
Final Thoughts
DTF success is not magic. It’s process control.
Start with consistent baseline settings:
- Temperature: 320–350°F
- Time: 10–15 seconds
- Pressure: medium to firm
- Peel: per film guidance
- Second press: 5–8 seconds with barrier sheet
Then refine based on fabric type, film brand, and your specific press.