


Paropy™ Transfer Paper CL Tattoo - Pack of 25
Tattoo Transfer Paper for Laser Printer
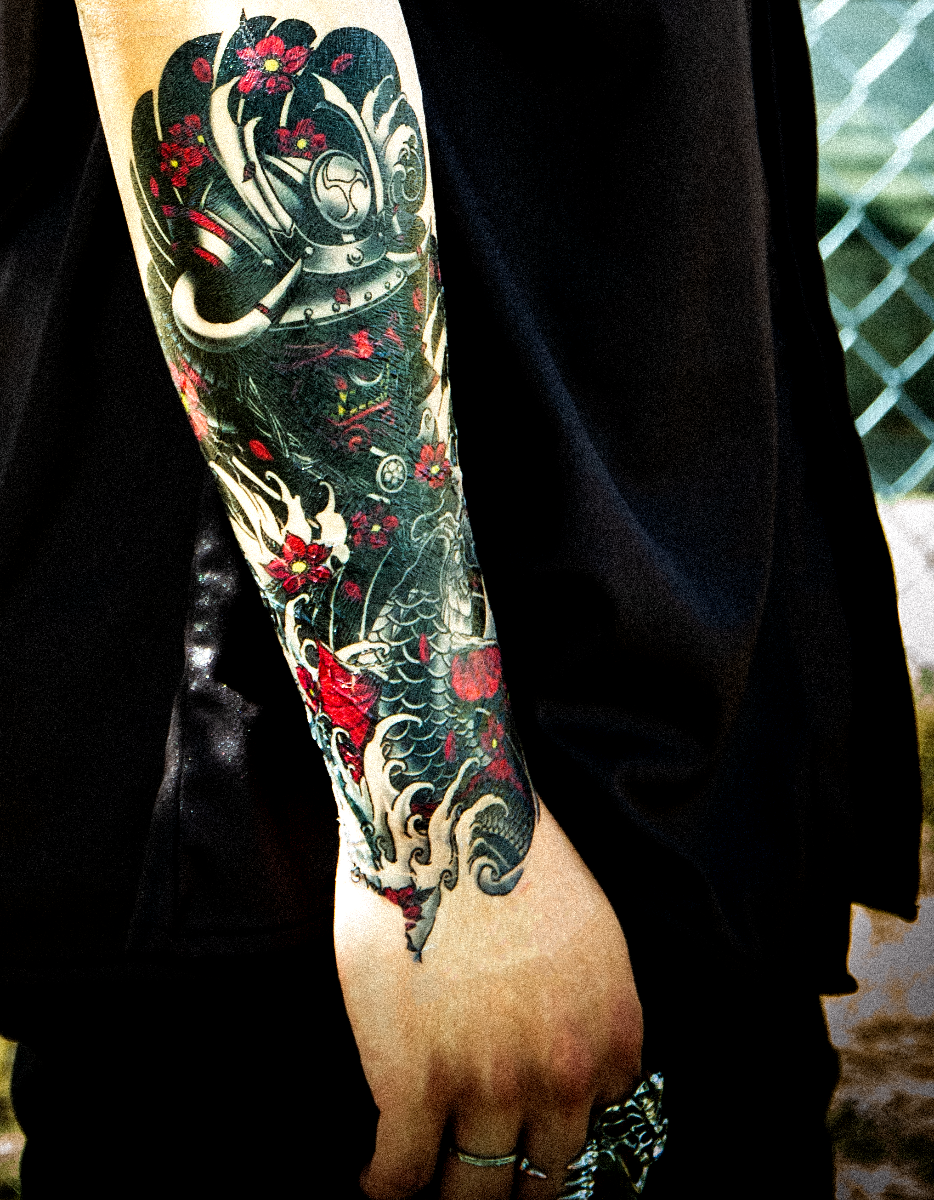
Create custom temporary tattoos using your laser printer with Paropy™ CL Tattoo Transfer Paper. This professional-grade tattoo paper is designed for oil and non-oil color laser copiers and printers, offering a reliable, high-quality transfer for events, branding, and creative projects.
Each set includes 25 printable sheets and 25 adhesive sheets, allowing you to produce full-color, skin-safe tattoos that apply easily with water and typically last up to 3 days. Whether you’re producing custom tattoos for a promotional campaign or theatrical use, Paropy™ CL delivers clean, bold results with speed and precision.
Key Features
- Laser-compatible tattoo paper – ideal for use with color laser printers and copiers
- 25 sets included: 25 printing sheets (A) + 25 adhesive sheets (B)
- Letter size (8.5" x 11") – standard for most desktop and office printers
- Applies easily with water using a towel or tissue
- Produces vibrant, durable temporary tattoos that last up to 3 days
- Safe for skin – easily removable with soap and water
Ideal For
- Promotional events and branded giveaways
- Film, theater, and cosplay use
- Large volume tattoo production
- Offices and print shops with color laser printers
How to Use Tattoo Transfer Paper (Laser Version)
- Design your artwork and print in mirror image on the glossy side of sheet A using a laser printer.
- Peel back one inch of the adhesive sheet (B) and align it with the printed sheet.
- Apply the adhesive layer carefully and smooth out air bubbles using a ruler or squeegee.
- Cut around the design as close as possible.
- Peel off the glossy top layer to expose the adhesive.
- Apply the design to the skin and rub gently.
- Use a damp towel or tissue to apply water for about 10 seconds.
- Remove the backing to reveal the finished tattoo.
Specifications
- Product: Paropy™ CL Tattoo Paper – AB Set
- Item No.: P-CLTT-AB-GEN-LT
- Paper Size: 8.5" x 11"
- Quantity: 25 sheets A + 25 sheets B
- Compatible Printers: Oil and non-oil color laser printers and copiers
Storage & Tips
- Store in a cool, dry environment away from direct heat and sunlight
- Trim closely around the design to minimize excess adhesive on the skin
- Always test before large or commercial applications
If you're looking for reliable tattoo transfer paper for laser printers, Paropy™ CL is the professional solution for crisp, vibrant, and skin-safe temporary tattoos.
| Brand | Paropy |
|---|---|
| Compatible Technology | Transfer Papers |
| FCC Attribute | Yes |
| Pack Size | 25 |
| SIP Attribute | Yes |
| Unit Sell | pack |
| Peel | |
|---|---|
| Equipment | |
| Image | Mirror |
| Pressure | |
| Application Temperature | |
| Time | |
| Equipment Used | Laser Printer |
| Wash Temperature | |
| Hints & Tips | |
| Imaging Instructions |
|