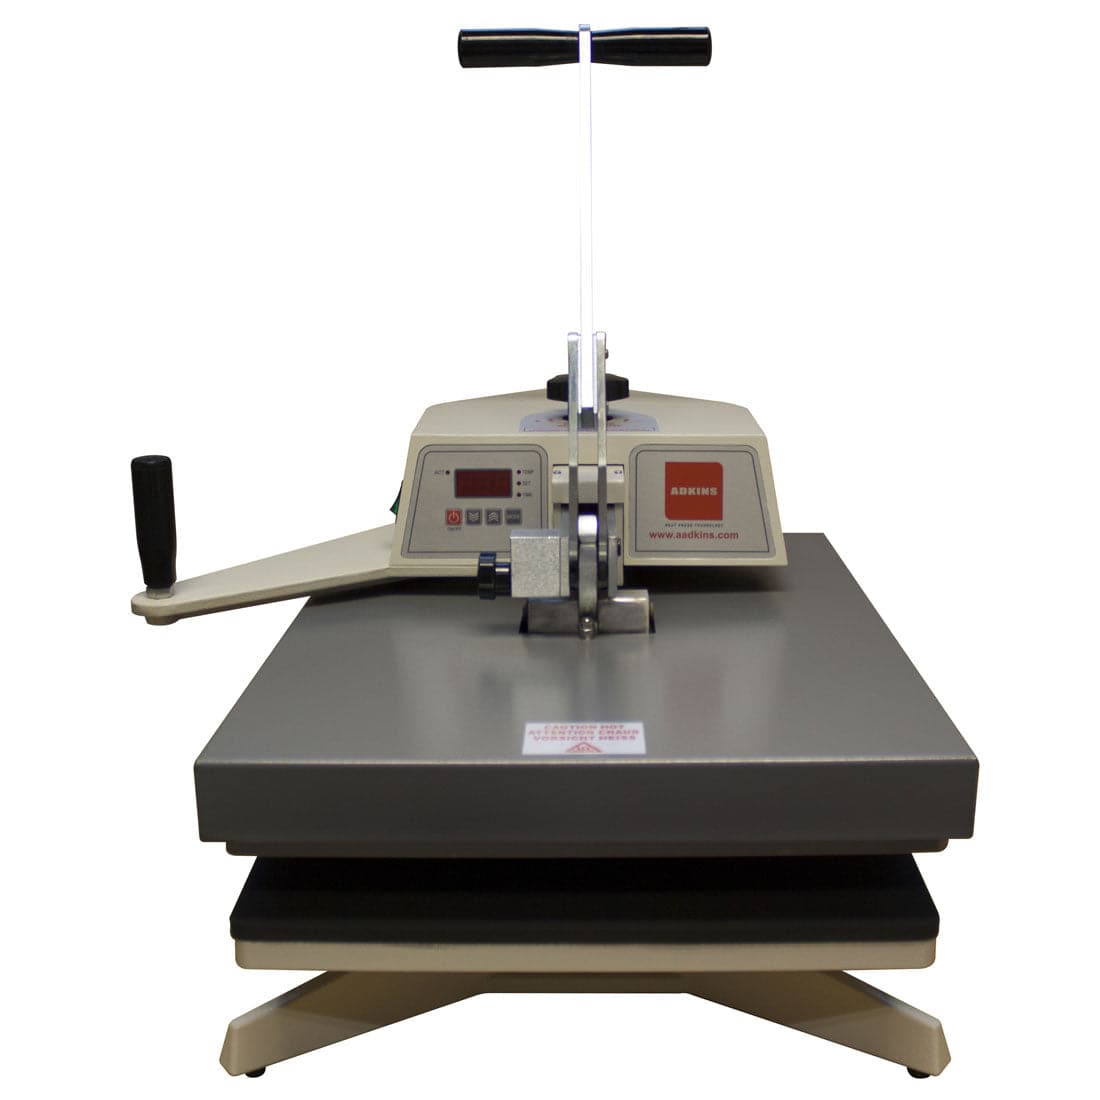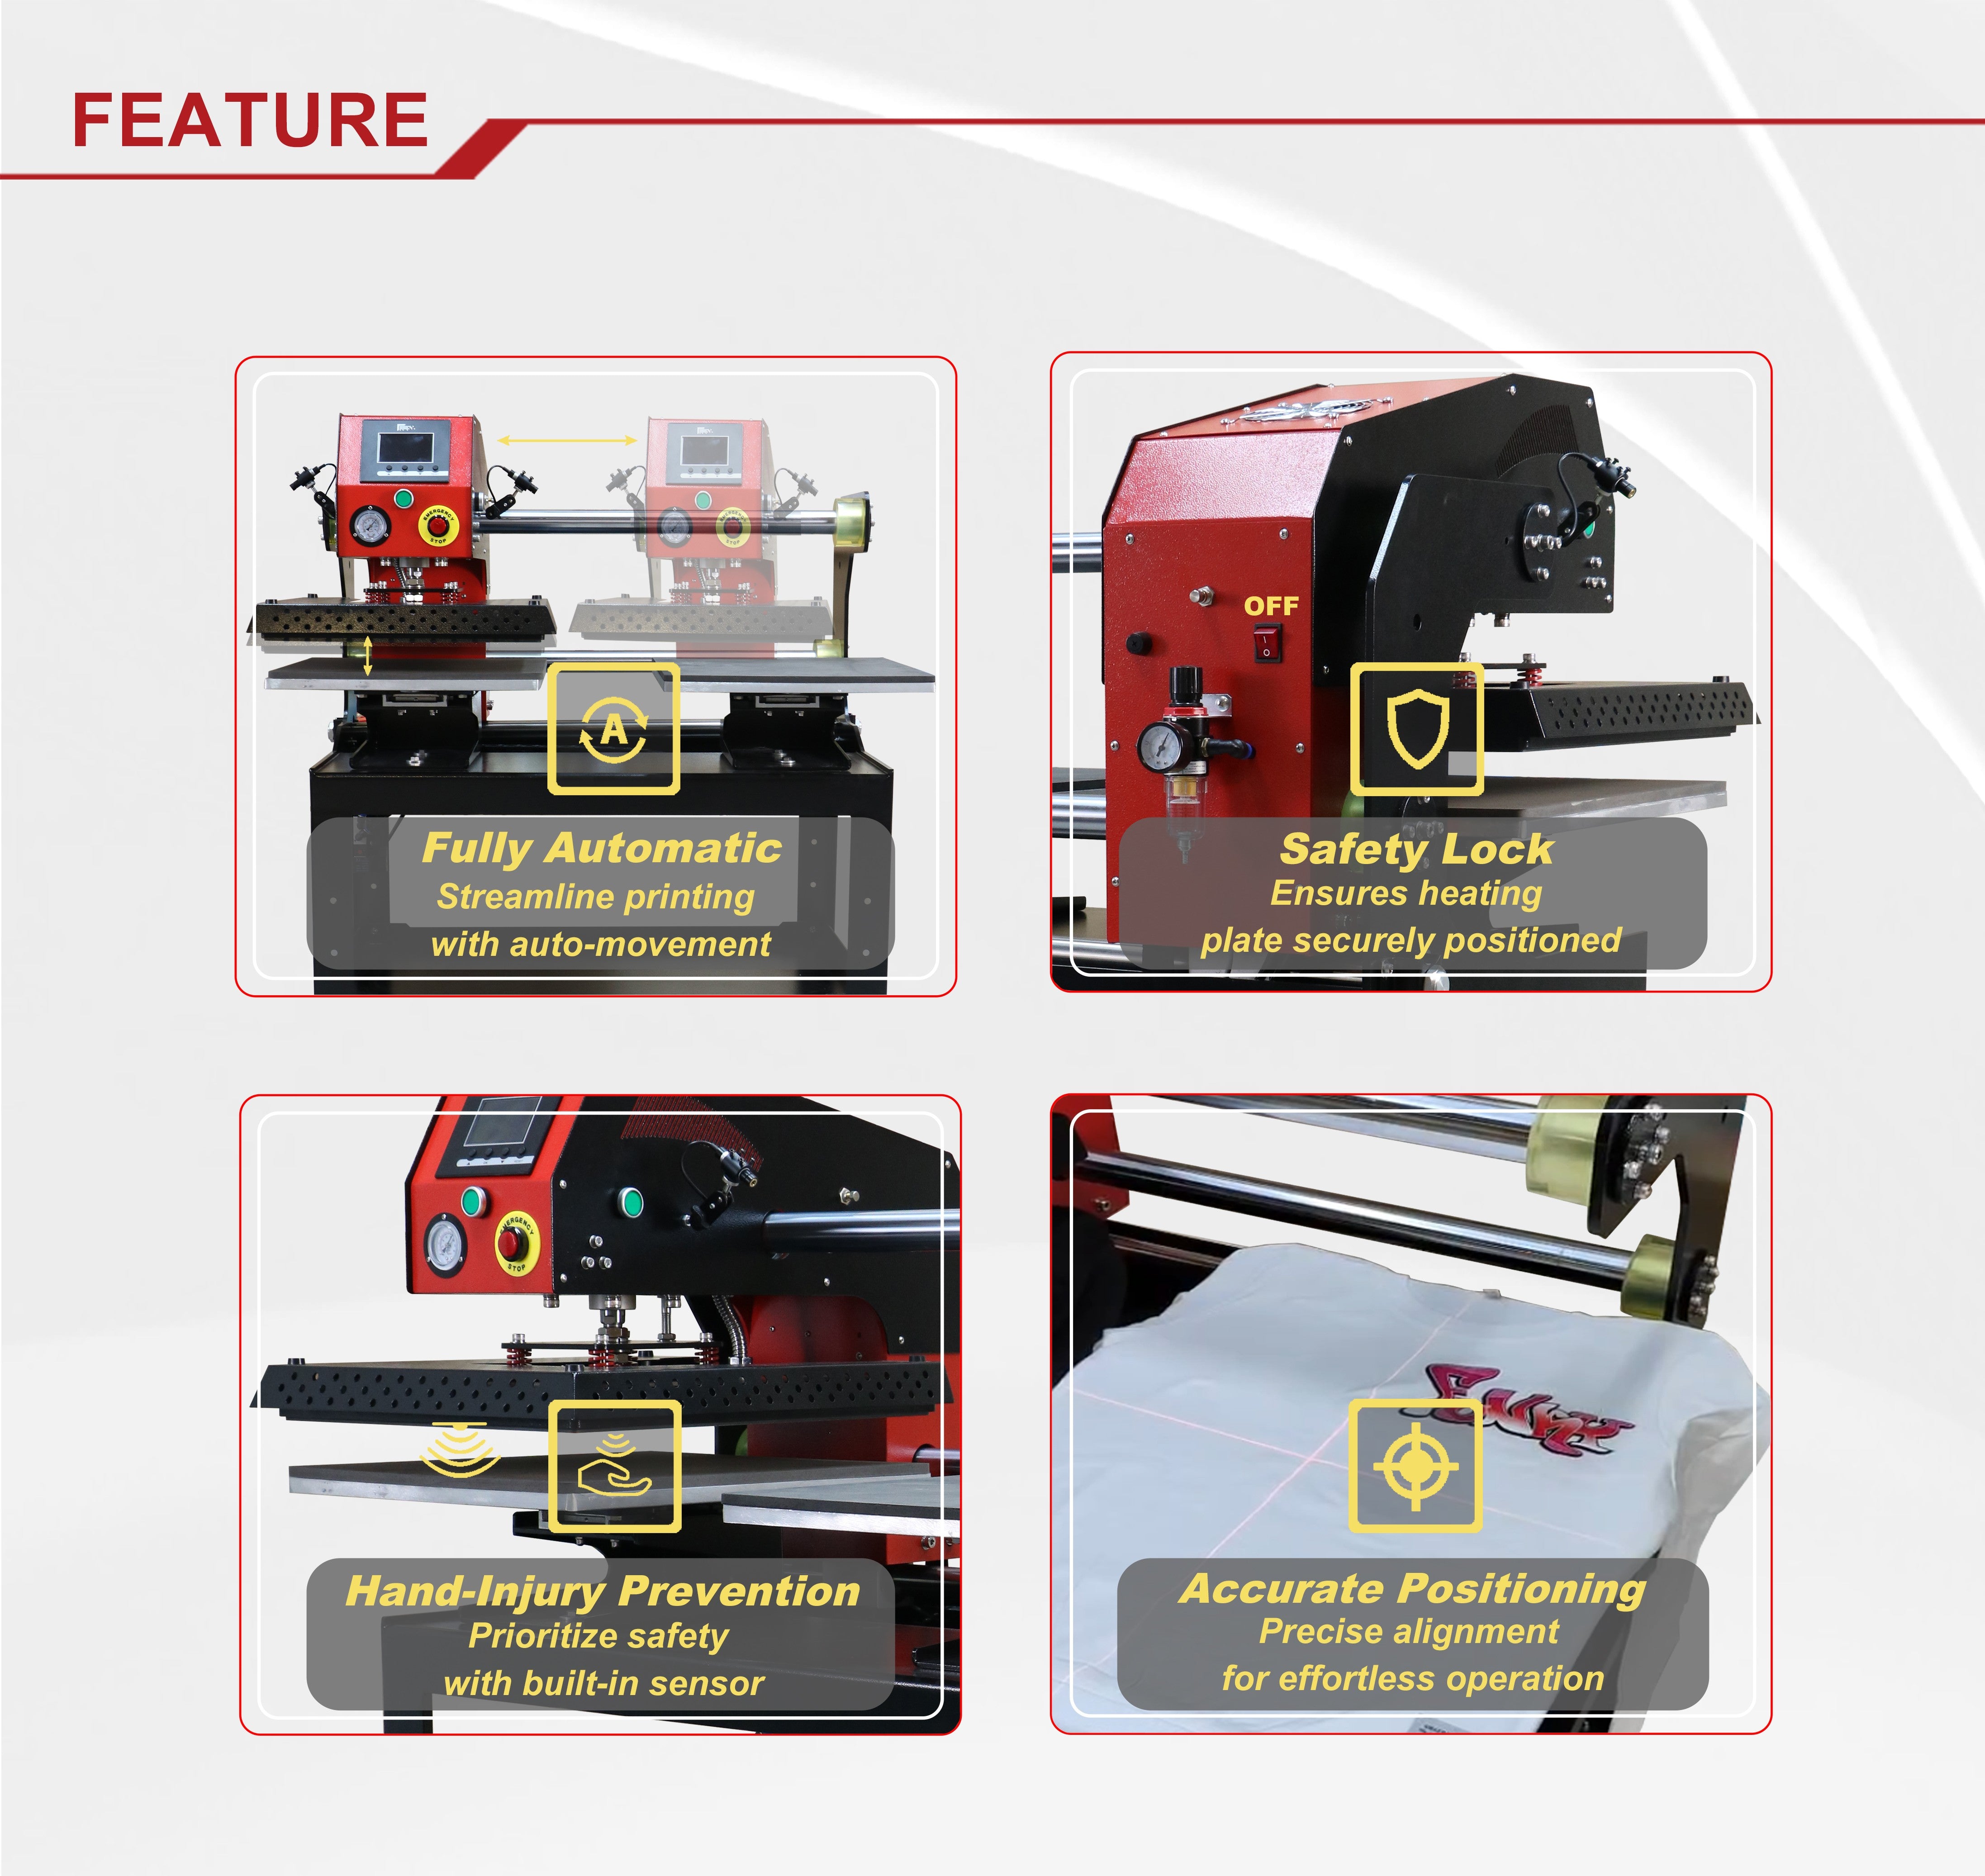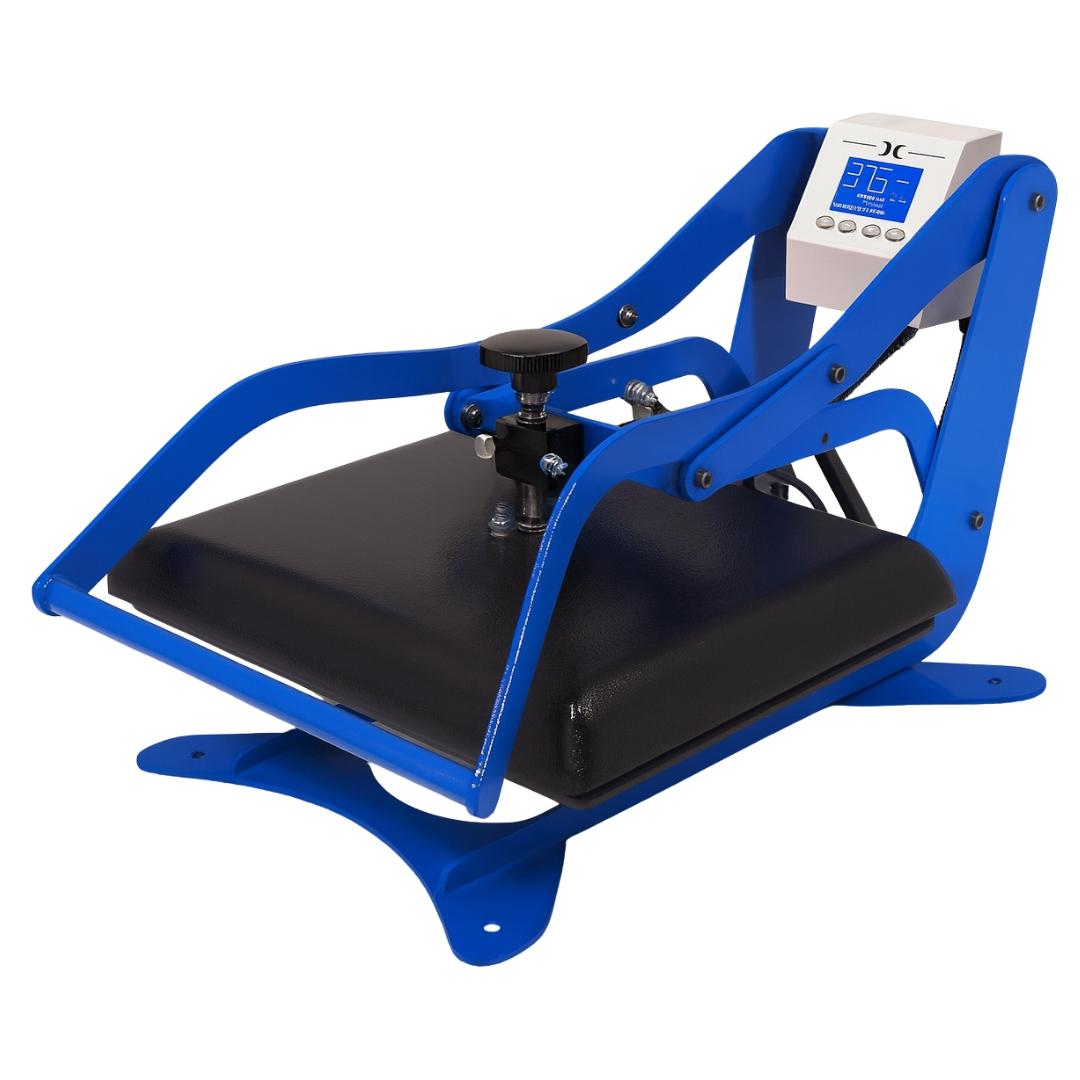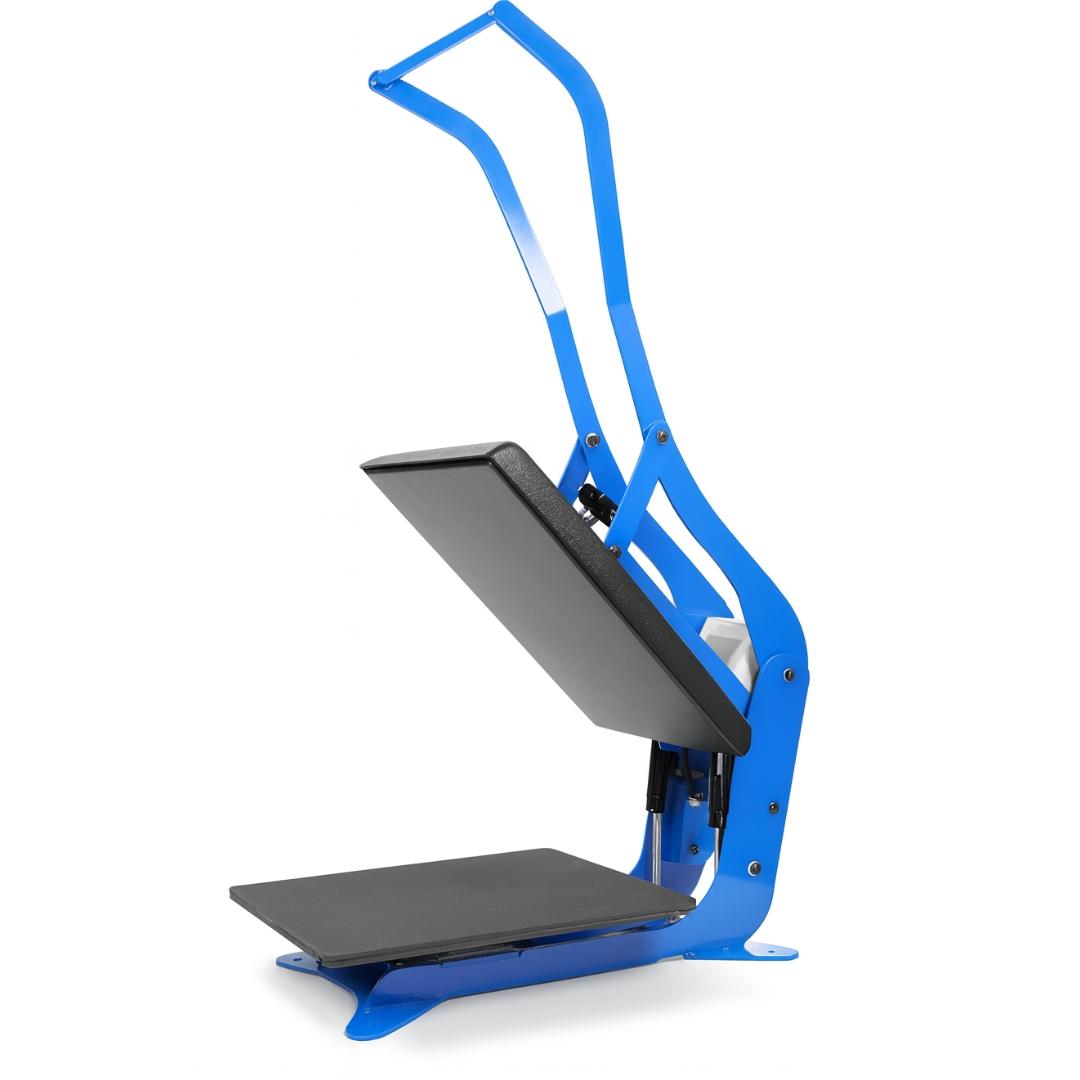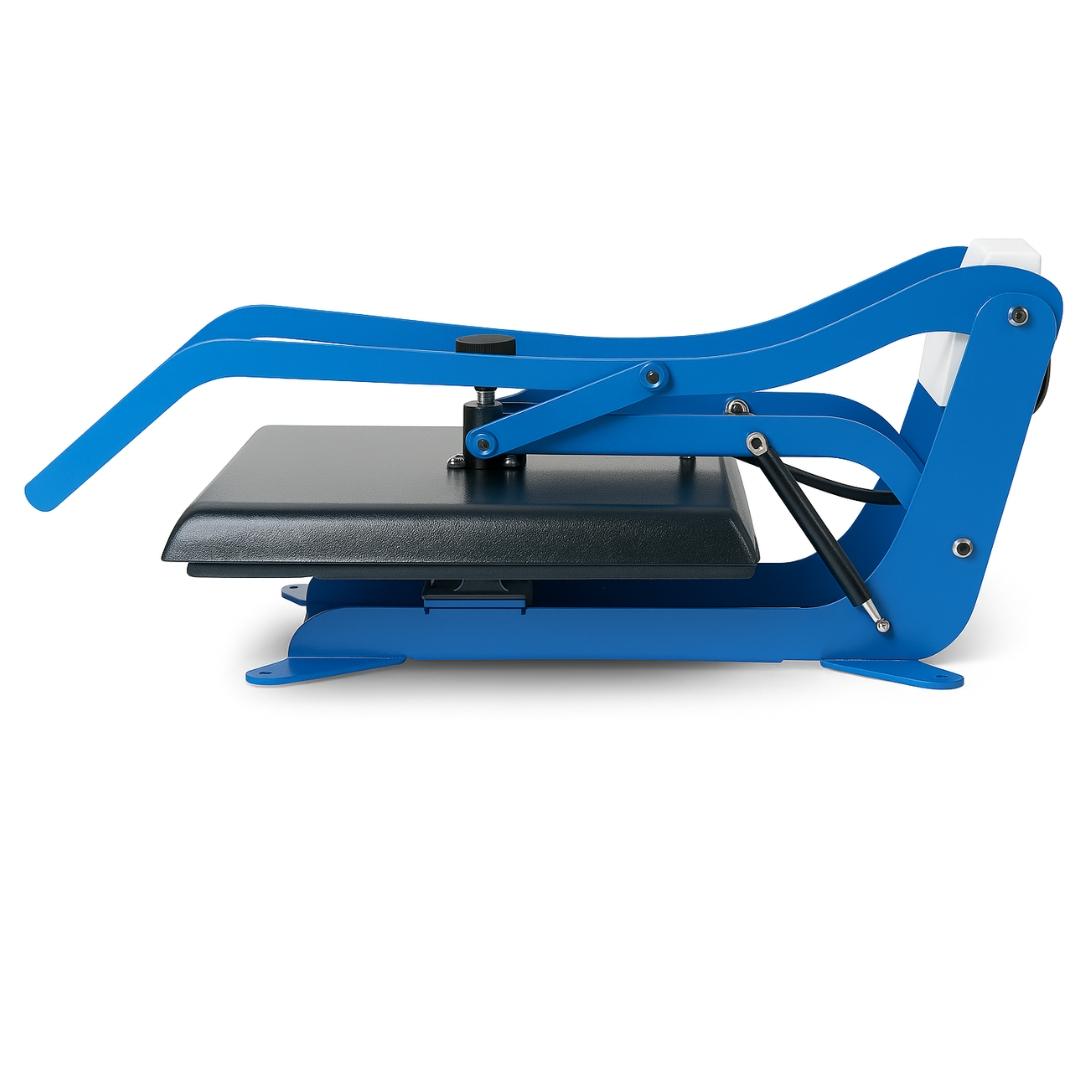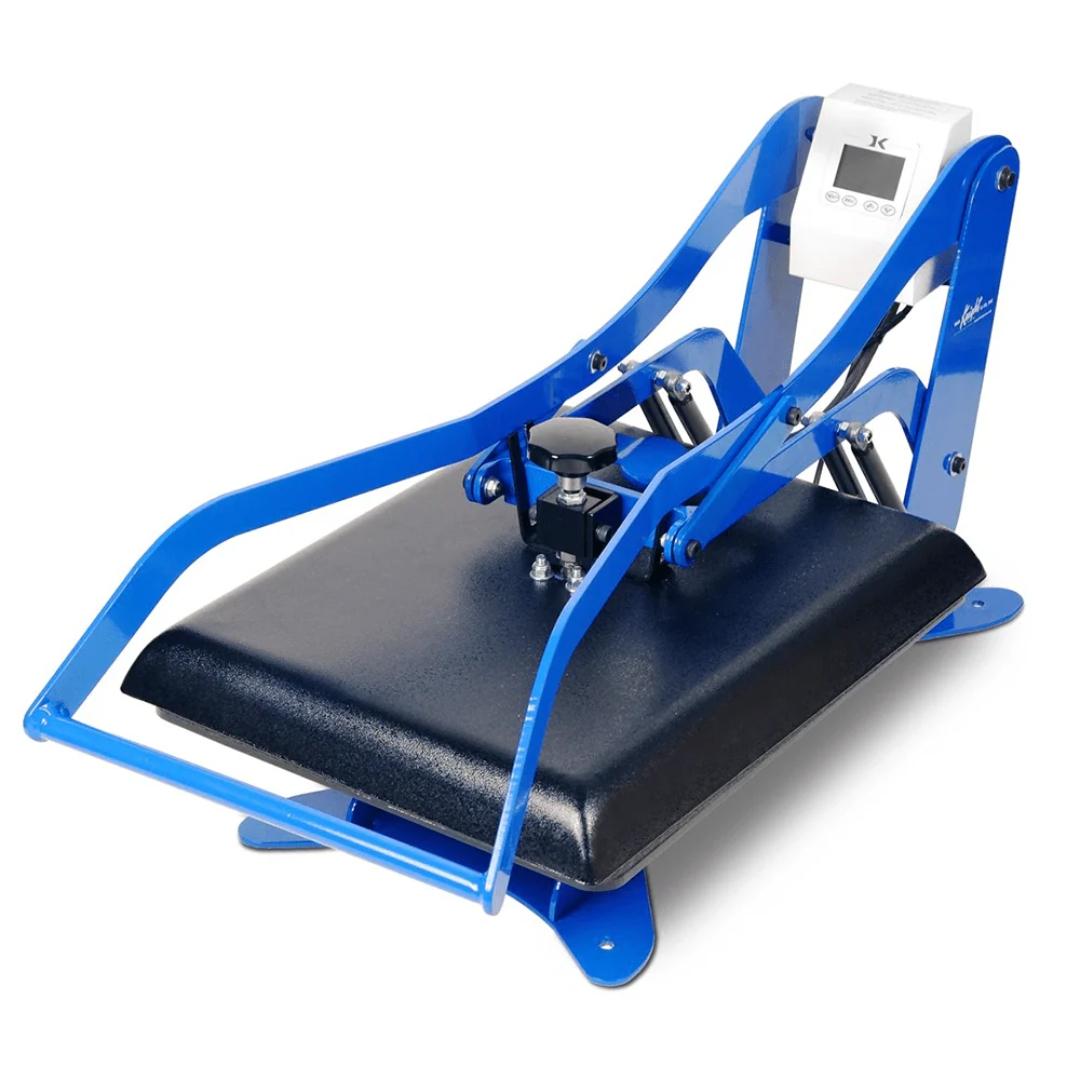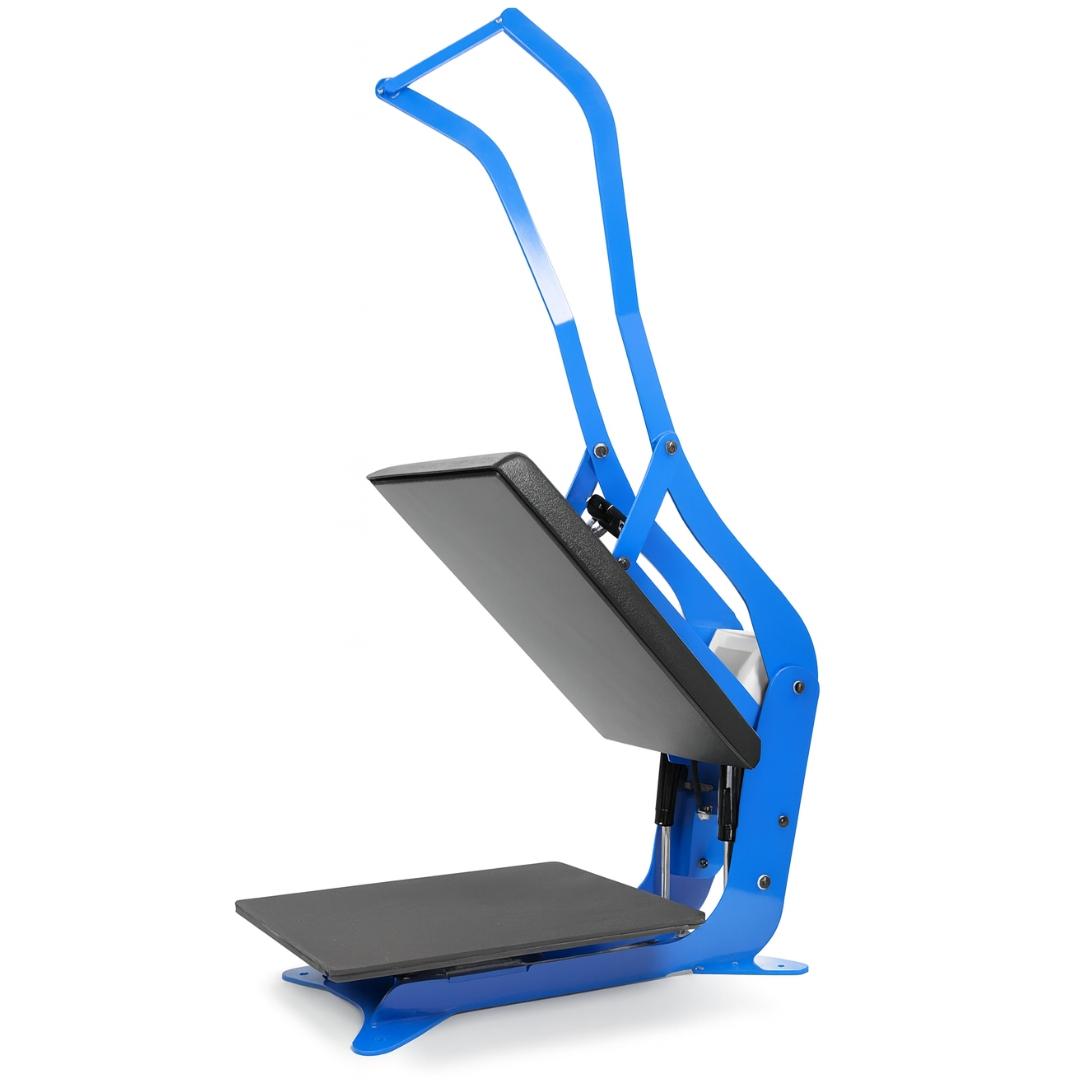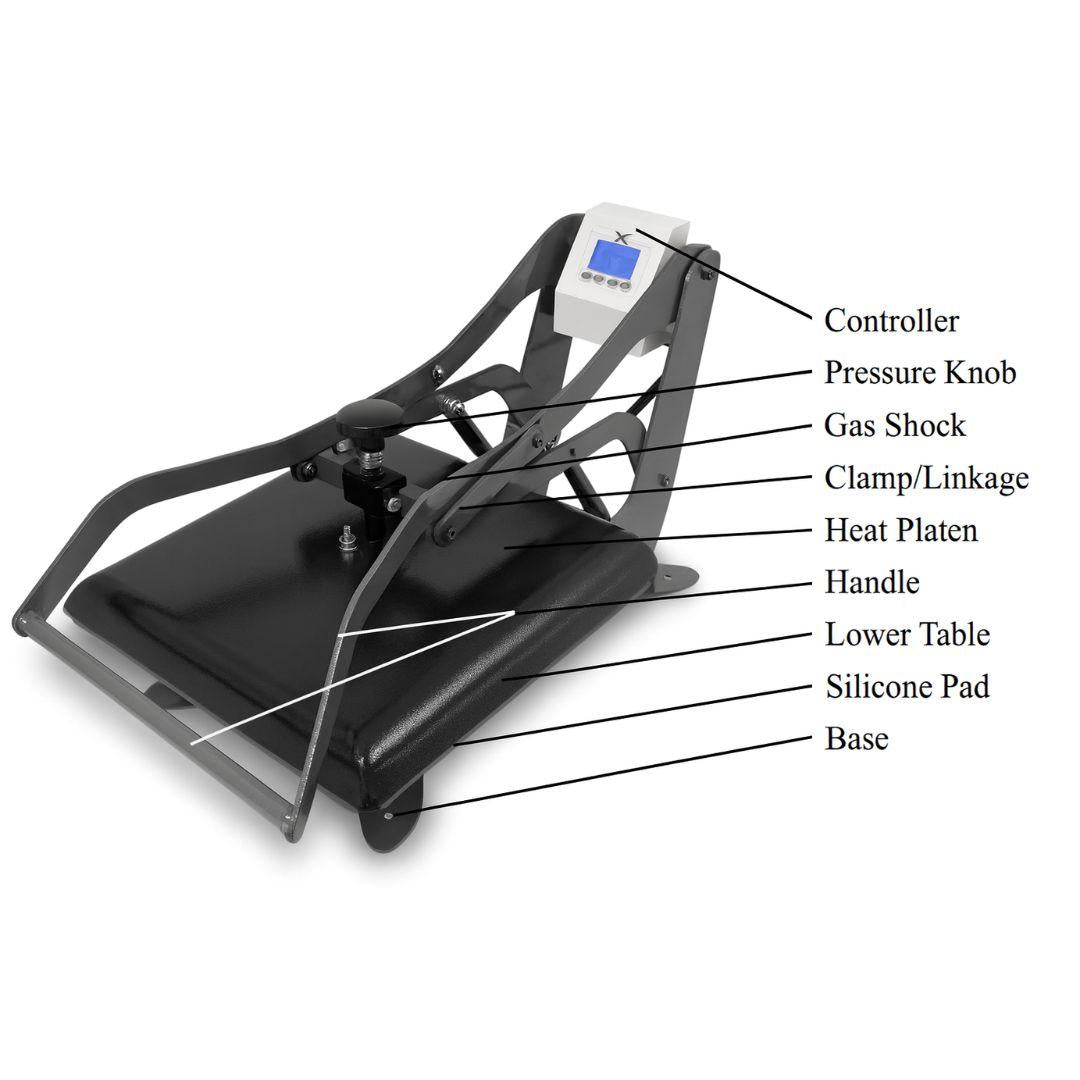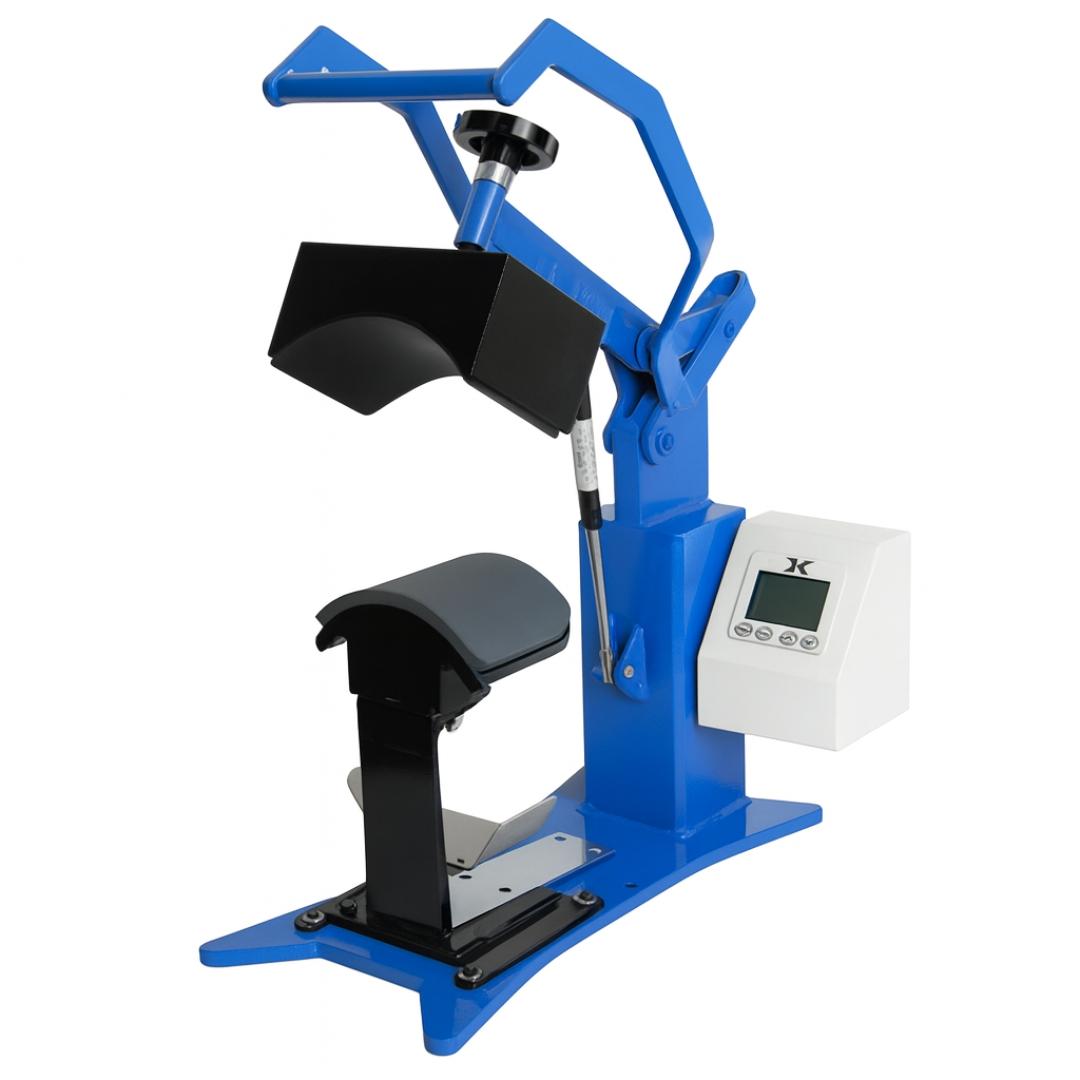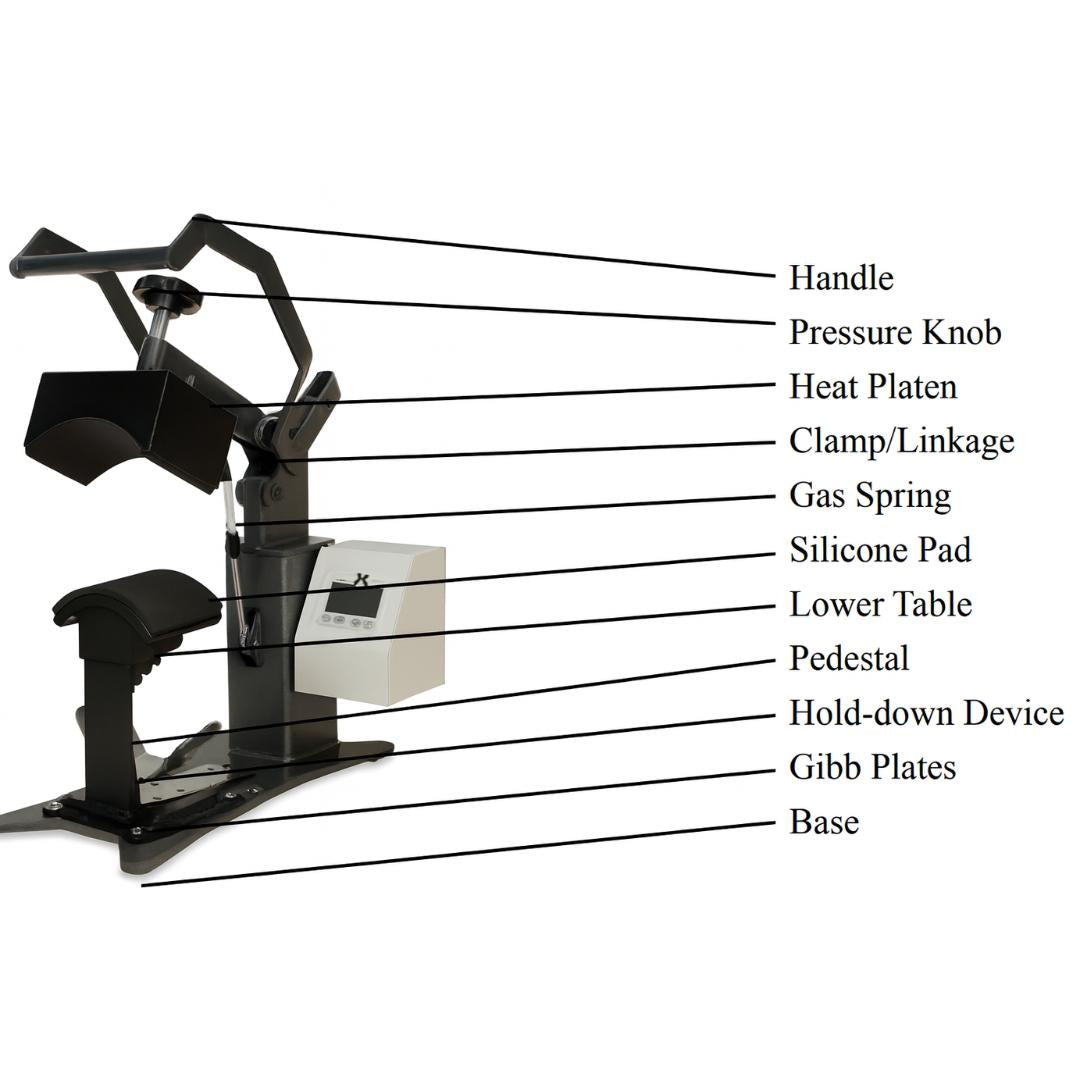
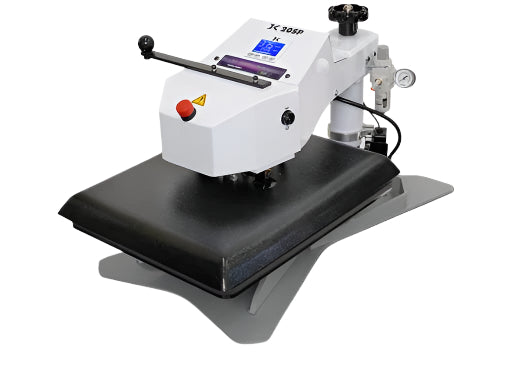


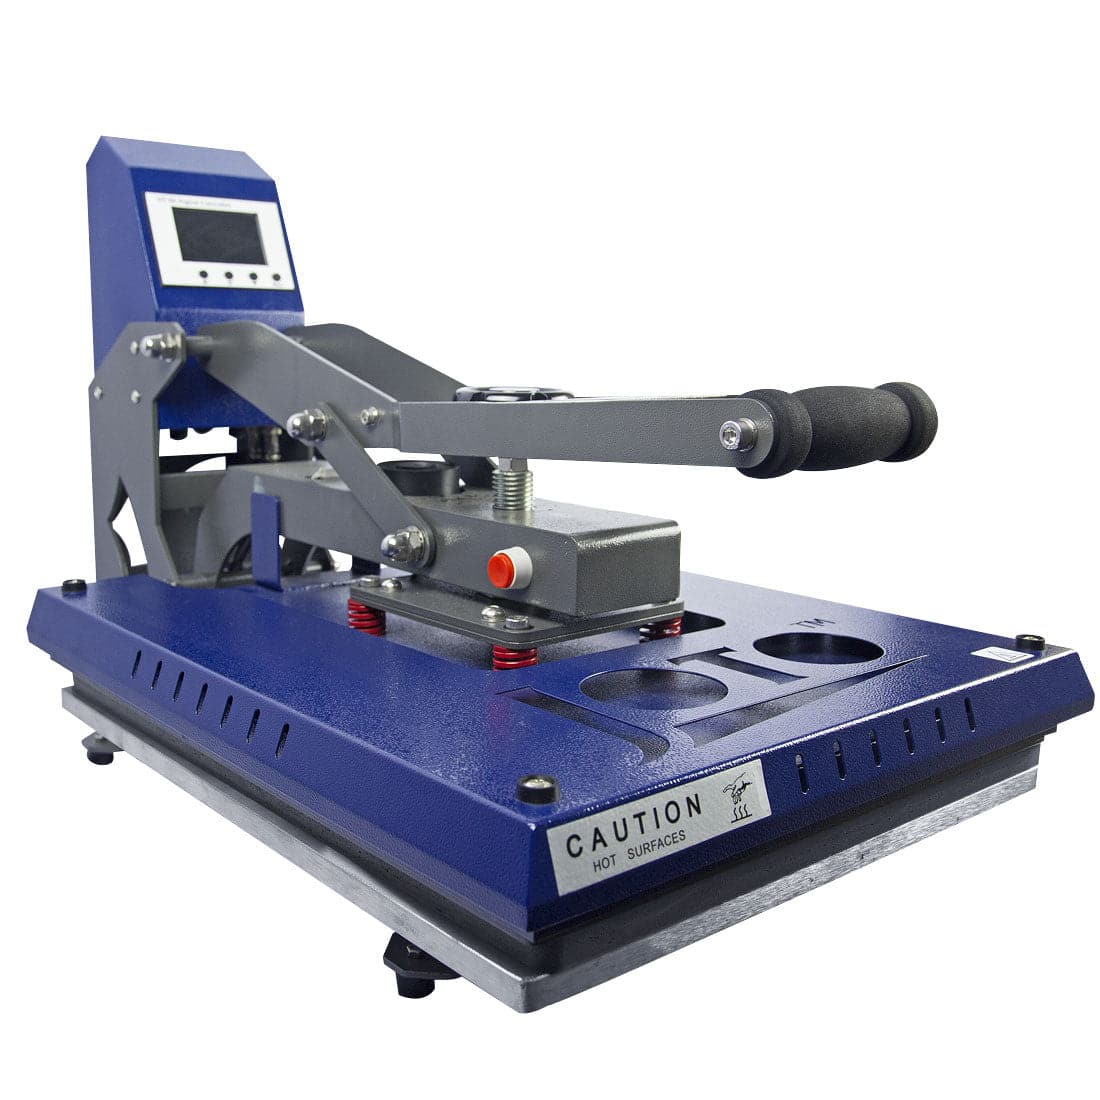


Swing away heat presses separate the upper heating platen from the work surface by pivoting 90 degrees away, eliminating burn hazards during substrate positioning and enabling extended setup time for complex garments.

This design costs approximately 40% more floor space than clamshell models but delivers critical safety advantages when pressing items with zippers, thick seams, or dimensional elements requiring careful alignment. The swing mechanism positions heat outside the operator workspace during loading, preventing the rushed positioning that causes ghosting and misalignment on clamshell presses.
This guide covers swing away press operation from workspace setup through production pressing, maintenance protocols, and troubleshooting. Understanding swing mechanism dynamics, brake system function, and auto-open timing prevents equipment damage and produces consistent transfer quality across thick and dimensional substrates.
Understanding Swing Away Heat Press Mechanics
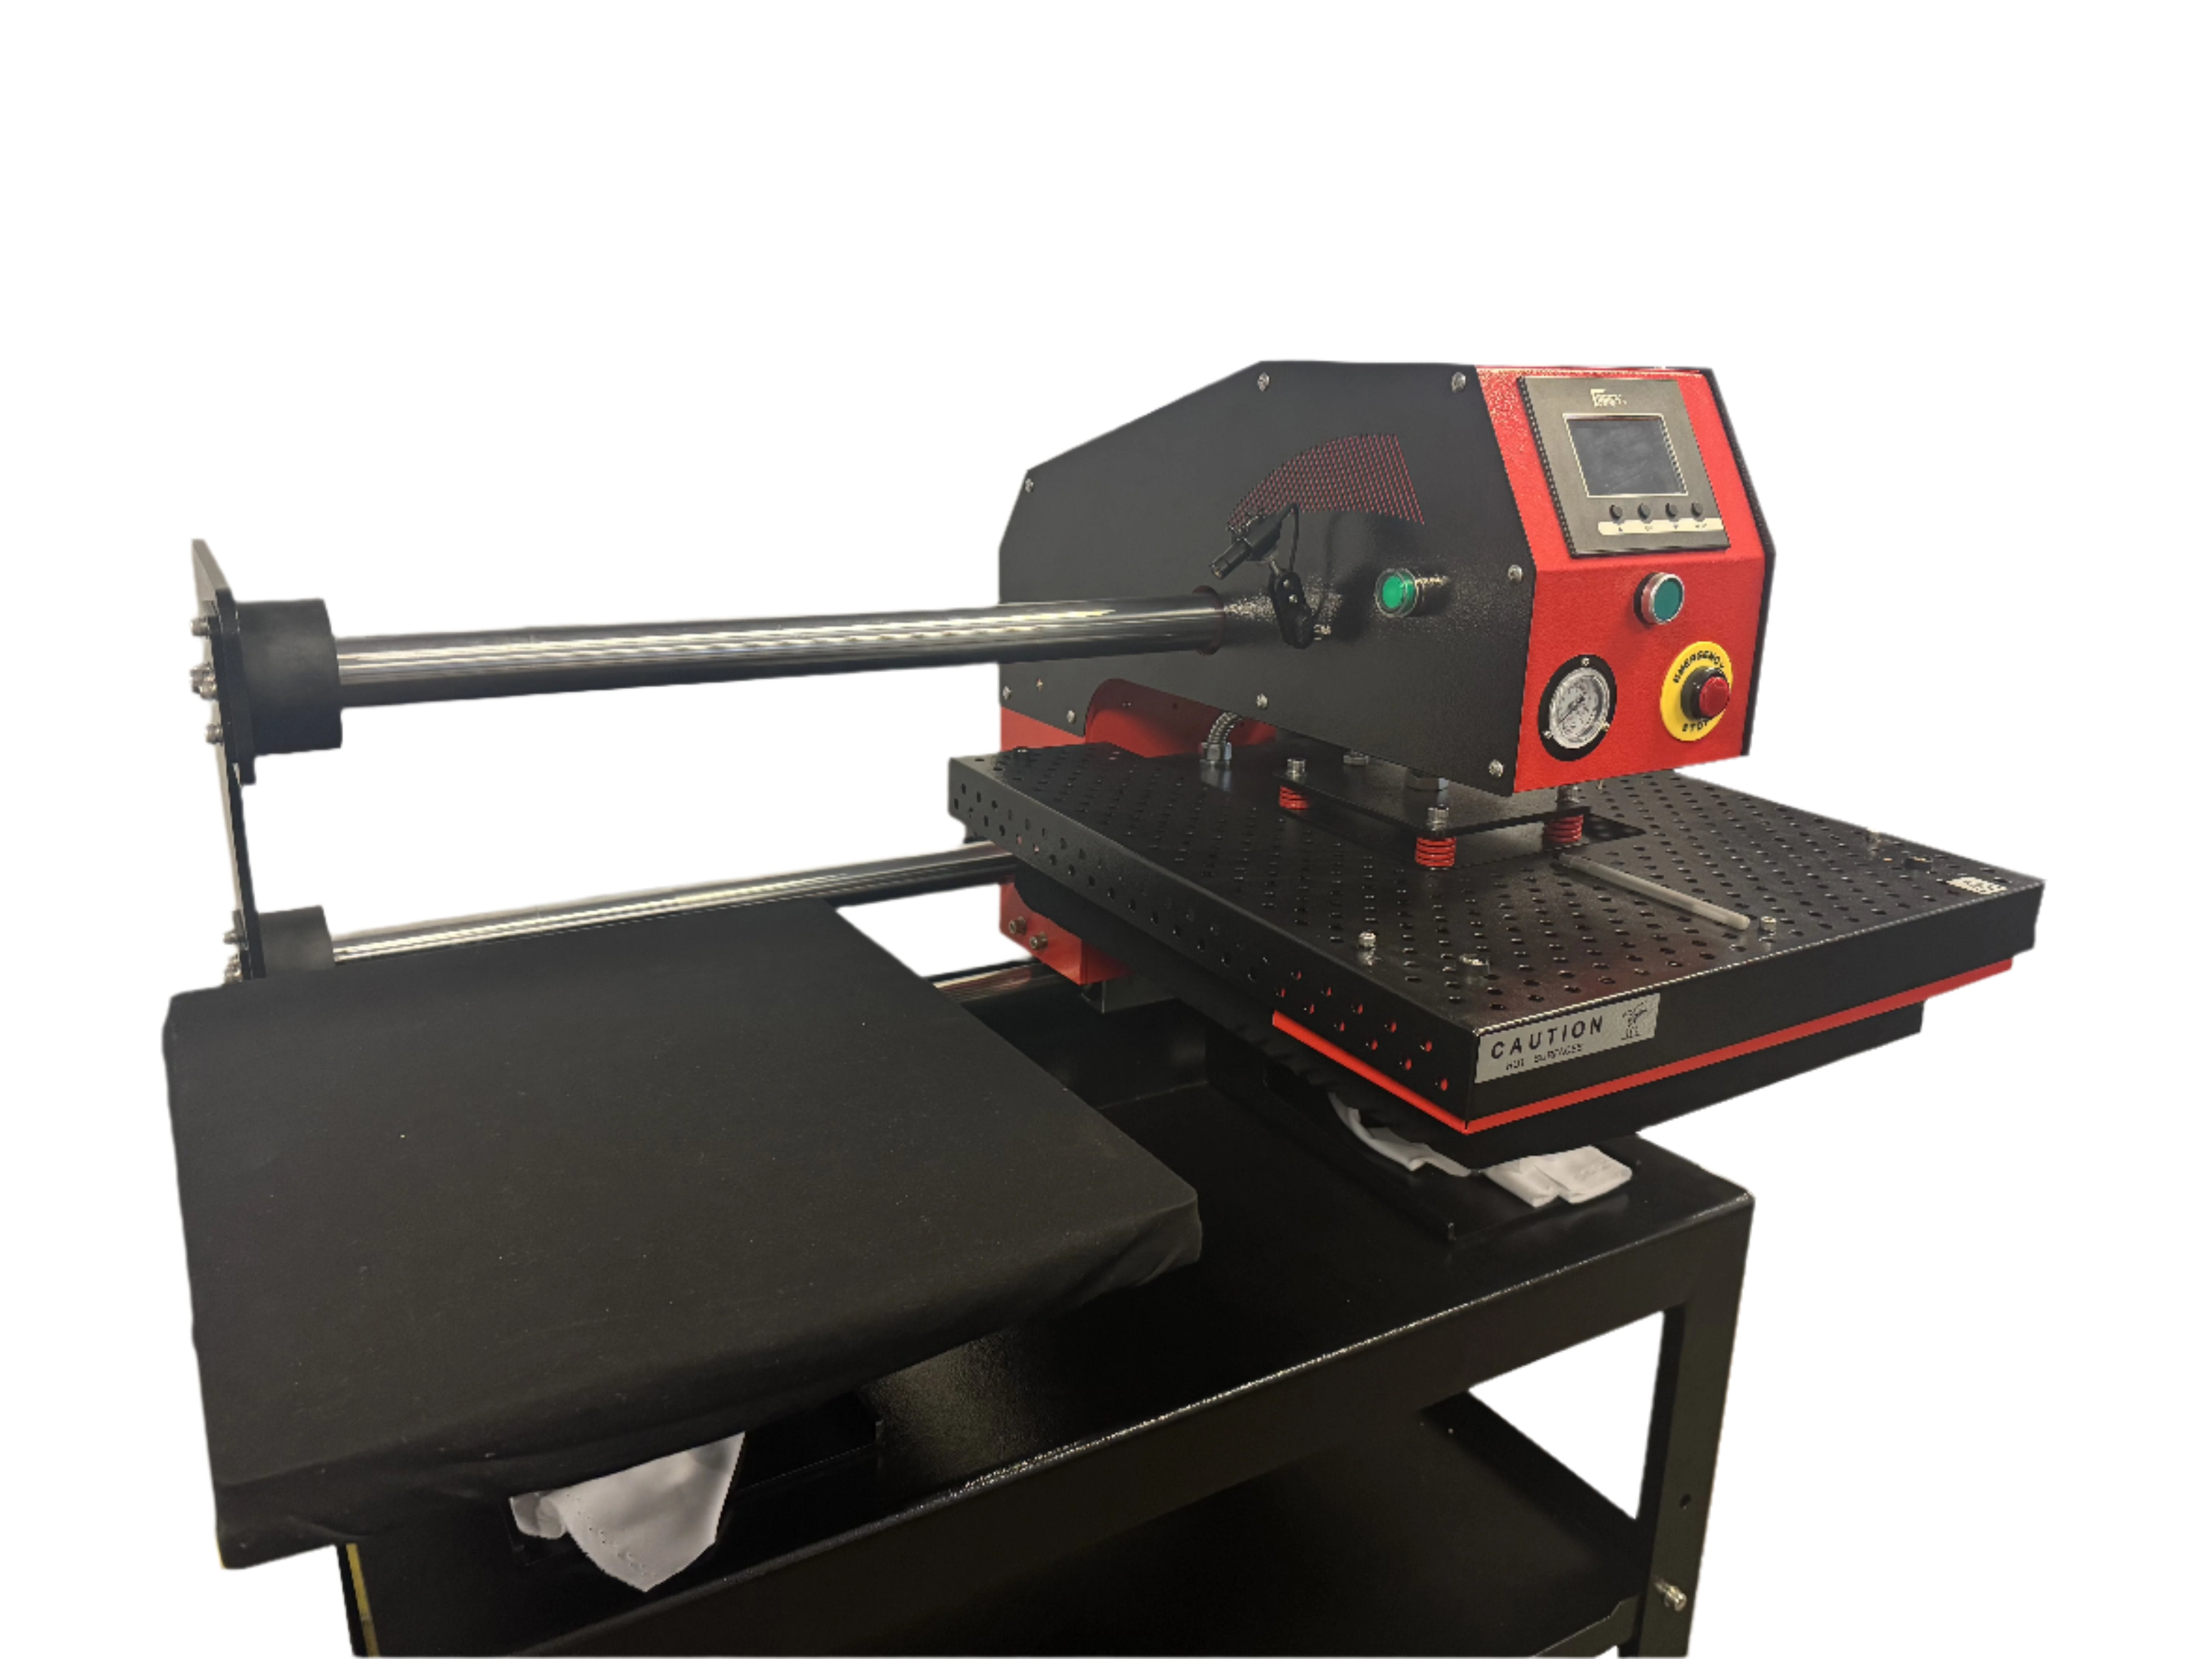
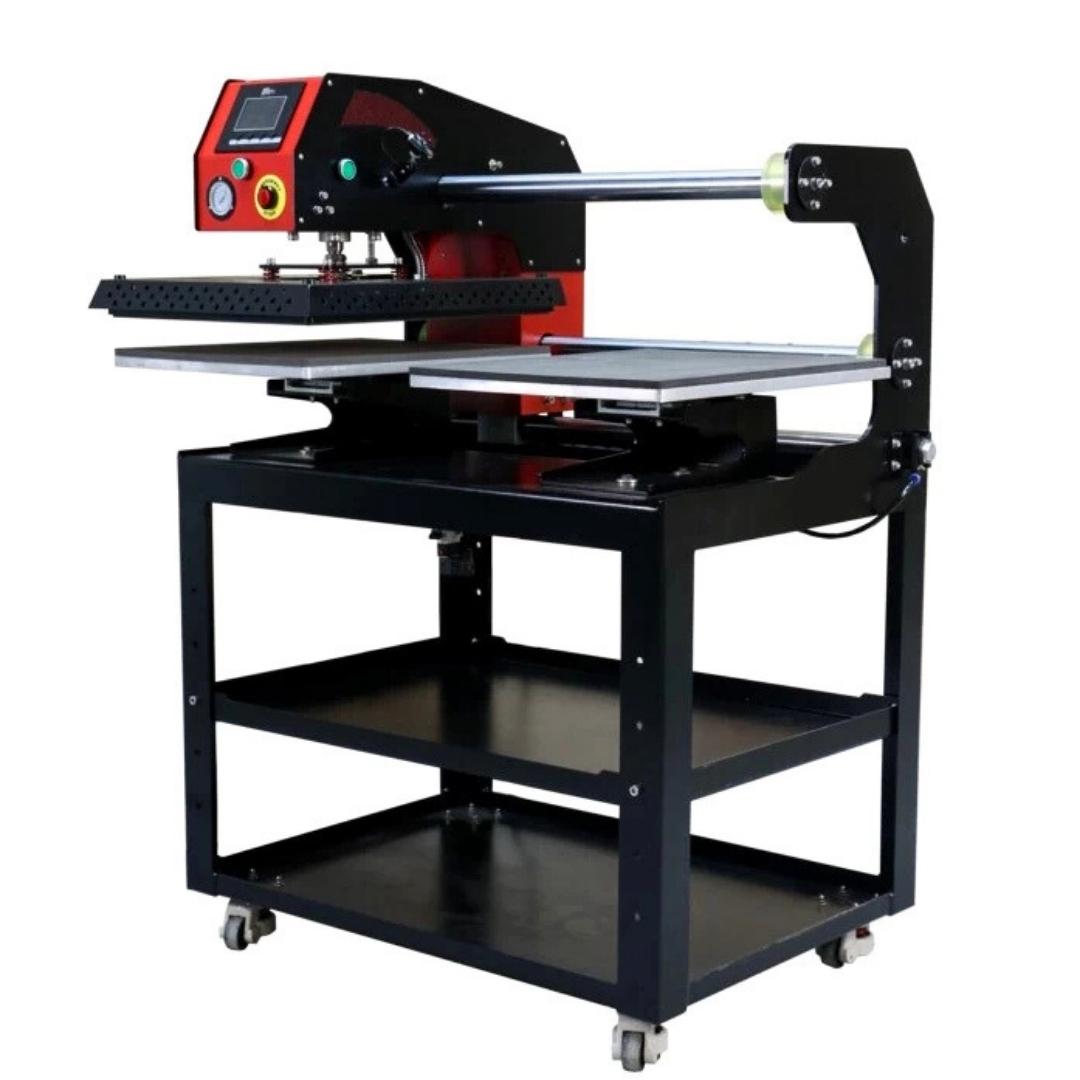
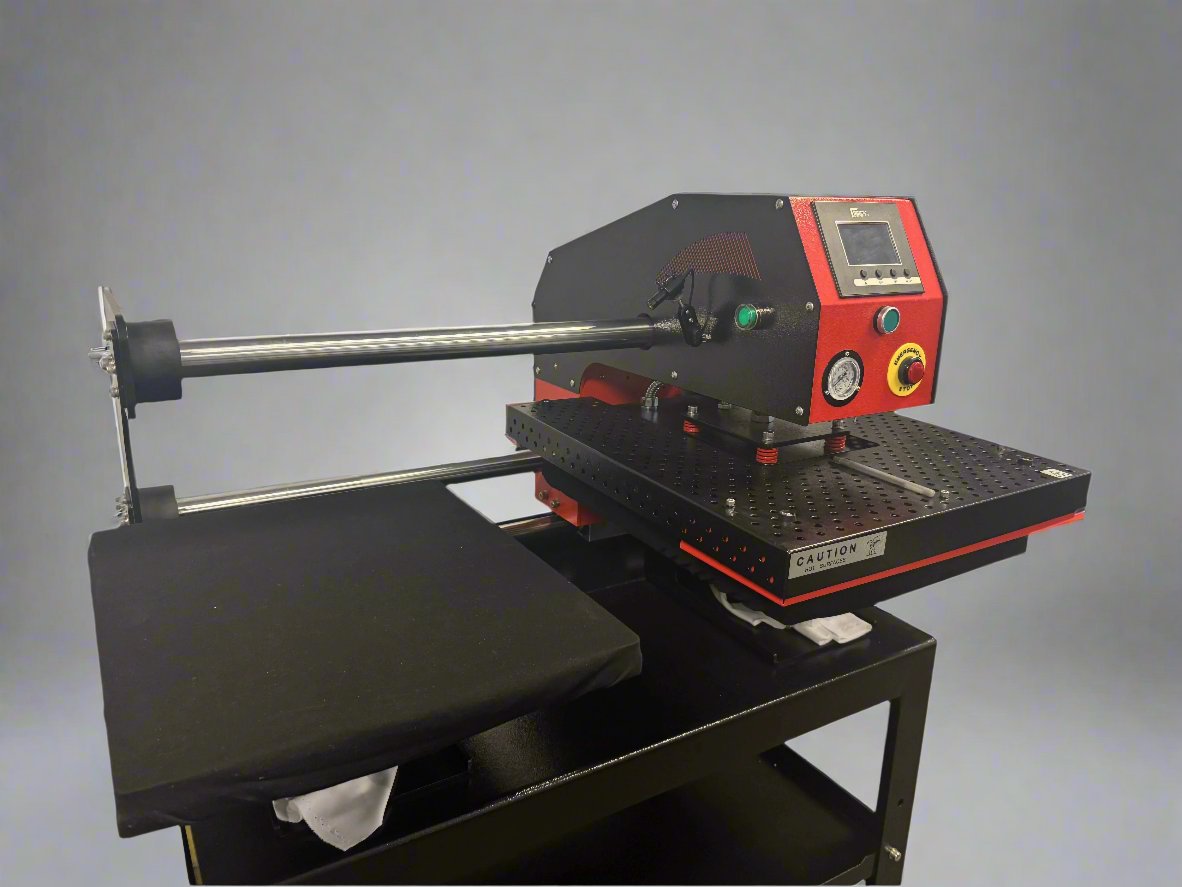
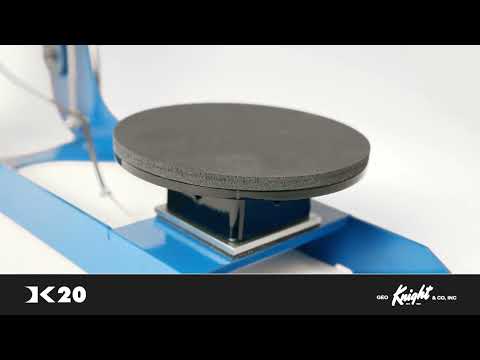
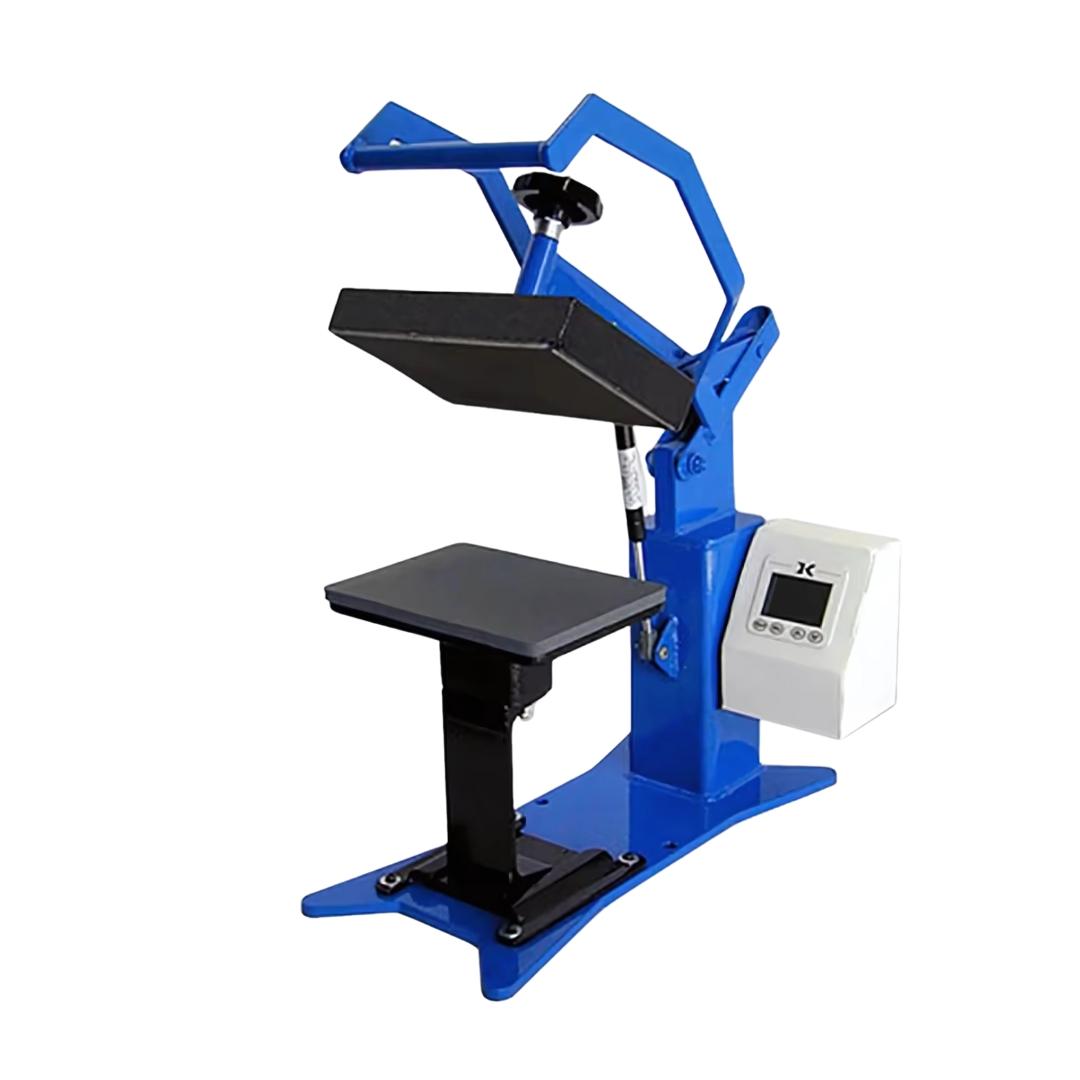
Swing away presses mount the upper heating platen on a pivot shaft allowing 90-degree rotation away from the lower work surface. This mechanical separation distinguishes swing away operation from clamshell designs where heat remains directly above the substrate throughout the work cycle.
Swing Mechanism and Pivot Dynamics
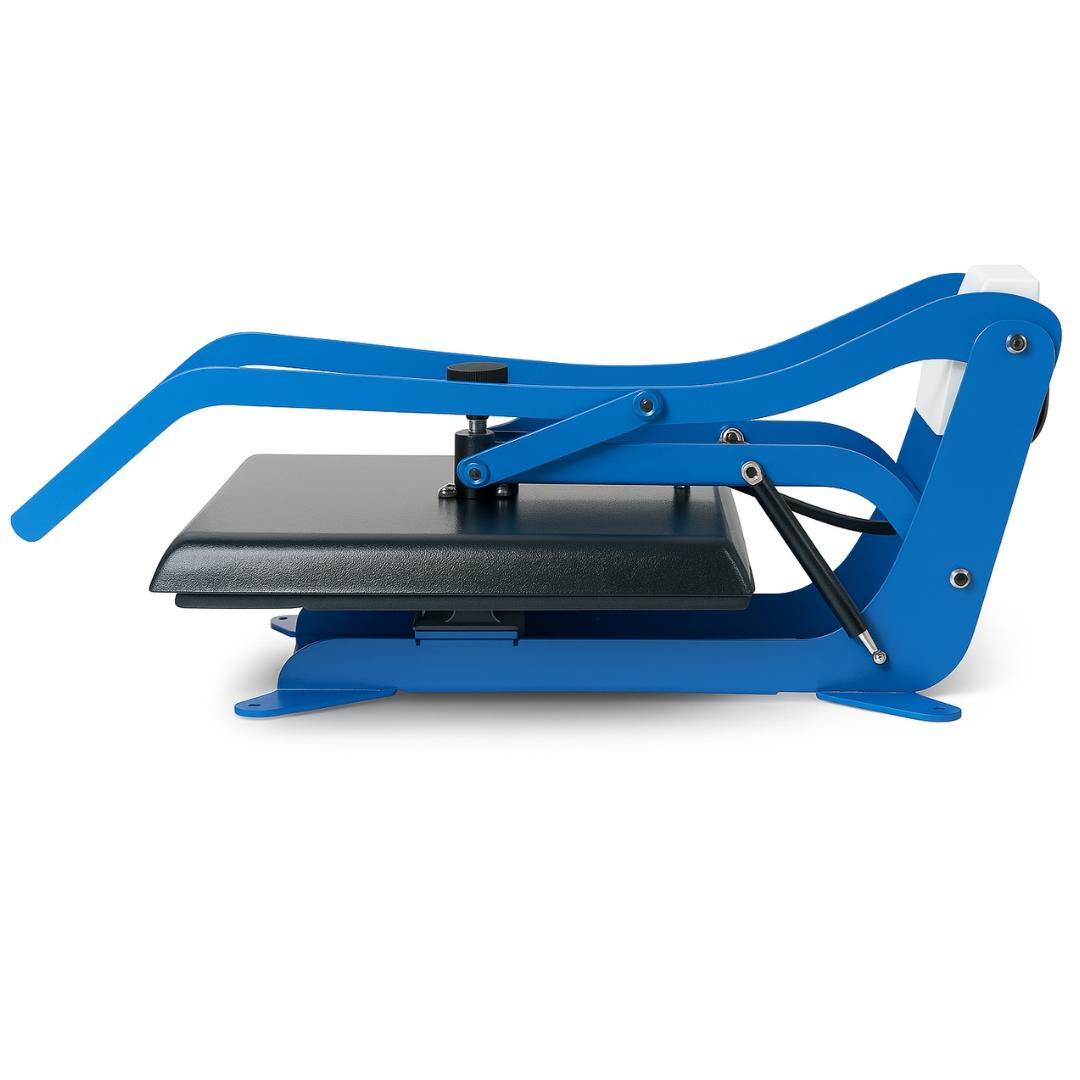
The swing shaft connects the upper heating assembly to the press base through precision bearings allowing smooth rotation. Quality swing away presses use sealed ball bearings rather than bushings to prevent binding during thousands of swing cycles. Bearing wear shows as increased resistance during swing motion or clicking sounds at rotation start.
Gas springs counterbalance the weight of the upper assembly, reducing operator effort during swing away and swing back motions. Spring pressure should support the upper assembly weight without making closing difficult. Weak springs cause the upper assembly to swing too quickly, creating collision hazards. Over-pressurized springs resist closing, requiring excessive operator force.
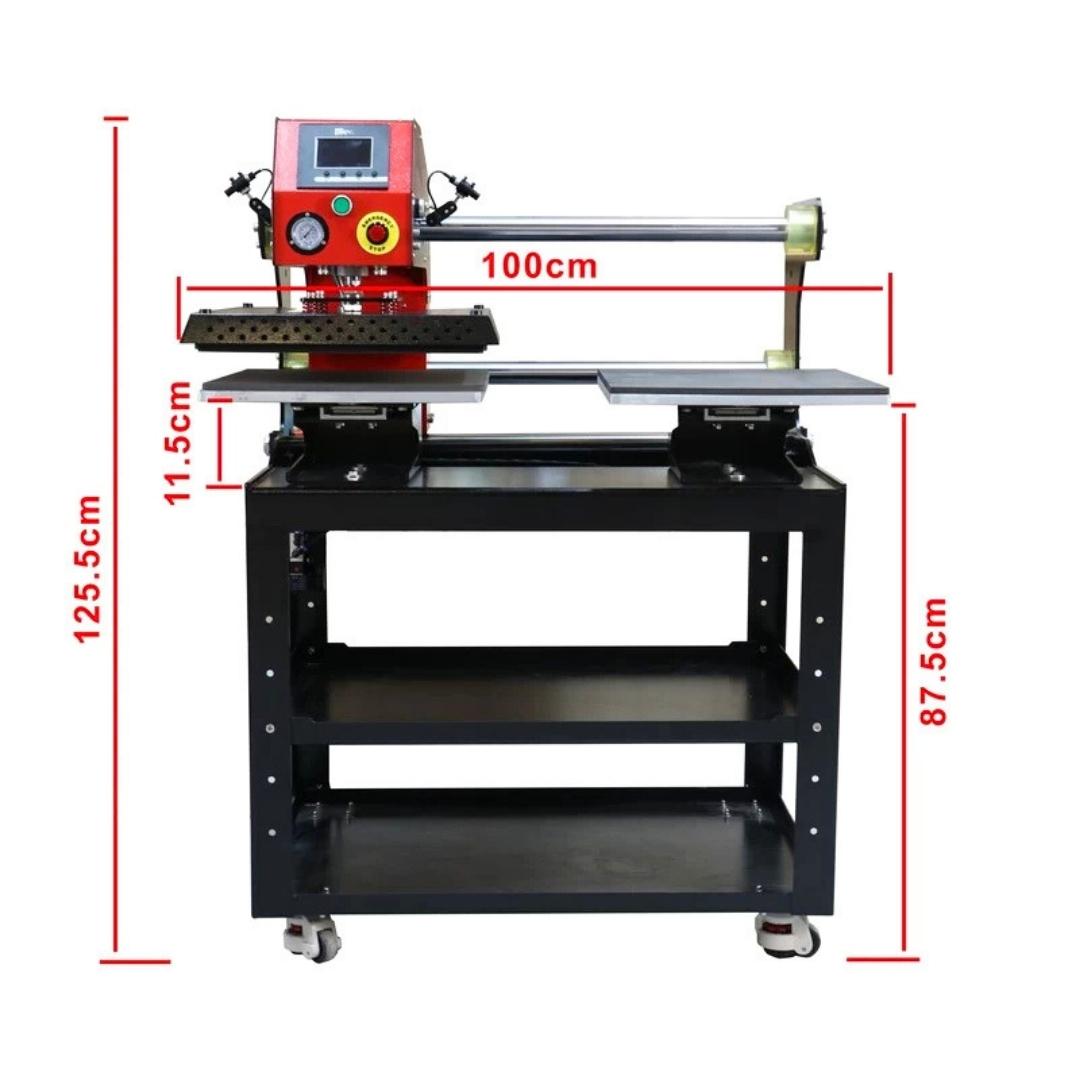
The swing radius determines required floor space. A 16" x 20" swing away press requires approximately 55-60 inches of lateral clearance for full swing range. Position the press with adequate space on the swing side to prevent collision with walls, equipment, or work surfaces during operation.
Braking System Operation
The braking handle locks the upper assembly in closed position during pressing. This mechanical lock prevents swing motion during the heat press cycle that would ruin transfers and damage equipment. The brake engages after closing the upper platen against the lower surface.
Two brake designs appear in swing away presses:
Mechanical clutch brakes: Friction plates grip the swing shaft when the brake handle engages. These systems require periodic adjustment as friction material wears. Insufficient brake pressure allows movement during pressing. Excessive pressure makes brake engagement difficult and accelerates wear.
Magnetic lock systems: Electromagnets in the upper assembly engage with magnetic plates on the lower base when the press closes. Electrical current through the magnets holds the press closed during the cycle. Power failure during pressing causes immediate magnetic release, potentially creating safety hazards.
Test brake function daily by attempting to swing the upper assembly while brake is engaged. Any movement indicates brake adjustment needed before production pressing begins.
Auto-Open Feature Operation
Auto-open systems release the brake mechanism automatically when the timer reaches zero, triggering gas springs to swing the upper assembly away from the substrate. This automation eliminates manual opening, reduces operator fatigue, and ensures consistent dwell time across all presses.
The auto-open sequence:
- Timer countdown reaches zero
- Audible alert sounds (typically 2-3 beeps)
- Brake mechanism electrically releases
- Gas springs swing upper assembly away
- Press reaches full open position
Stand clear during auto-open operation. The upper assembly swings with significant momentum that could cause injury if body parts block the swing path. Position yourself perpendicular to the swing direction rather than in line with the motion.
Pre-Operation Setup and Safety Checks
Swing away presses require more extensive setup than clamshell models due to moving parts and larger footprint. This setup sequence ensures safe, reliable operation:
Workspace and Clearance Verification
Measure and mark the complete swing radius before positioning the press. The upper assembly must swing freely without contacting walls, shelving, equipment, or operators. Insufficient clearance forces positioning adjustments mid-swing that stress bearings and create collision hazards.
Position the lower work surface at comfortable standing height. Operators should access the platen without reaching up or bending down repeatedly. Standard height places the lower platen 36-40 inches from floor level, though this varies by operator height and work surface design.
Ensure adequate lighting across both closed and open positions. Operators need clear visibility when positioning substrates with the press open and when inspecting completed transfers after auto-open. Poor lighting in the swing away position causes positioning errors that waste materials.
Mechanical Component Inspection
Check swing mechanism components before each production session:
Swing shaft bearings: Rotate the upper assembly through full swing range. Motion should feel smooth without binding or clicking. Rough movement indicates bearing wear or contamination requiring service.
Gas spring condition: Open the upper assembly and observe swing motion. The assembly should swing away smoothly without dropping rapidly or moving sluggishly. Rapid movement indicates excessive spring pressure. Slow movement shows weak or failed springs.
Brake mechanism function: Engage the brake handle and attempt to move the upper assembly. Zero movement should occur with brake engaged. Any shifting indicates adjustment needed.
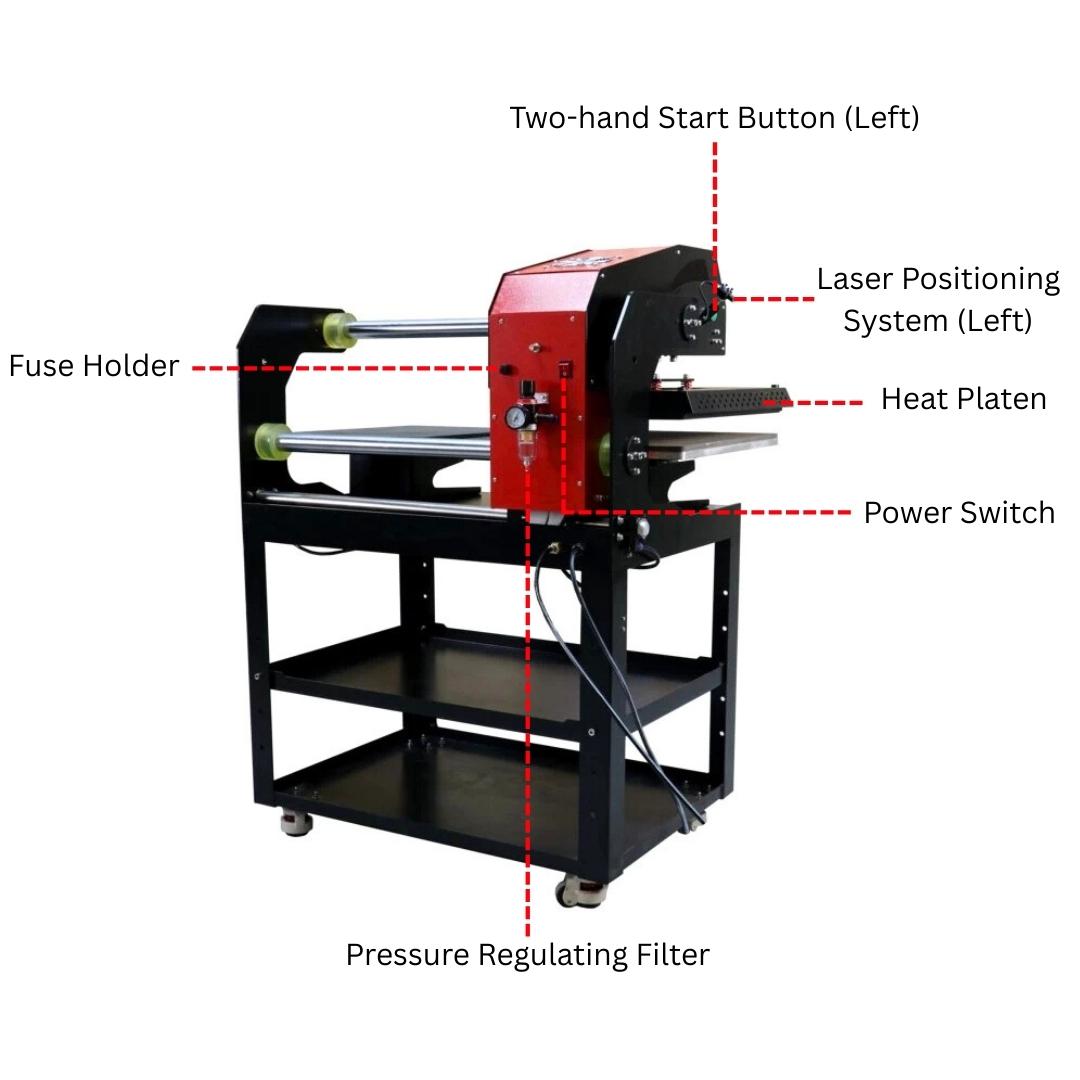
Emergency stop operation: Press the emergency stop button and verify immediate power cutoff. The red button should remain depressed until manually reset by twisting. Test this monthly to confirm function.
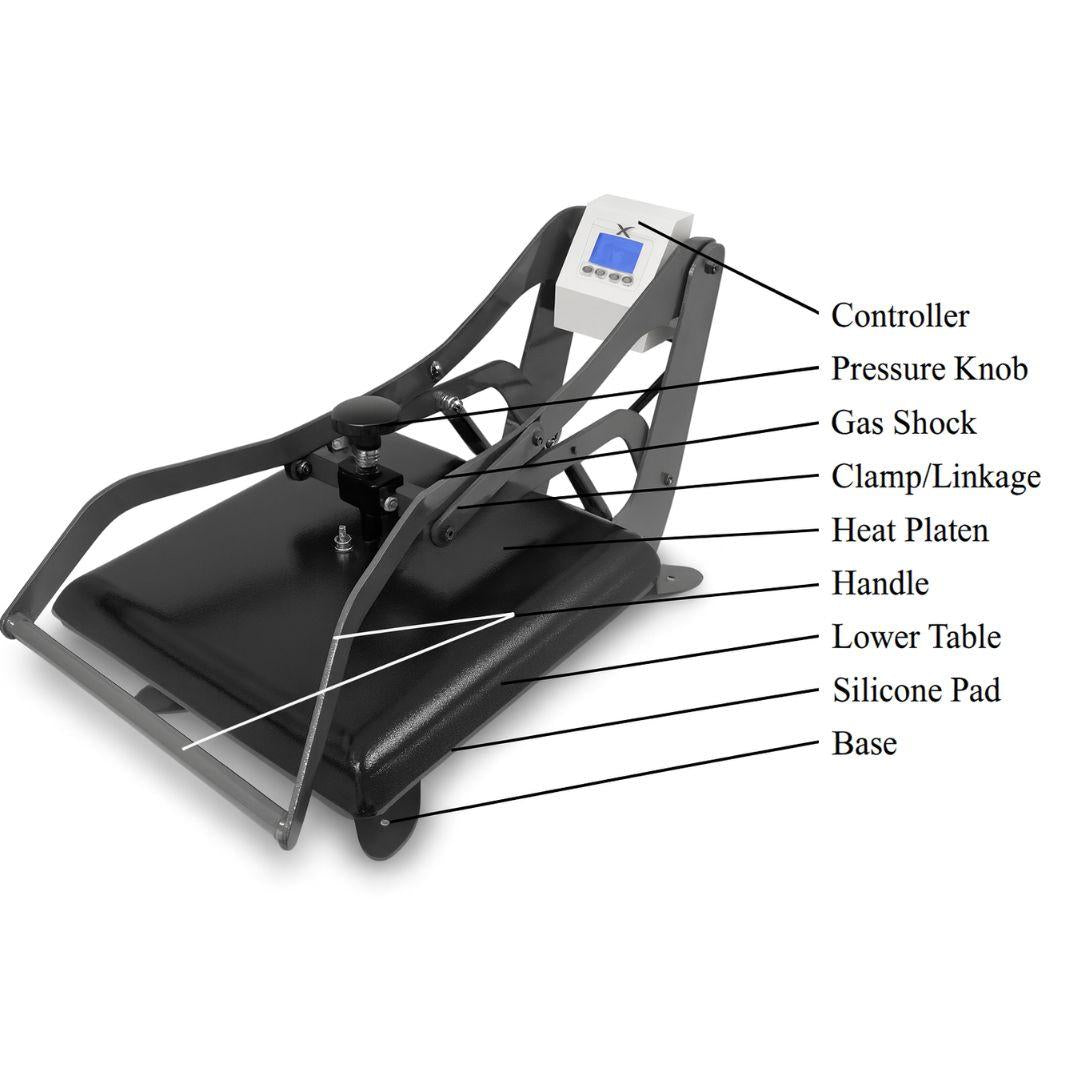
Temperature Controller Setup

Swing away presses use digital temperature controllers displaying both current (PV) and set (SV) values. The dual display prevents premature pressing before platen reaches operating temperature.
Common temperature settings by application:
- Sublimation transfers on polyester: 385-400°F (195-205°C)
- Sublimation on rigid substrates: 375-385°F (190-195°C)
- Heat transfer vinyl: 305-320°F (150-160°C)
- Plastisol transfers: 350-375°F (175-190°C)
- Inkjet transfers light fabric: 365-385°F (185-195°C)
- Inkjet transfers dark fabric: 350-365°F (175-185°C)
Allow 10-15 minutes heat soak after the controller reaches set temperature. Swing away presses have heavier upper assemblies than clamshells, requiring longer stabilization time. Press without proper heat soak causes center-heavy transfers where edges appear faded.
Pressure Calibration Process
Swing away pressure adjustment works identically to clamshell systems but must account for swing mechanism weight. Use this calibration sequence:
Step 1: Swing mechanism weight test
- Swing upper assembly to closed position
- Engage brake mechanism
- Note whether upper platen contacts lower surface under its own weight
- If gap exists, increase pressure adjustment until contact occurs
Step 2: Contact uniformity test
- Place plain paper across entire lower platen surface
- Close press and engage brake
- Immediately release brake and swing away
- Examine paper for even contact marks edge to edge
- Adjust pressure if marks show light or missing areas
Step 3: Production substrate test
- Press blank transfer on scrap substrate using full cycle
- Evaluate transfer uniformity across entire surface
- Faded edges indicate insufficient pressure
- Over-compression or shiny marks indicate excessive pressure
Operating Workflow for Swing Away Pressing
Swing away operation differs significantly from clamshell workflow due to heat separation during substrate loading. This sequence maximizes the safety and positioning advantages of swing away design:
Initial Heat Platen Positioning
Before each pressing cycle, position the upper assembly for safe substrate loading:
- Hold the swing handle with dominant hand
- Release brake handle with other hand
- Allow gas springs to swing upper assembly away
- Verify assembly reaches full open position
- Ensure assembly remains stable in open position
The upper assembly should stay open without operator support. If the assembly drifts toward closed position, gas spring pressure requires adjustment. Operating with drifting assemblies creates collision hazards and rushing during substrate loading.
Substrate Preparation and Positioning
With heat separated from the work area, operators have extended time for precise positioning without burn risk:
Thick garment positioning: Hoodies, zippered items, and dimensional garments require careful layout to avoid pressure marks from seams or hardware. Position zippers and buttons away from the transfer area. Use pressing pillows to raise transfer areas above thick seams when necessary.
Complex alignment: Multi-color or registration-critical transfers benefit from extended positioning time. Secure alignment marks with heat tape and verify registration before swinging heat platen into position.
Rigid substrate setup: Ceramic tiles, aluminum panels, and polymer-coated substrates require flat, stable positioning. Use silicone pads on the lower platen to prevent shifting during press closing. Substrates sliding during closing cause partial transfers and equipment damage.
Transfer Material Application
Place transfer paper printed side down against substrate surface. Verify correct orientation - text should read reversed when viewing the transfer paper from above. Once pressing begins, repositioning wastes the transfer.
Secure transfer paper corners with heat-resistant tape. The swing mechanism creates air movement when closing that can shift unsecured papers. Use minimum four tape points on larger transfers to prevent movement.
Cover transfers with Teflon protective sheets. This prevents ink migration to the platen and protects substrates from direct heat contact. Replace sheets showing ink buildup or physical damage.
Closing and Pressing Sequence
Proper closing technique prevents shock loading that damages swing bearings:
Step 1: Swing handle positioning
- Grip swing handle firmly with both hands
- Pull upper assembly toward closed position using controlled motion
- Avoid dropping or releasing assembly during swing
- Guide assembly until upper platen contacts substrate
Step 2: Brake engagement
- Verify upper platen sits flat against substrate
- Engage brake handle while maintaining downward pressure
- Confirm brake locks - handle should not move after engagement
- Release swing handle - assembly should remain motionless
Step 3: Timer activation
- Verify timer countdown begins (some models auto-start on brake engage)
- Check audible beep confirms cycle start
- Step clear of swing path if using auto-open
- Monitor for any smoke, burning smell, or unusual sounds
Auto-Open Response and Substrate Removal
When the timer reaches zero on auto-open equipped presses:
- Audible alert sounds 2-3 seconds before opening
- Position yourself perpendicular to swing path
- Brake releases automatically
- Gas springs swing assembly to full open position
- Allow assembly to reach full open before approaching
- Remove substrate from lower platen
- Peel transfer paper per manufacturer specifications (hot, warm, or cold peel)
Never attempt to stop or slow auto-open motion. The gas spring force exceeds manual control capability. Interference can cause equipment damage or operator injury.
Temperature and Time Settings by Substrate
Swing away presses excel at dimensional and thick substrates requiring careful positioning. These settings address common swing away applications:
Hoodies and Thick Garments
-
Temperature: 365-385°F (185-195°C)
-
Time: 20-30 seconds
-
Pressure: Medium (40-50 psi)
- Peel: Warm or cold peel
Heavy fleece and thick cotton hoodies require lower temperatures than thin T-shirts to prevent scorching. Longer setup time available with swing away design allows proper positioning to avoid pressure marks from thick seams and hood attachment points.
Zippered Items
-
Temperature: 350-365°F (175-185°C)
-
Time: 15-25 seconds
-
Pressure: Light-medium (30-40 psi)
- Peel: Hot or warm peel
Position transfers away from zipper teeth to prevent permanent impressions through the fabric. Use pressing pillows to raise transfer areas above zipper bulk. Swing away design provides time to position pillows correctly without rushing near hot platens.
Multi-Layer Items (Bags, Totes with Straps)
-
Temperature: 365-385°F (185-195°C)
-
Time: 25-35 seconds
-
Pressure: Firm (50-60 psi)
- Peel: Hot peel
Tote bags with handles and reinforced bottoms create uneven pressing surfaces. Extended positioning time allows precise transfer placement on flat areas between straps. Higher pressure compensates for canvas/duck cloth texture that requires adhesive penetration.
Ceramic and Rigid Substrates
-
Temperature: 375-385°F (190-195°C)
-
Time: 60-90 seconds
-
Pressure: Medium-firm (45-55 psi)
- Peel: Cold peel after complete cooling
Rigid substrates benefit from swing away safety during setup. Ceramic tiles and aluminum panels require flat, stable positioning that's easier to achieve without hot platens overhead. Extended press times allow heat penetration through material thickness without rushing that causes incomplete transfers.
Common Operating Issues and Solutions
Swing away specific problems stem from mechanical components not present in clamshell designs:
Upper Assembly Drifts During Loading
Symptom: Upper assembly swings toward closed position while positioning substrates.
Causes and solutions:
- Weak gas springs: Replace springs if drift occurs. Temporary solution: place blocking object under swing handle to hold open position
- Binding in swing mechanism: Lubricate swing shaft bearings. Clean any debris from pivot points
- Imbalanced upper assembly: Check mounting of heating elements and controller box. Verify no loose components shifting weight
Brake Fails to Hold During Pressing
Symptom: Upper assembly moves or shifts after brake engagement.
Causes and solutions:
- Worn friction material: Adjust or replace brake pads/clutch plates per manufacturer specifications
- Magnetic lock failure: Verify electrical connection to electromagnets. Test magnet strength when energized
- Contaminated brake surfaces: Clean friction surfaces with denatured alcohol. Remove any oil or grease contamination
- Insufficient engagement: Adjust brake cable tension or linkage to ensure full engagement
Auto-Open Fails or Opens Prematurely
Symptom: Press doesn't open automatically at timer completion, or opens before timer reaches zero.
Causes and solutions:
- Electrical connection failure: Check wiring to brake release solenoid. Verify connections remain secure during swing motion
- Solenoid malfunction: Test solenoid operation outside press. Replace if clicking but not releasing brake
- Timer programming error: Verify timer set correctly. Check for auto-open enable setting in controller menu
- Premature opening: Inspect timer contacts for arcing or pitting. Replace timer if showing premature trigger
Uneven Swing Motion or Binding
Symptom: Upper assembly swings roughly, makes noise, or requires excessive force to move.
Causes and solutions:
- Dry or damaged bearings: Lubricate swing shaft bearings with high-temperature bearing grease. Replace if clicking or grinding occurs
- Bent swing shaft: Inspect shaft for straightness using dial indicator. Bent shafts cause binding at specific rotation angles
- Misaligned mounting: Check base level and upper assembly alignment. Adjust mounting if press rocks or sits unevenly
- Debris in mechanism: Clean swing pivot area. Remove any paper fragments, lint, or material buildup
Safety Protocols for Swing Away Operation
Swing away presses present unique safety considerations due to moving upper assemblies:
Swing Path Clearance
Maintain clear swing paths at all times. The upper assembly weighs 40-60 pounds and swings with momentum that causes serious injury if contact occurs. Never position yourself, tools, or materials in the swing arc during operation.
Mark swing radius on floor with tape or paint if multiple operators use the press. Clear identification prevents inadvertent entry into swing path by operators unfamiliar with equipment.
Train all operators on auto-open timing. Stand perpendicular to swing direction during countdown, never in line with swing motion. Position yourself where you can access the substrate after opening without entering the swing path.
Brake Engagement Verification
Always verify brake engagement before releasing swing handle. Insufficient brake allows swing during pressing that ruins transfers and potentially damages bearings. Test brake hold by attempting slight movement after engagement - zero motion should occur.
Never walk away from the press with upper assembly closed but brake not engaged. The assembly will swing open unexpectedly, creating collision hazards for nearby operators or equipment.
Emergency Stop Procedures
Press the red emergency stop button to immediately cut power and release brake. This causes instant opening with full gas spring force. Keep hands on swing handle during emergency stop to control opening motion and prevent collision.
Emergency stops during mid-cycle waste the transfer but prevent equipment damage or injury in hazardous situations. Don't hesitate to use emergency stop if smoke, burning smell, or unusual sounds occur.
Maintenance Schedule for Swing Away Presses
Swing away mechanical components require more frequent maintenance than clamshell designs:
Daily Tasks
Swing motion inspection: Swing upper assembly through full range before production. Motion should feel smooth without binding, clicking, or excessive resistance.
Brake function test: Engage brake with press closed and attempt movement. Zero shift should occur with properly functioning brake.
Protective sheet inspection: Check Teflon sheets for tears, ink buildup, or adhesive residue. Replace when contamination affects transfer quality.
Weekly Tasks
Swing shaft lubrication: Apply high-temperature bearing grease to accessible bearing points. Wipe excess to prevent drips onto substrates.
Brake adjustment verification: Check brake engagement force. Adjust cable tension or friction material if engagement requires excessive force or fails to hold firmly.
Gas spring inspection: Test spring force by manual swing operation. Weak springs allow rapid closure. Excessive force indicates over-pressurization.
Monthly Tasks
Bearing inspection: Check swing shaft bearings for play or wear. Grasp upper assembly and attempt to rock side-to-side perpendicular to swing direction. Movement indicates bearing wear requiring replacement.
Auto-open system test: Run complete cycles verifying consistent auto-open timing and smooth release. Inspect brake release mechanism for wear or damage.
Electrical connection inspection: Check all electrical connections to controller, heating elements, brake solenoid, and auto-open mechanism. Verify secure connections and absence of corrosion or heat damage.
Quarterly Tasks
Complete swing mechanism disassembly: Remove upper assembly per manufacturer procedure. Clean and inspect all bearing surfaces, pivot points, and mounting hardware. Replace any worn components.
Gas spring replacement evaluation: Measure spring force if available. Replace springs showing reduced force or erratic motion even if not completely failed.
Brake system overhaul: Disassemble brake mechanism. Replace friction materials showing wear, glazing, or oil contamination. Adjust clearances per manufacturer specifications.
Swing Away Press Models and Selection
Swing away presses serve specific production needs where safety and positioning time justify larger footprint:
Manual Swing Away Presses
Basic swing away designs without auto-open features suit moderate production volumes where operators manually control all functions. These models provide swing safety advantages at lower cost than auto-open versions.
Typical specifications:
- Platen sizes: 15" x 15" to 16" x 24"
- Manual swing operation with gas spring assist
- Digital temperature controller
- Manual pressure adjustment
- Mechanical or magnetic brake systems
- Manual opening at timer completion
Best applications: Shops focusing on complex garments, educational environments prioritizing safety, operations with frequent thick substrate pressing.
Auto-Open Swing Away Presses
Auto-open functionality eliminates operator fatigue from manual opening while maintaining all swing away positioning advantages. These models handle 50-100 units daily efficiently.
Featured model:
- Joto Swing Away Heat Press 16" x 20" - Professional capacity with auto-open feature for consistent timing
Typical specifications:
- Platen sizes: 16" x 20" to 20" x 24"
- Gas spring assisted swing
- Digital PID temperature control (±5°F accuracy)
- Calibrated pressure adjustment
- Electromagnetic brake with auto-release
- Audible countdown alerts
- Emergency stop override
Best applications: Production shops handling mixed substrate types, operations pressing thick garments regularly, businesses prioritizing operator safety and ergonomics.
Frequently Asked Questions
Why choose swing away over clamshell if both press the same substrates?
Swing away design separates heat from the work area during substrate loading, eliminating burn hazards and providing unlimited positioning time. This matters most for thick garments with zippers or seams requiring careful layout, complex multi-color transfers needing precise registration, and operations prioritizing operator safety. The 40% larger footprint justifies these advantages only when regularly pressing items requiring extended setup time.
Can I convert my swing away press to auto-open if it doesn't have this feature?
Conversion requires adding brake release solenoid, wiring to timer controller, and potentially upgrading to compatible timer. Most manufacturers don't support field conversion due to liability concerns. Contact the manufacturer for specific model conversion availability. Purchasing auto-open equipped press initially costs less than retrofitting.
How do I know if my gas springs need replacement?
Weak gas springs allow upper assembly to drop rapidly toward closed position instead of controlled motion. Strong springs work but require excessive force to close. Test by manually swinging upper assembly - motion should feel smooth and controlled without rushing or excessive resistance. Replace springs if operation feels different than when press was new.
What causes brake to slip during pressing even after adjustment?
Brake slippage indicates worn friction material, contaminated surfaces, or insufficient engagement. Clean brake surfaces with denatured alcohol to remove any oil or grease. Adjust engagement mechanism to increase clamping force. If slippage continues after adjustment, friction materials require replacement. Operating with slipping brake damages bearings and ruins transfers.
Is swing away design necessary for sublimation or only for HTV and plastisol?
Swing away benefits any application involving thick or dimensional substrates regardless of transfer type. Sublimation on thick hoodies, zippered items, or bags with straps benefits from extended positioning time. Thin T-shirt sublimation works fine on clamshells. Choose swing away based on substrate characteristics, not transfer method.
How much space do I actually need for a 16" x 20" swing away press?
Plan approximately 55-60 inches lateral clearance for full swing arc plus 30-36 inches depth and 20-24 inches front clearance for operator access. Total footprint requires roughly 60" x 48" floor space. This doubles the space requirement compared to equivalent clamshell designs. Measure and verify clearance before purchasing to prevent operation issues.
Can swing away presses handle the same production volume as clamshells?
Yes, swing away presses handle equivalent volumes once operators master swing motion workflow. The swing operation adds 3-5 seconds per cycle compared to clamshell opening, but extended positioning time without burn risk reduces mistakes and reprints. Auto-open swing away models match clamshell productivity while providing superior safety and positioning advantages.
Conclusion: Mastering Swing Away Operation
Swing away heat press mastery requires understanding mechanical systems absent in clamshell designs. Gas springs, swing shafts, and brake mechanisms demand regular maintenance and daily inspection to maintain consistent operation. This additional complexity pays for itself through enhanced safety and improved results on dimensional substrates.
The core advantage of swing away design - heat separation during loading - matters only when substrate complexity justifies extended positioning time. Operations pressing primarily flat T-shirts gain little benefit from swing away design. Shops handling thick garments, complex positioning, or prioritizing operator safety find swing away design essential.
Master the swing motion sequence: swing handle grip, controlled rotation, flat contact verification, brake engagement, countdown monitoring, auto-open response. This workflow becomes automatic after 20-30 presses, allowing operators to focus on substrate positioning rather than equipment operation.
Maintain mechanical components on schedule. Weekly lubrication and monthly bearing inspection prevent failures during production runs. Quarterly gas spring evaluation catches degradation before complete failure occurs.
For operations requiring swing away capabilities, the larger footprint and higher maintenance requirements prove worthwhile through reduced burn risk, improved positioning accuracy, and enhanced transfer quality on complex substrates.