


Operating a clamshell heat press requires three synchronized variables: temperature maintained within ±5°F, pressure calibrated to substrate thickness, and dwell time precise to the second.
These parameters interact as a system where adjusting one affects the others. Temperature set 10°F too low cannot be compensated by adding pressure or extending time. Each variable must align with transfer material specifications for complete bonding without substrate damage.
This guide covers the complete operational workflow for clamshell heat presses, from initial setup through production pressing and quality troubleshooting. Understanding the mechanics of vertical platen operation, heat distribution patterns, and pressure calibration prevents the costly mistakes that waste materials and create customer complaints.
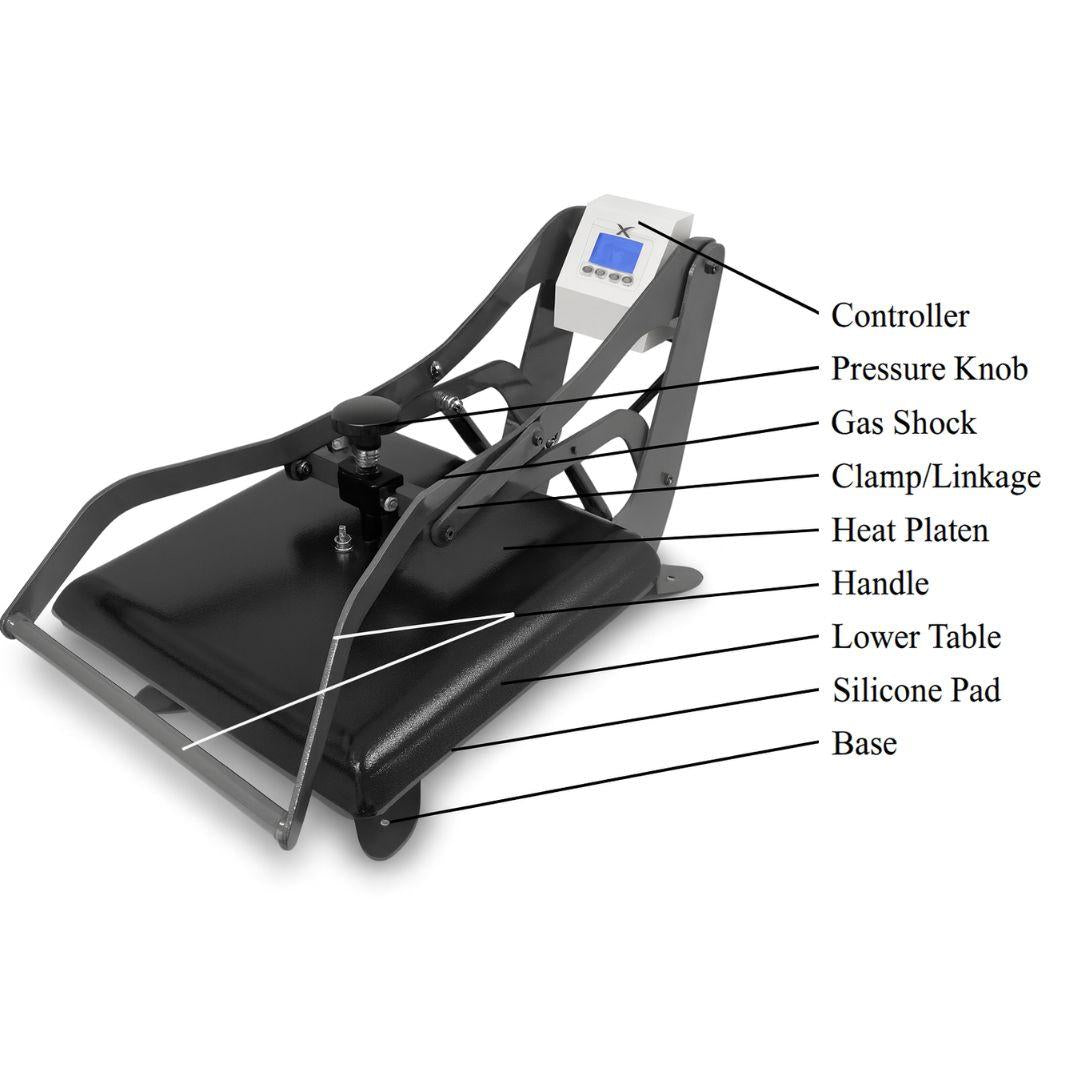
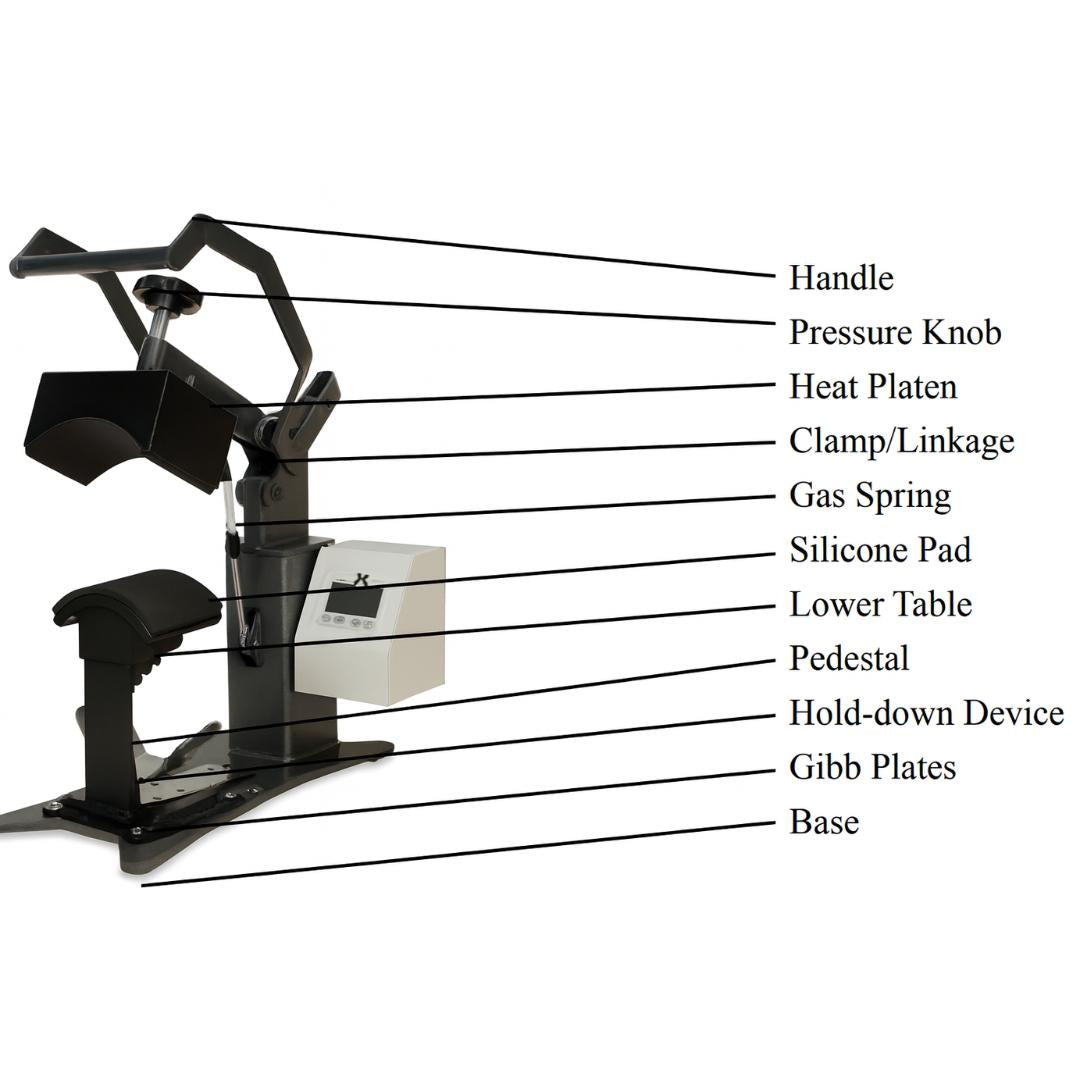
Understanding Clamshell Heat Press Mechanics

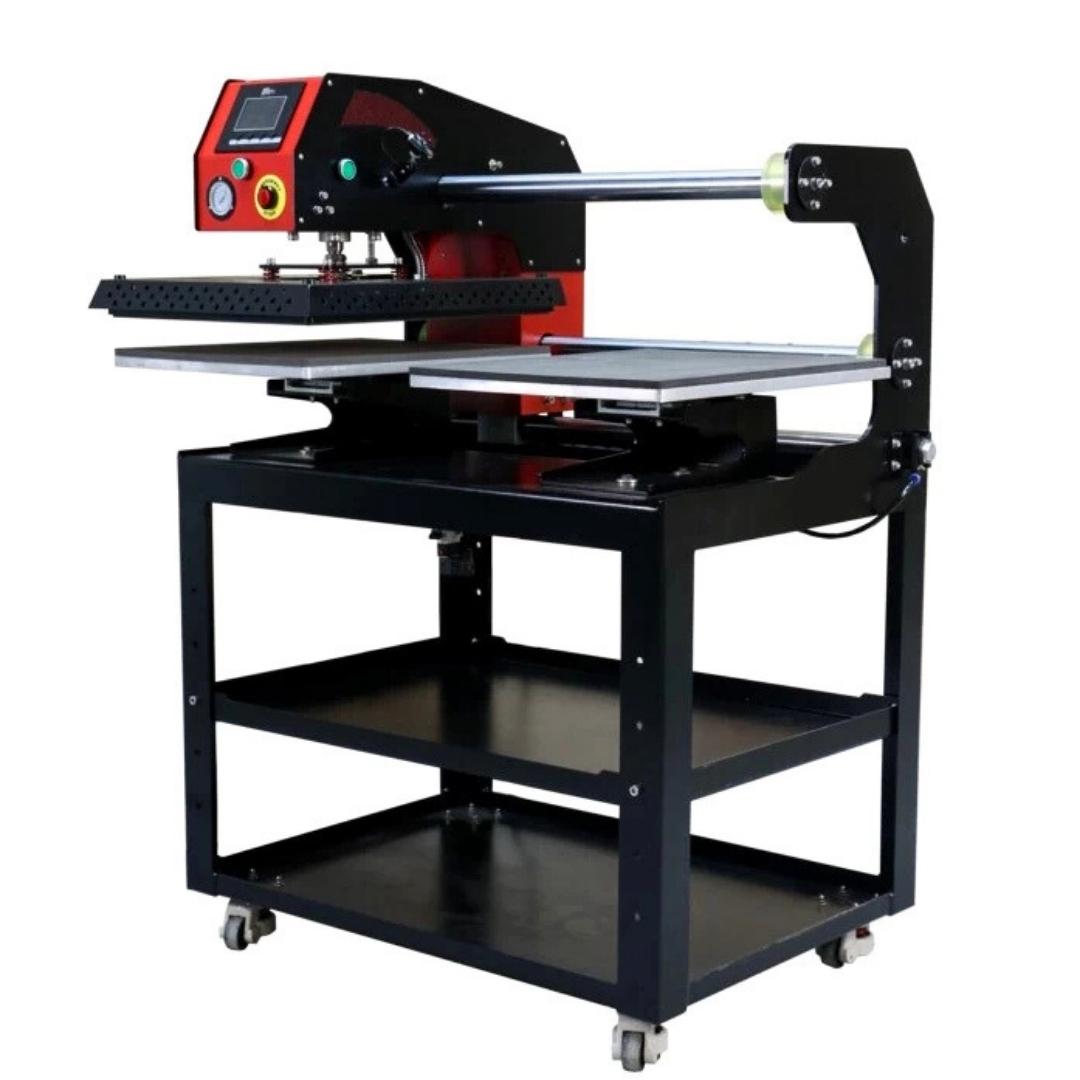
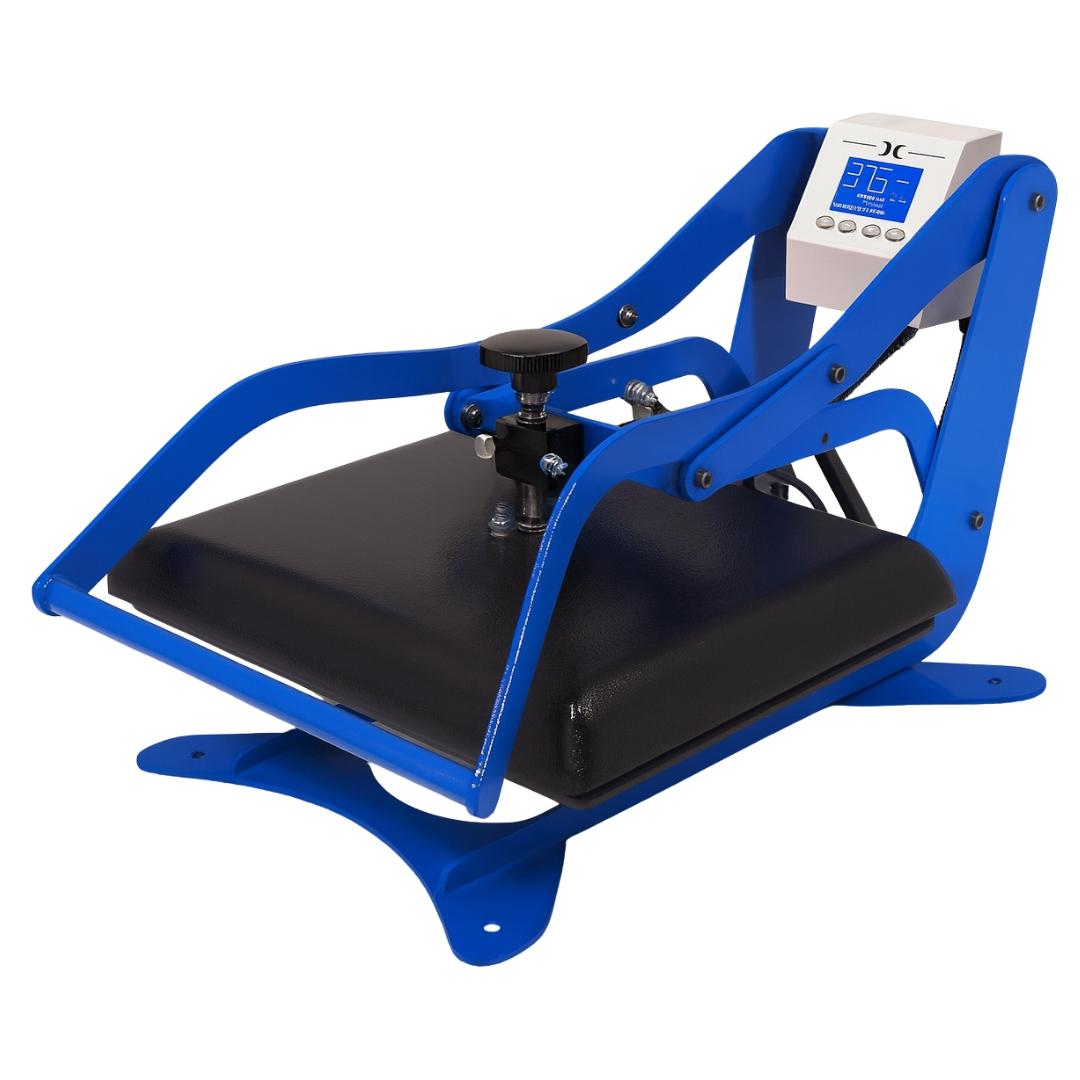
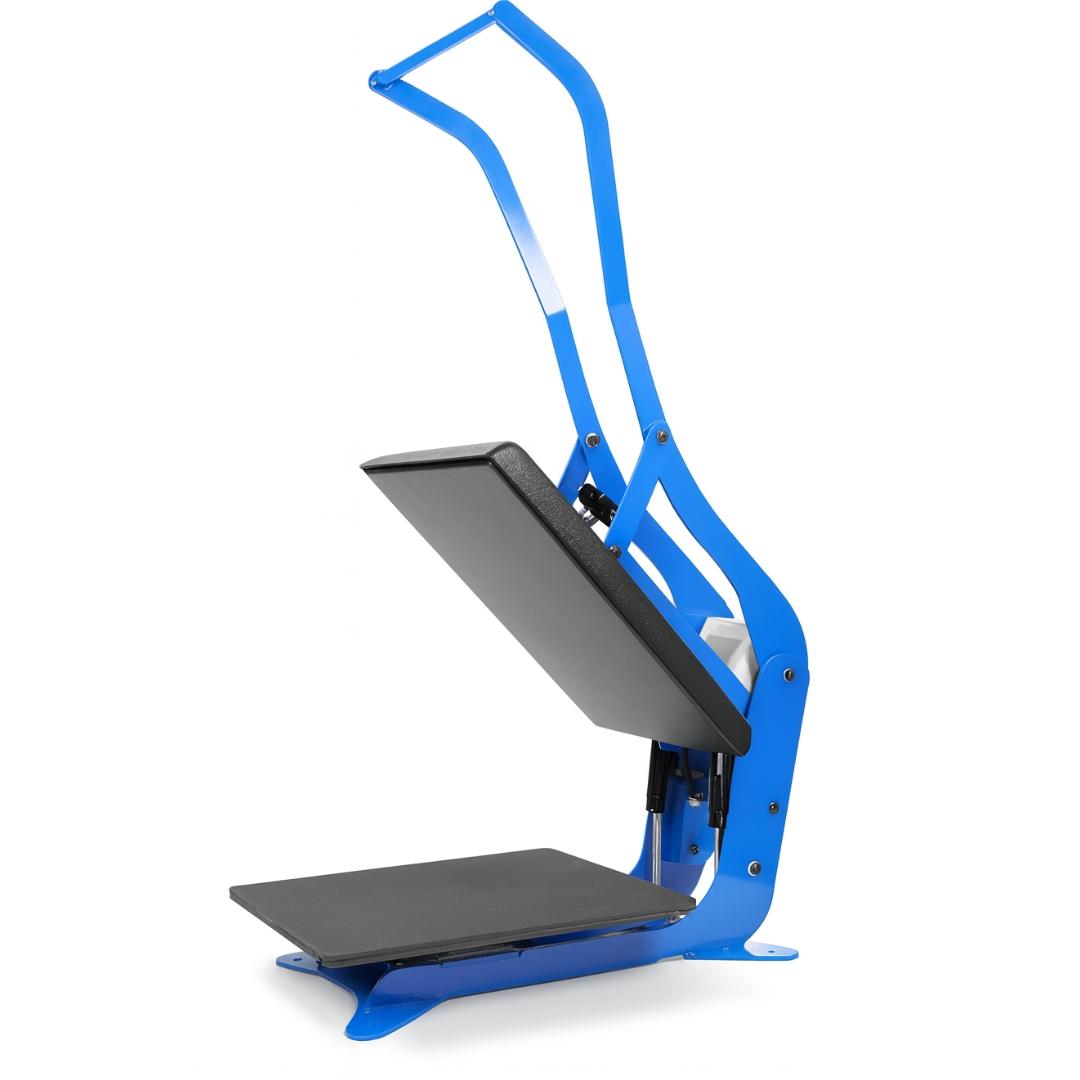
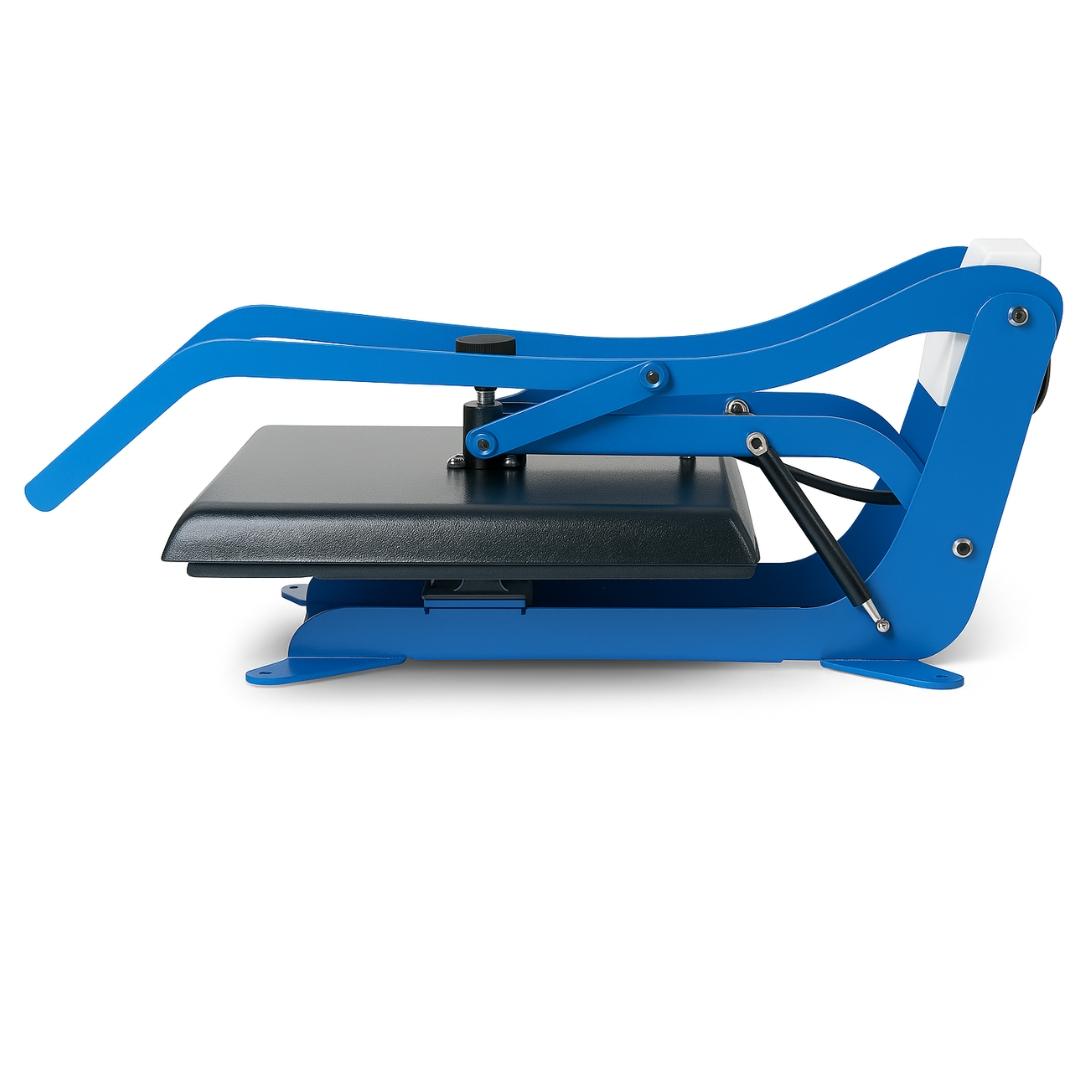
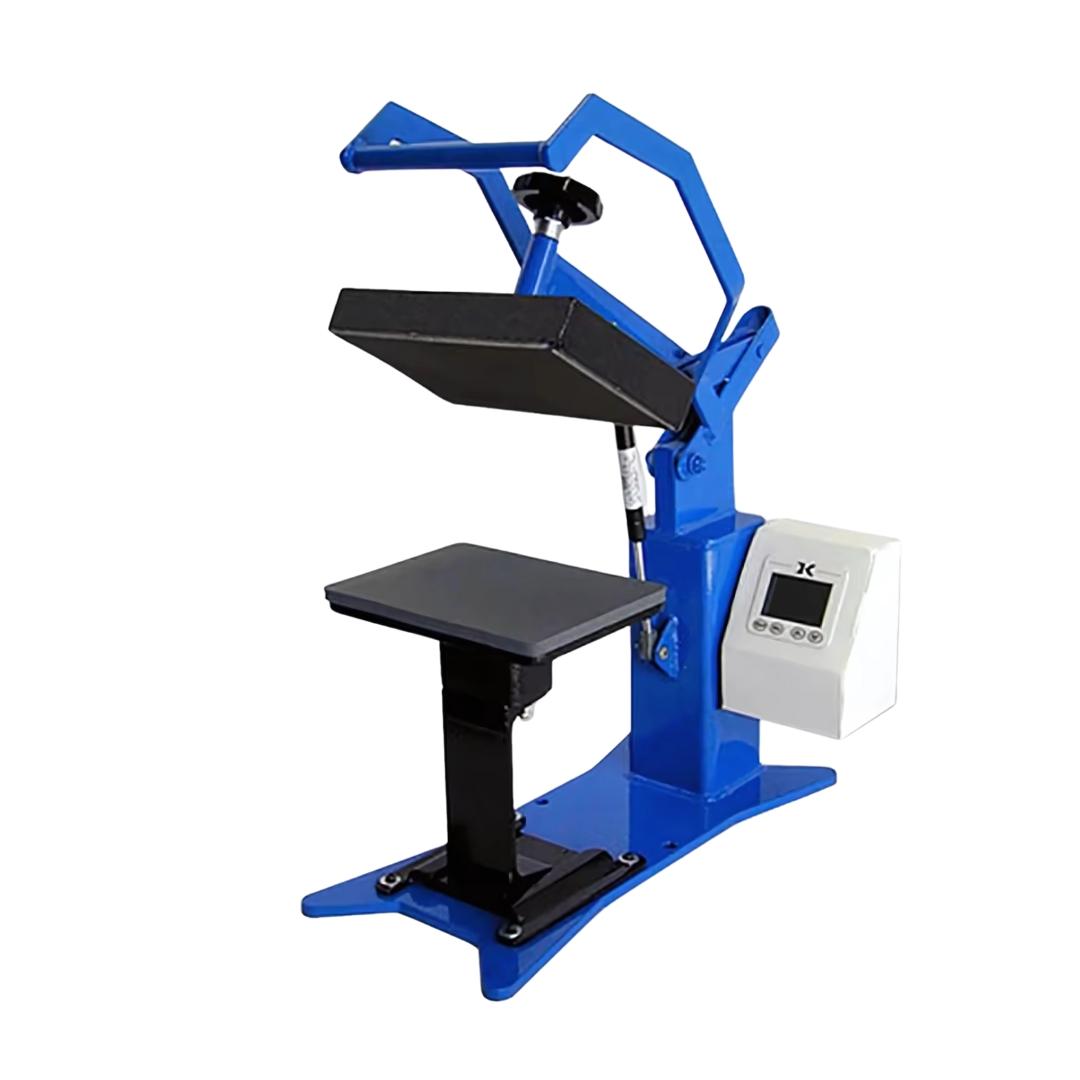
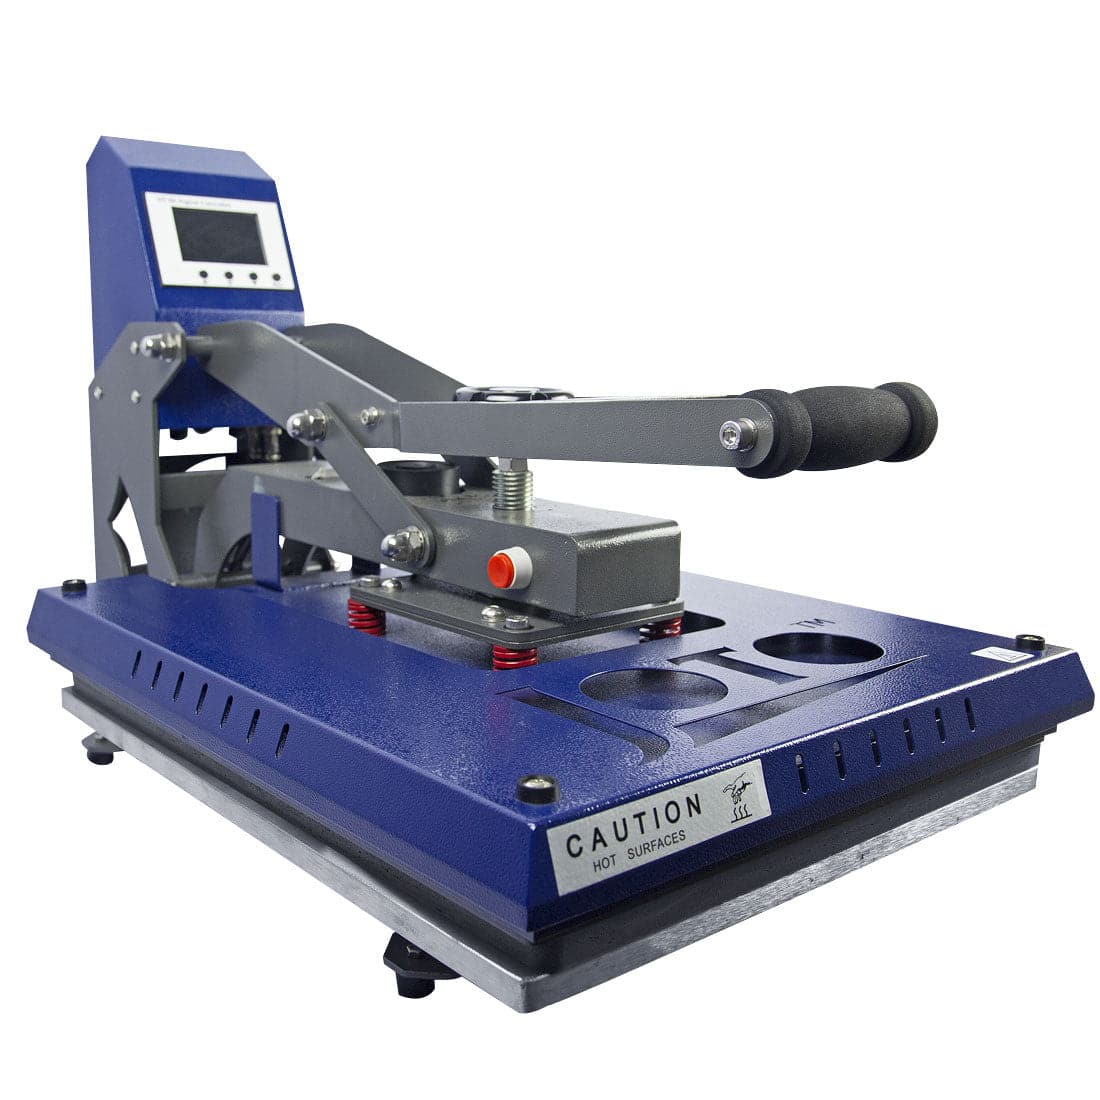
Clamshell presses feature a top-hinged heating platen that opens vertically over a fixed lower platen. This vertical opening mechanism creates the compact footprint that makes clamshells ideal for space-limited workshops. The design also determines operational characteristics that affect workflow and safety.
Heat Distribution in Vertical Platen Design
The upper heating platen contains embedded heating elements distributed across the pressing surface. Quality clamshells maintain temperature uniformity within ±5°F from center to edges. This consistency requires proper element placement and adequate heat soak time before pressing.
Lower platens remain at room temperature, relying on upper platen heat to penetrate through the transfer material and into the substrate. This one-sided heating means thicker substrates require longer dwell times to allow heat transfer through the material depth.
Corner and edge areas cool faster than center sections due to greater surface area exposure to ambient air. Presses compensate through higher element density at perimeter locations or slightly elevated edge temperatures. This prevents the common problem of faded transfer edges while centers appear fully saturated.
Pressure Application Through Vertical Closing
Vertical closing applies pressure perpendicular to the substrate surface. This creates even distribution across flat materials but requires substrate positioning exactly parallel to the lower platen. Any substrate tilt or wrinkle concentrates pressure on the high points, leaving gaps in low areas.
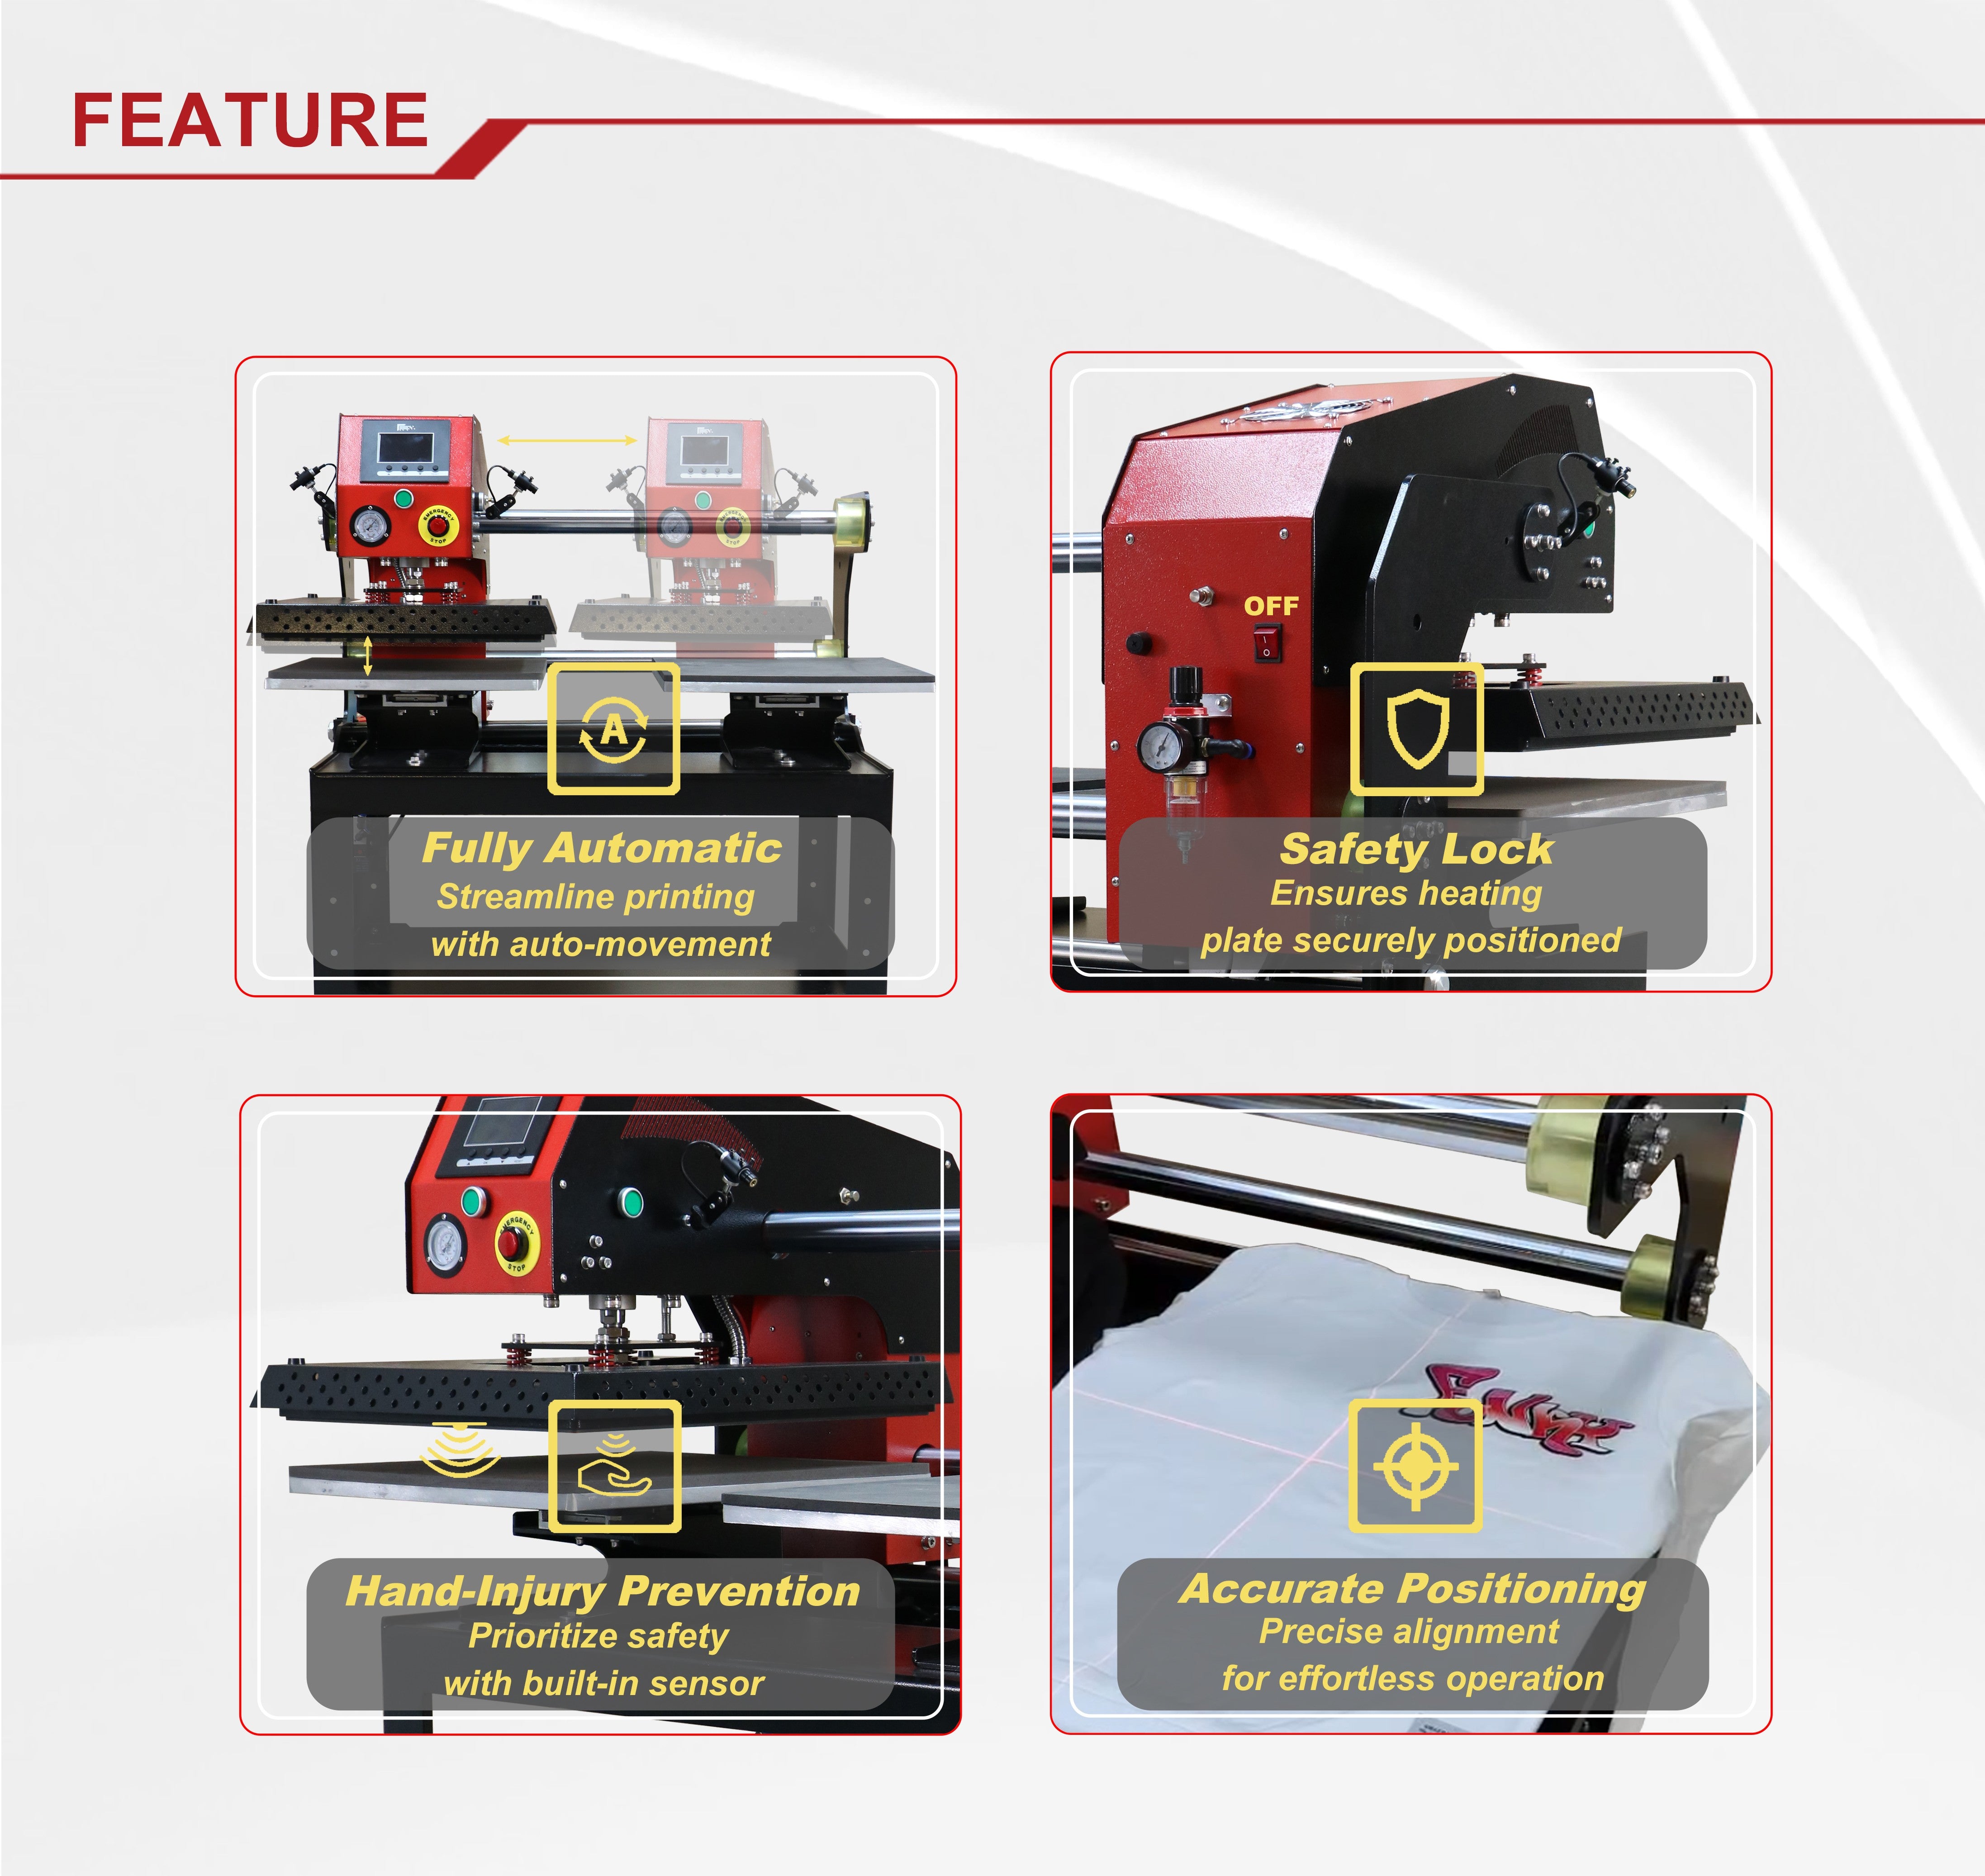
Manual clamshells require operator force to close and hold the press throughout the dwell cycle. Arm fatigue after 15-20 closings can reduce applied pressure on subsequent presses. Auto-release clamshells eliminate this variable by using springs or pneumatic cylinders to maintain consistent closing force.
Pressure adjustment mechanisms vary by model. Threaded knobs compress springs controlling closing force. Turn clockwise to increase pressure, counterclockwise to decrease. Make adjustments in small increments and test press on scrap material before committing to production substrates.
Pre-Operation Setup Sequence
Proper setup before the first press of each session prevents inconsistent results and substrate waste. This sequence ensures all systems operate within specifications:
Workspace Preparation
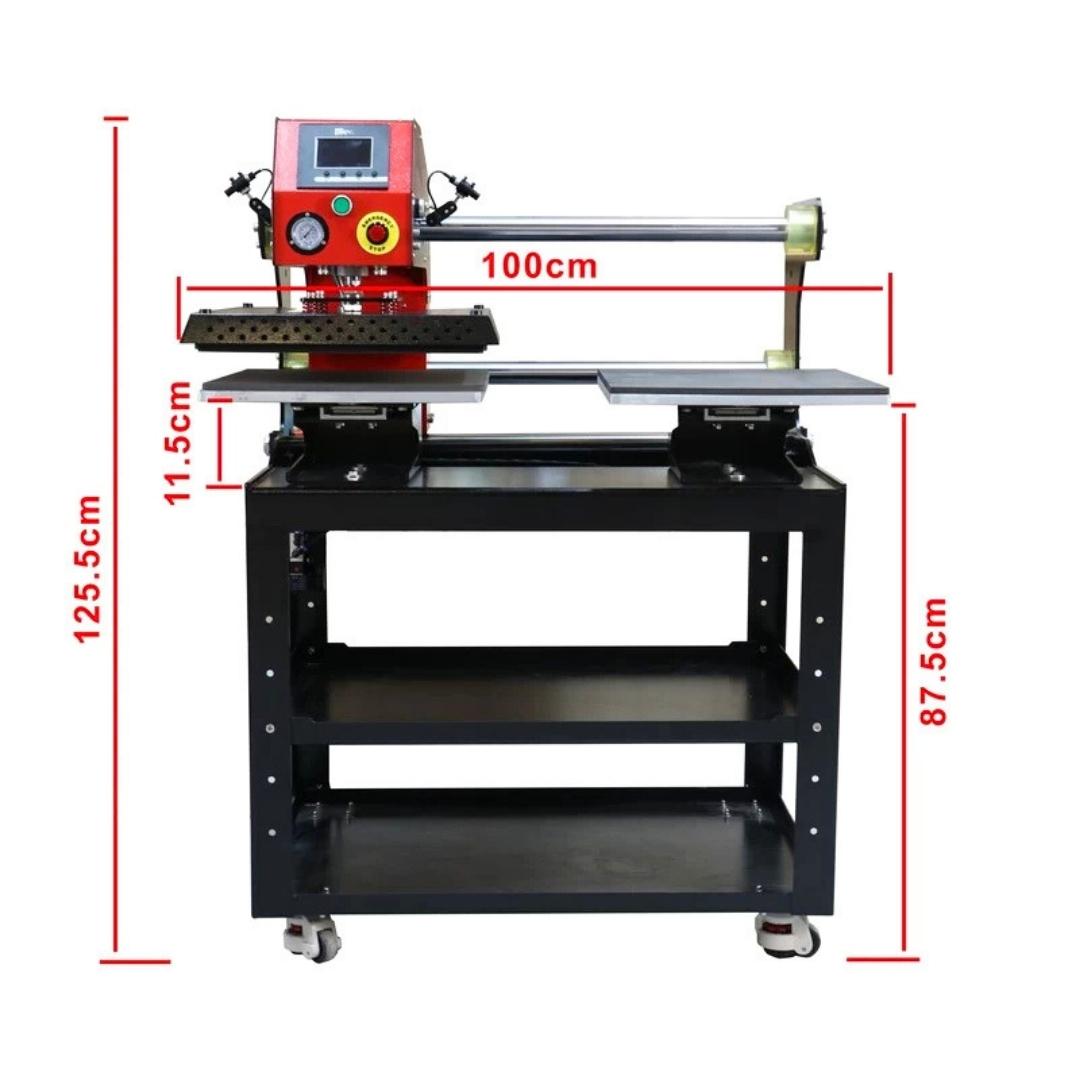
Position the clamshell heat press on a stable work surface at waist height. The lower platen should align with the operator's natural arm position when standing relaxed. Positioning too high forces reaching up repeatedly, while too low requires bending that strains the back during extended sessions.
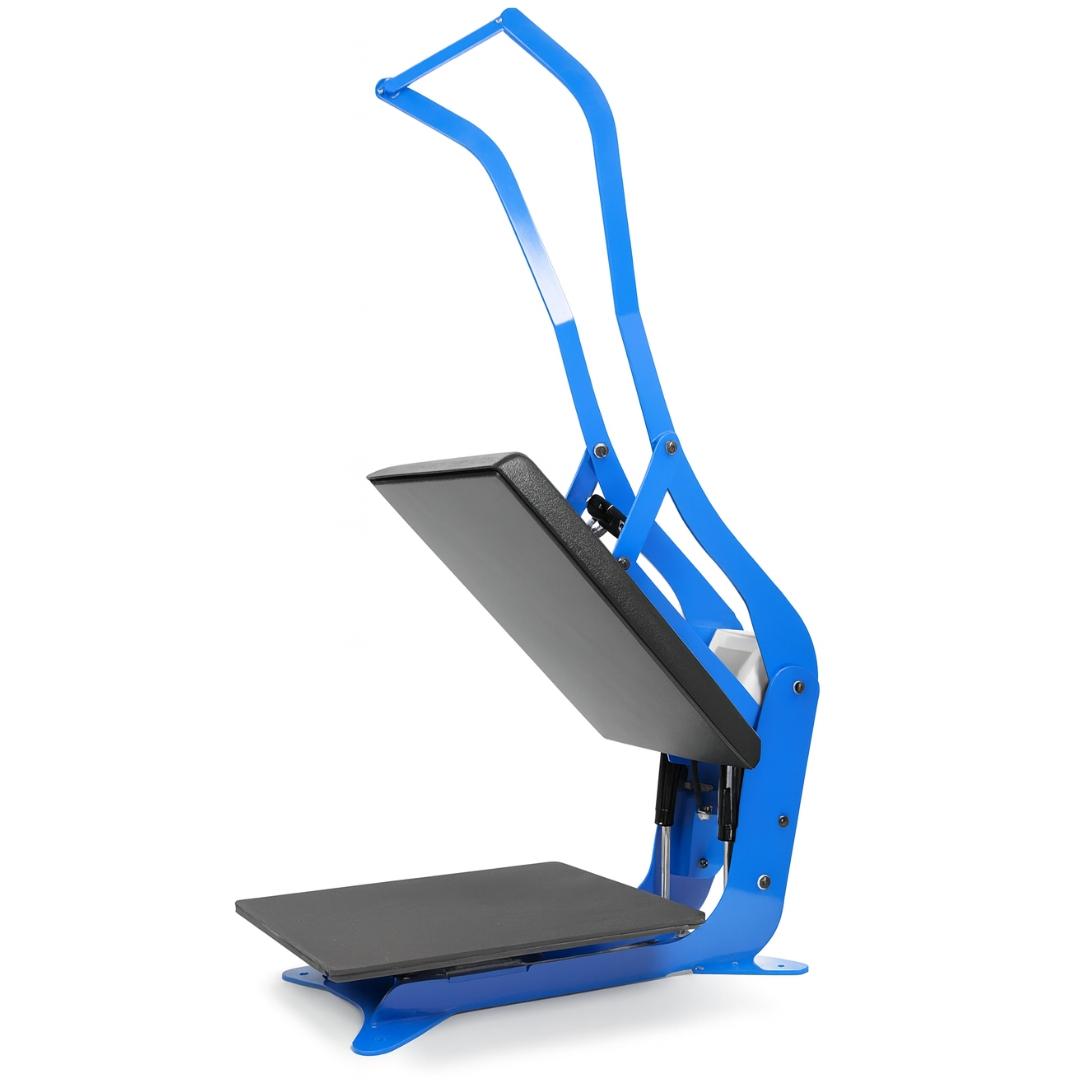
Ensure adequate clearance above the press for full vertical opening. The upper platen swings approximately 75-90 degrees open. Overhead cabinets, shelving, or low ceilings can interfere with operation or create collision hazards.
Keep transfer materials, protective sheets, and finished substrate storage within arm's reach. Minimize walking or reaching during production runs. Each wasted motion adds cycle time and increases fatigue.
Power and Electrical Verification
Clamshell heat presses in the US operate on standard 120V household circuits drawing 1750-1800W during heating. Verify the circuit supports this load without other high-draw devices connected simultaneously.
Check power cord condition before each session. Damaged insulation near the plug or press connection creates fire and shock hazards. Replace cords showing wear rather than attempting repairs.
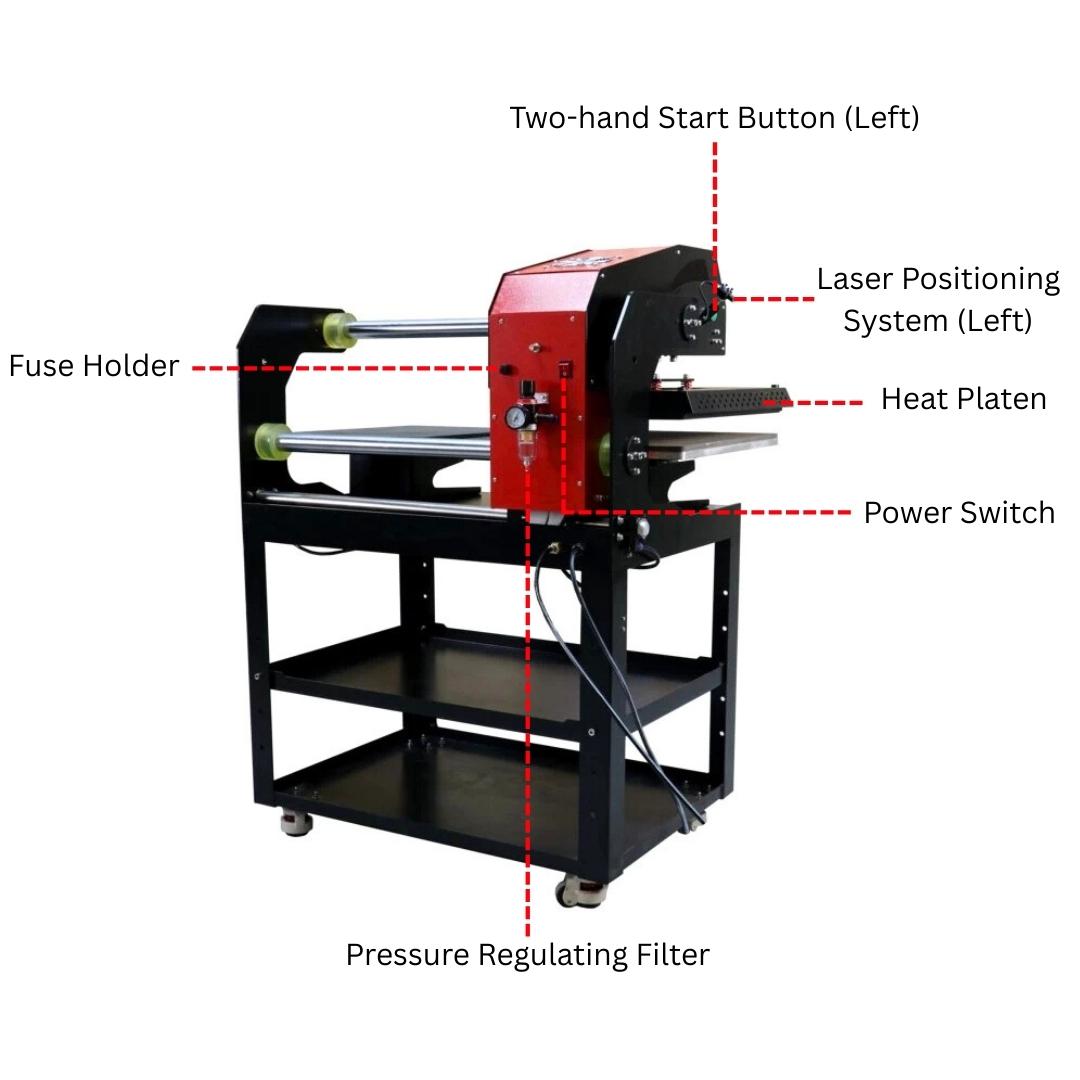
Locate emergency shutoff controls. Manual presses feature red emergency stop buttons that immediately cut power. Auto-release models include mechanical overrides for opening the press if electrical systems fail mid-cycle.
Temperature Controller Setup
Digital temperature controllers display both current temperature (PV - Process Value) and set temperature (SV - Set Value). Understanding this dual display prevents the common mistake of pressing before the platen reaches operating temperature.
Set temperature based on transfer material requirements. Common settings:
- Sublimation transfers: 375-400°F (190-205°C)
- Plastisol transfers: 350-375°F (175-190°C)
- Heat transfer vinyl: 310-330°F (155-165°C)
- Inkjet transfers for light fabrics: 365-385°F (185-195°C)
- Inkjet transfers for dark fabrics: 350-365°F (175-185°C)
Allow 8-12 minutes heat soak after reaching set temperature before pressing production items. This stabilizes element temperature and ensures readings accurately reflect actual platen surface temperature.
Pressure Calibration Process
Proper pressure creates complete contact between transfer material and substrate without crushing or distorting either. Test pressure before production using this sequence:
Step 1: Visual contact test
- Place blank substrate on lower platen
- Lower upper platen without locking closed
- Check for light gaps visible between platen and substrate
- Adjust pressure mechanism until platen contacts entire substrate surface
Step 2: Paper test
- Place sheet of plain paper on lower platen
- Close press and immediately open
- Examine paper for even contact marks across entire surface
- Light or missing marks indicate pressure adjustment needed
Step 3: Test transfer
- Press blank transfer paper onto scrap substrate
- Complete full cycle with proper temperature and time
- Evaluate transfer uniformity edge to edge
- Adjust pressure if results show uneven coverage
Operating Workflow for Production Pressing
Consistent results require systematic workflow that eliminates variables between presses. This sequence applies to most flat substrate applications:
Substrate Preparation
Inspect substrates before loading. Remove tags, stickers, or packaging materials that could melt under heat or create pressure marks through the fabric. Wrinkles in fabric substrates telegraph through transfers, appearing as lines in the finished image.
Pre-press fabric items for 3-5 seconds to remove moisture and relax fibers. This step prevents steam release during the transfer press that can cause blurry images or poor adhesion. Moisture in fabric creates steam barriers preventing complete transfer bonding.
Position substrates centered on the lower platen. Garment seams should lie flat without bunching. Ensure the transfer area sits completely within the heated platen boundaries. Transfers extending beyond platen edges receive insufficient heat and pressure for proper bonding.
Transfer Positioning and Securing
Place transfer material printed side down against the substrate surface. Verify correct orientation by checking any text or directional design elements. Once pressing begins, repositioning becomes impossible without wasting the transfer.
Secure transfer paper with heat-resistant tape on at least two opposing corners. This prevents paper movement during the platen closing motion that would cause ghosting or double images. Standard office tape melts under heat press temperatures.
Cover the transfer with a Teflon protective sheet. This prevents ink migration to the upper platen and protects the substrate from direct heat contact. Replace protective sheets when ink buildup or tears compromise their function.
Closing and Pressing Procedure
For manual clamshell presses:
- Grip the upper platen handle firmly with both hands
- Pull downward with steady force until the locking mechanism engages
- Verify the timer has started counting down
- Maintain position until timer reaches completion
- Release lock and lift upper platen clear of substrate
For auto-release clamshell presses:
- Lower upper platen until locking mechanism engages
- Confirm timer started and audible beep sounds
- Step away from press during cycle
- Watch for auto-release at timer completion
- Allow platen to open fully before approaching
Never obstruct the auto-release motion path. The spring or pneumatic system opens with significant force that could cause injury if hands or objects block the movement. Position yourself to the side during pressing rather than directly in front.
Transfer Removal and Cooling
Transfer peel timing varies by material type. Check transfer manufacturer specifications:
Hot peel: Remove transfer paper immediately while substrate remains hot. Most heat transfer vinyl and plastisol transfers require hot peel. Wait 2-3 seconds for pressure release, then peel transfer paper in one smooth motion.
Cold peel: Allow substrate to cool 15-30 seconds before removing transfer paper. Most sublimation and some inkjet transfers bond during cooling phase. Peeling too early lifts ink from the substrate surface.
Warm peel: Remove transfer after 5-10 seconds partial cooling. The substrate should feel warm but not scalding. This intermediate approach works for transfers where specifications list either hot or cold peel as acceptable.
Place finished items flat to complete cooling. Folding or stacking hot substrates can create unwanted creases or cause transfers to stick together. Allow minimum 60 seconds cooling before quality inspection or packaging.
Temperature and Time Settings by Application
Transfer success depends on matching heat press parameters to material specifications. These settings provide starting points requiring adjustment based on specific products and press characteristics:
Sublimation on Polyester Fabrics
-
Temperature: 385-395°F (195-200°C)
-
Time: 45-60 seconds
-
Pressure: Medium (40-50 psi)
- Peel: Hot peel after 3-5 second cooling
Sublimation requires sustained temperature for dye gas activation. Lower temperatures produce faded colors. Higher temperatures risk scorching polyester or causing transfer ghosting from paper movement.
Sublimation on Rigid Substrates
-
Temperature: 375-385°F (190-195°C)
-
Time: 60-90 seconds
-
Pressure: Medium-firm (45-55 psi)
- Peel: Cold peel after complete cooling
Ceramic, aluminum, and polymer-coated substrates require longer dwell times to heat through material thickness. Pressure must be firm enough for complete contact but not excessive to avoid cracking rigid materials.
Heat Transfer Vinyl (HTV)
-
Temperature: 310-330°F (155-165°C)
-
Time: 10-15 seconds
-
Pressure: Firm (50-60 psi)
- Peel: Hot or warm peel per manufacturer specs
HTV bonds through adhesive activation rather than dye sublimation. Lower temperatures prevent vinyl scorching. Higher pressure ensures adhesive penetrates fabric texture. Excessive time can melt vinyl or degrade adhesive.
Plastisol Transfers
-
Temperature: 350-375°F (175-190°C)
-
Time: 8-12 seconds
-
Pressure: Medium-firm (45-55 psi)
- Peel: Hot peel immediately
Plastisol ink melts and bonds quickly. Short dwell times prevent ink migration beyond transfer boundaries. Immediate hot peel required while plastisol remains molten. Waiting causes carrier sheet bonding to substrate.
Inkjet Transfers on Light Fabrics
-
Temperature: 365-385°F (185-195°C)
-
Time: 25-35 seconds
-
Pressure: Firm (50-60 psi)
- Peel: Cold peel after cooling
Light fabric transfers use thin transfer papers requiring complete cooling for proper bonding. Peeling hot causes ink lifting. Higher pressure ensures transfer adhesion through fabric texture without adhesive showing.
Inkjet Transfers on Dark Fabrics
-
Temperature: 350-365°F (175-185°C)
-
Time: 20-30 seconds
-
Pressure: Firm (50-60 psi)
- Peel: Hot or warm peel
Dark fabric transfers include white underlayer requiring activation at specific temperatures. Too hot causes yellowing. Too cool prevents adhesive bonding. Follow transfer manufacturer specifications precisely for dark fabric applications.
Common Operating Problems and Solutions
Most clamshell heat press issues stem from improper parameter settings or technique errors rather than equipment failure. These troubleshooting approaches resolve typical problems:
Uneven Transfer Coverage
Symptom: Transfer appears darker in center with faded edges, or vice versa.
Causes and solutions:
- Pressure imbalance: Adjust pressure mechanism. Test with paper contact method to verify even pressure distribution
- Platen temperature variance: Verify temperature uniformity with infrared thermometer. Center and edges should read within ±5°F
- Substrate thickness variation: Ensure fabric lies completely flat. Wrinkles or folds create high and low areas receiving different pressure
- Insufficient heat soak: Allow longer warm-up time after reaching set temperature. Platens need 8-12 minutes to stabilize
Transfer Ghosting or Double Images
Symptom: Faint duplicate image appears offset from main transfer.
Causes and solutions:
- Paper movement during pressing: Secure transfer paper with heat tape on all corners. Check tape adhesion before closing press
- Substrate shifting: Ensure substrate remains stationary on lower platen. Pre-press fabric items to increase friction
- Platen closing motion: Close press with controlled motion rather than dropping upper platen. Sudden impact can shift materials
- Vibration during cycle: Verify press sits on stable surface. Unstable mounting allows movement during dwell time
Weak Bonding or Transfer Peeling After Washing
Symptom: Transfer appears correct initially but lifts or fades after first wash.
Causes and solutions:
- Insufficient temperature: Verify actual platen temperature with infrared thermometer. Controller display may not reflect true surface temp
- Short dwell time: Increase pressing time by 10-second increments. Test wash durability on sample before production run
- Low pressure: Increase pressure adjustment. Transfer adhesive must penetrate fabric texture for mechanical bonding
- Fabric moisture: Always pre-press fabrics before transfer application. Trapped moisture prevents proper adhesion
- Incompatible materials: Verify transfer paper compatibility with fabric type. Not all transfers work on all fabrics
Scorching or Substrate Discoloration
Symptom: Brown marks, yellowing, or fabric texture changes appear after pressing.
Causes and solutions:
- Excessive temperature: Reduce set temperature by 10-15°F increments. Test on scrap material between adjustments
- Extended dwell time: Decrease pressing time. Many transfers require less time than operators assume
- Direct platen contact: Always use Teflon protective sheet between platen and substrate. Direct contact causes scorching
- Synthetic fabric sensitivity: Lower temperatures for polyester blends. Pure polyester tolerates 400°F but blends may scorch at 350°F
Pressure Marks or Platen Texture Transfer
Symptom: Shiny marks, fabric compression, or grid patterns appear on finished substrate.
Causes and solutions:
- Excessive pressure: Reduce pressure adjustment. Fabric should contact platen fully without visible compression
- Worn protective sheet: Replace Teflon sheet if texture or damage visible. Sheet texture telegraphs through to substrate
- Thin substrates: Use lighter pressure for thin fabrics. Compression marks appear more readily on lightweight materials
- Foreign objects: Check lower platen for debris, tape residue, or material fragments that create pressure points
Safety Protocols for Clamshell Operation
Clamshell heat presses operate with surface temperatures reaching 400°F and spring-loaded closing mechanisms. Following these safety protocols prevents burns and equipment damage:
Burn Prevention
The upper heating platen remains at operating temperature during the entire work session. Accidental contact causes immediate burns requiring medical attention.
Safe practices:
- Never reach toward or under the open upper platen
- Position substrates and transfers before opening the press
- Work quickly but deliberately when hands near the heat platen
- Use heat-resistant gloves when positioning materials on preheated presses
- Keep loose clothing, hair, and jewelry away from the press during operation
- Place the press where accidental contact during room traffic cannot occur
Auto-Release Safety
Auto-release mechanisms open with significant force at timer completion. This sudden motion presents injury risk if operators position hands or body parts in the opening path.
Safe practices:
- Stand to the side rather than directly in front during pressing cycle
- Never place hands on the upper platen during countdown
- Keep children and untrained persons away from operating presses
- Ensure adequate clearance above the press for full auto-release movement
- Test emergency stop buttons monthly to verify function
Electrical Safety
Heat presses draw significant electrical current during heating cycles. Proper electrical installation prevents fire hazards and equipment damage.
Safe practices:
- Connect presses to dedicated 20-ampere circuits when possible
- Never use extension cords rated below 20 amperes
- Inspect power cords before each session for damage
- Unplug presses during maintenance or when not in use
- Keep liquids away from electrical components and controllers
- Shut down immediately if electrical odors or smoke appears
Maintenance Schedule for Consistent Performance
Regular maintenance prevents performance degradation and extends equipment lifespan. These tasks maintain pressing quality over thousands of cycles:
Daily Tasks
Protective sheet inspection: Check Teflon sheet for tears, ink buildup, or adhesive residue. Replace when contamination cannot be removed or physical damage appears.
Lower platen cleaning: Wipe lower platen with damp cloth to remove lint, debris, or adhesive fragments. Debris creates pressure points causing uneven transfers.
Power cord inspection: Verify cord condition at plug and press connection points. Look for insulation damage, exposed conductors, or stress fractures.
Weekly Tasks
Upper platen cleaning: Clean heating platen when cool using platen cleaner or mild detergent solution. Remove any ink or adhesive that contacted the surface. Rinse completely and dry before reheating.
Hinge mechanism lubrication: Apply light machine oil to hinge pivot points. Wipe excess to prevent drips onto substrates during pressing.
Pressure calibration verification: Perform paper contact test to confirm even pressure distribution. Recalibrate if contact pattern shows irregularities.
Monthly Tasks
Temperature verification: Use infrared thermometer to verify actual platen temperature matches controller display at three points: center, edge, and corner. Calibrate controller if variance exceeds ±10°F.
Emergency stop testing: Press emergency stop button to verify immediate power cutoff. Test mechanical overrides on auto-release models to confirm manual opening capability.
Electrical connection inspection: Check plug fit in wall outlet. Loose connections create heat and fire hazards. Verify all controller connections remain secure.
Quarterly Tasks
Deep platen cleaning: Remove stubborn buildup using specialized platen cleaning solutions. Some ink types bond to platen surface requiring chemical removal.
Pressure mechanism inspection: Check springs, adjustment threads, and mechanical components for wear. Lubricate adjustment mechanisms to maintain smooth operation.
Documentation review: Record pressing parameters, substrate types, and any quality issues in maintenance logs. Trend analysis predicts component failures before production impacts occur.
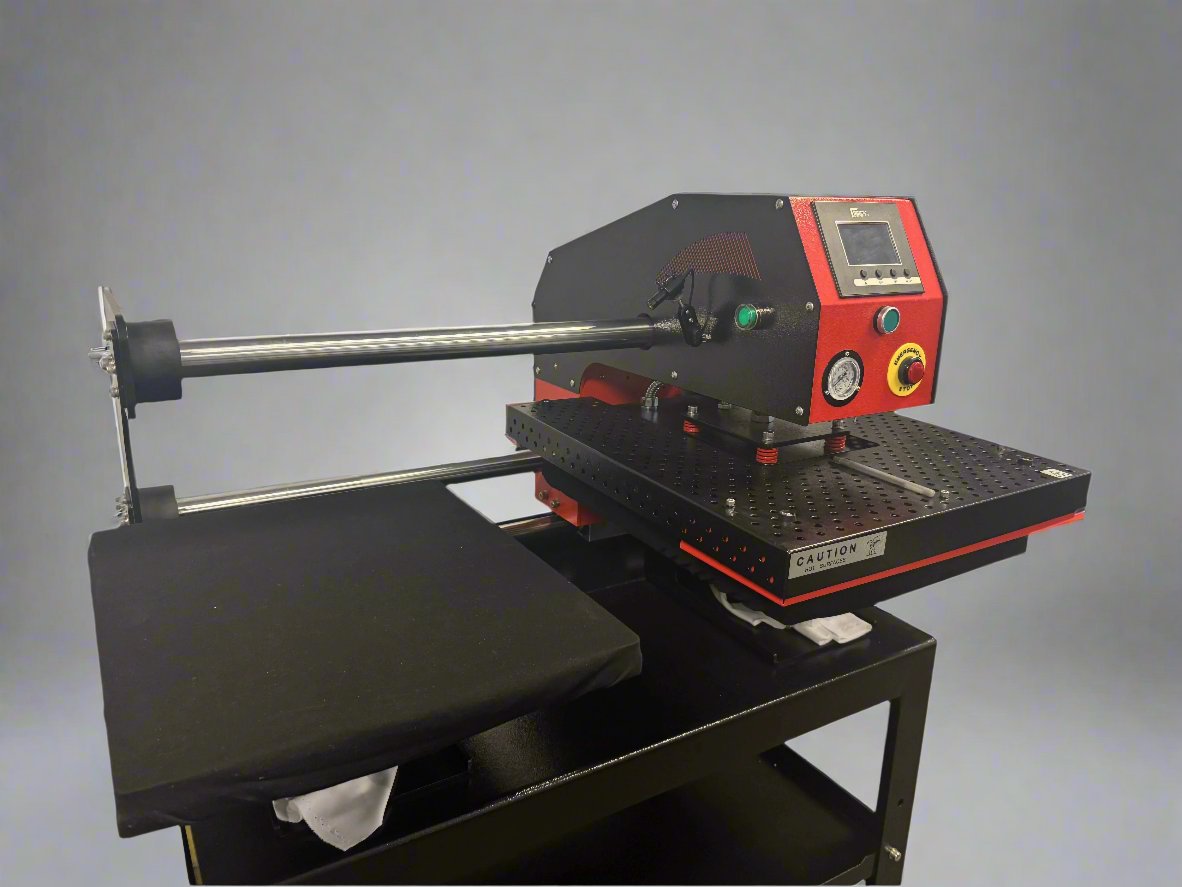
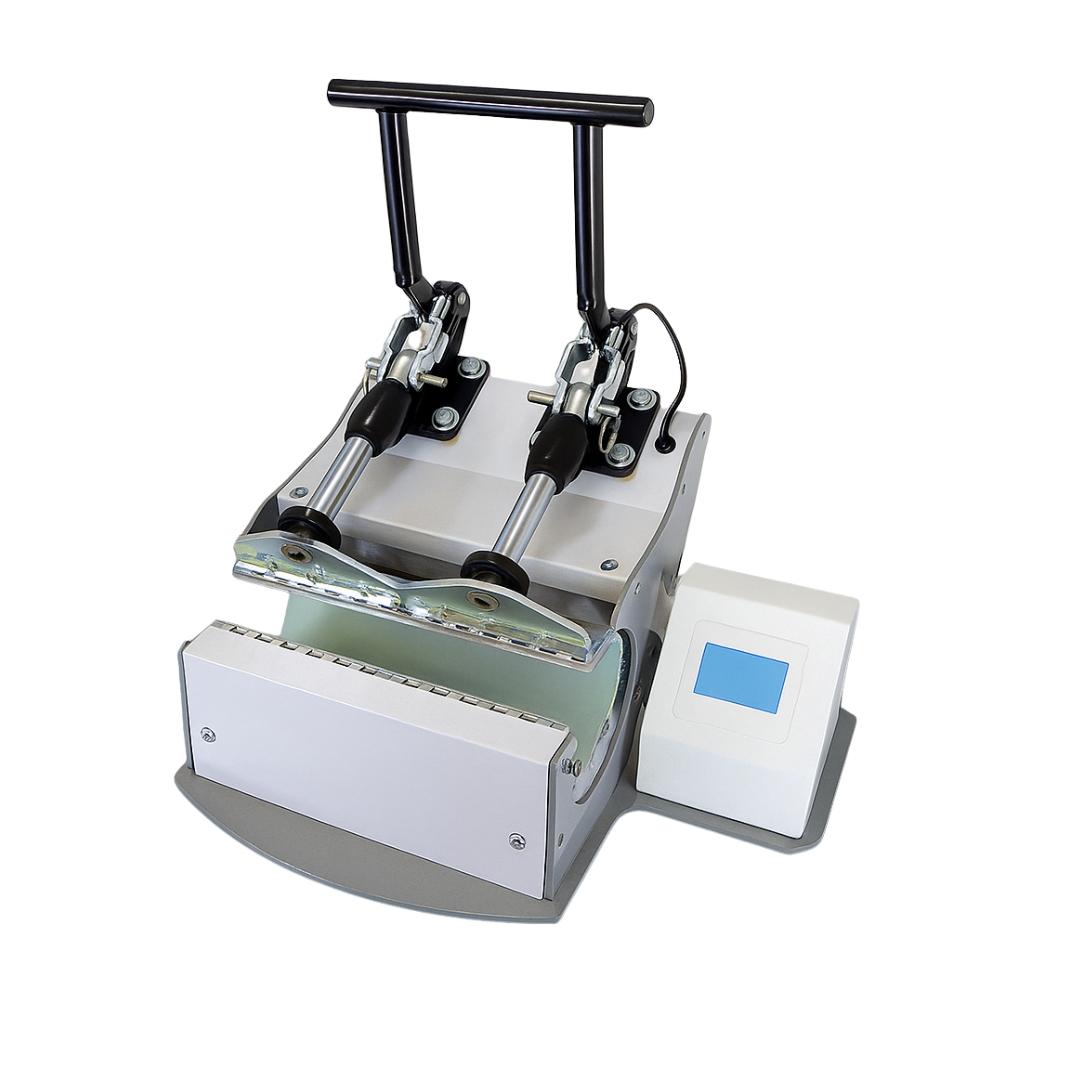
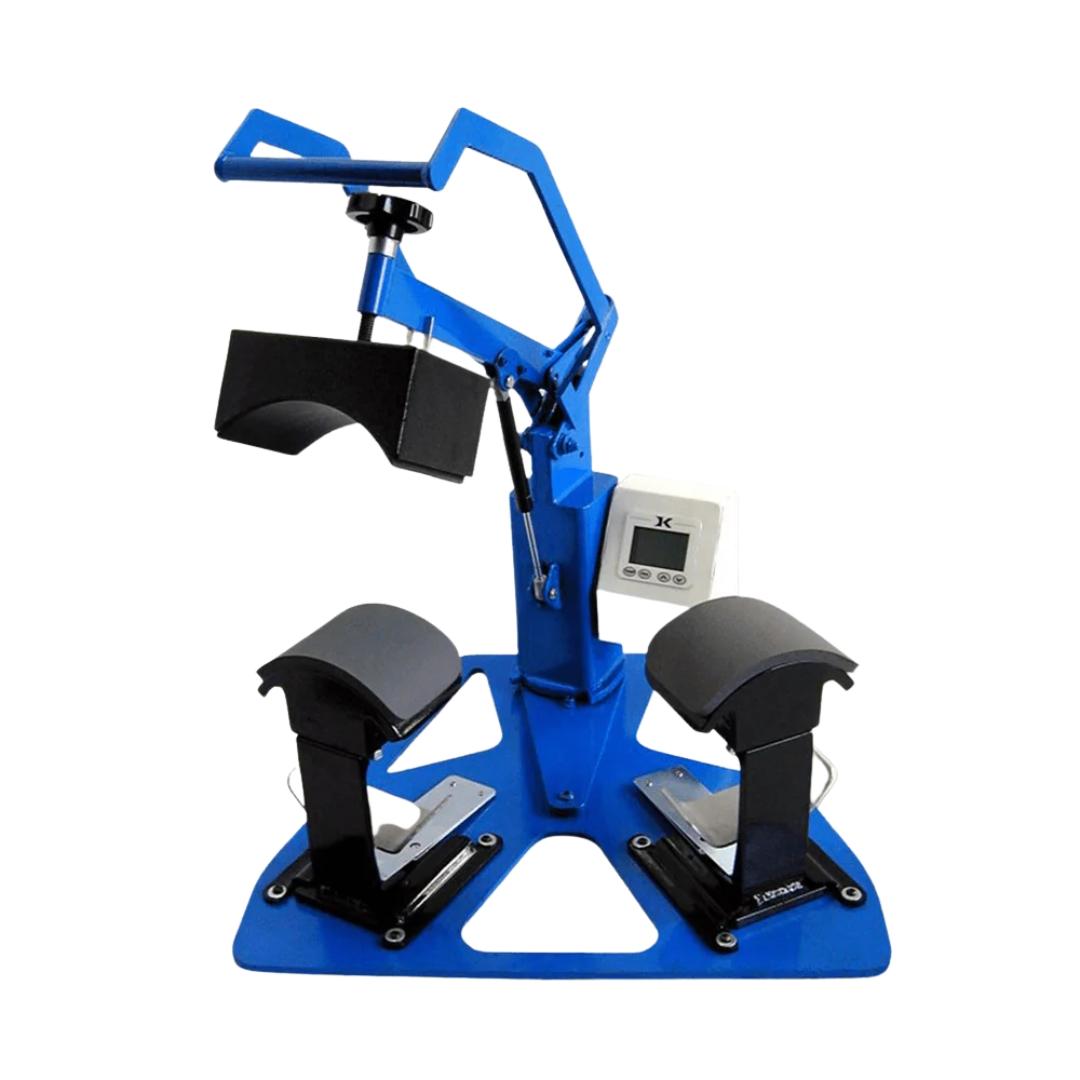
Clamshell Press Models for Different Applications
Clamshell heat press selection depends on production volume, substrate variety, and workspace constraints. These model categories serve specific operational needs:
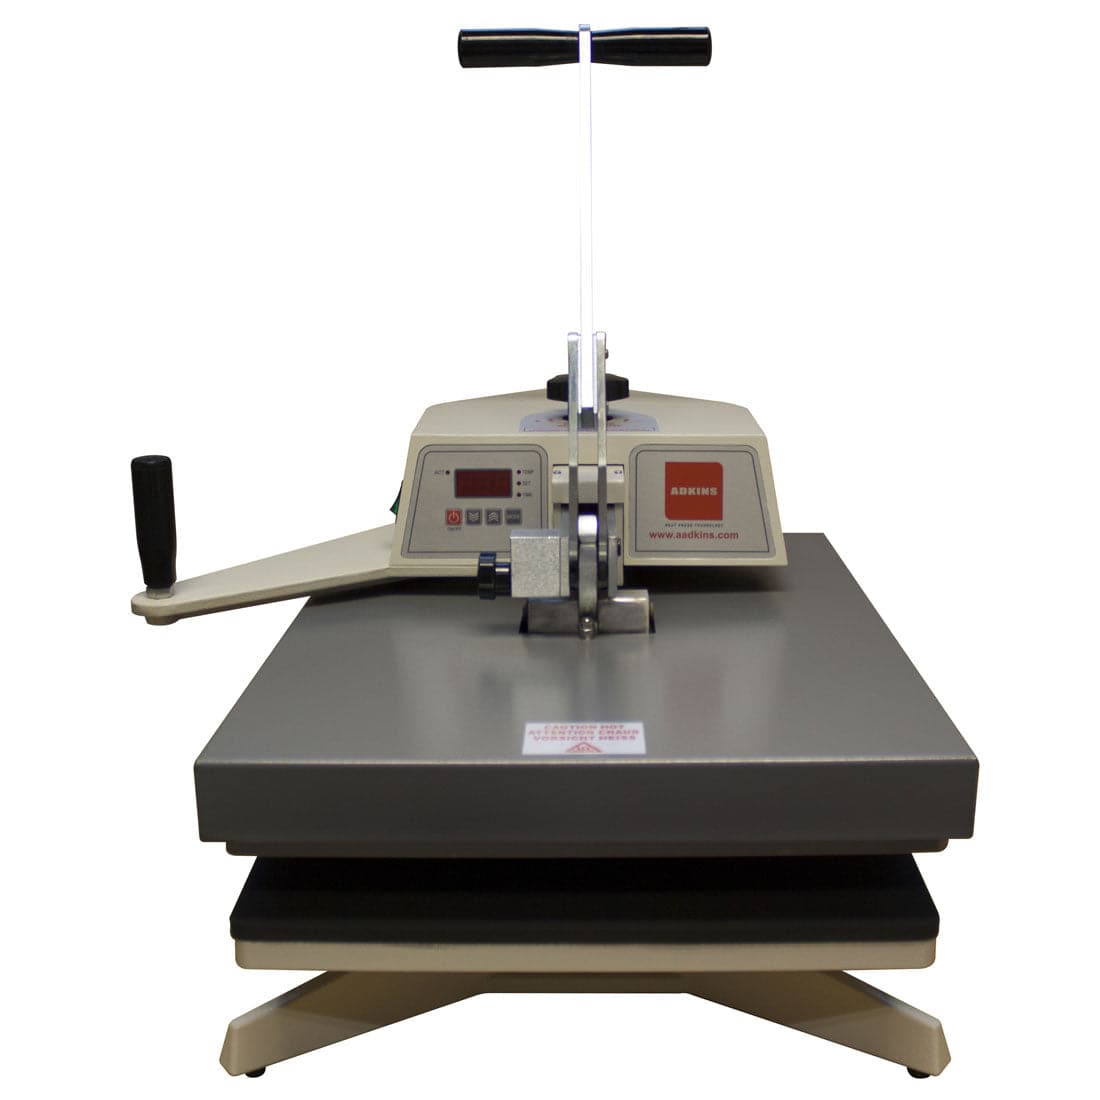
Entry-Level Manual Clamshells
Manual operation with analog or basic digital temperature control suits low-volume production under 20 units daily. Operators control all pressing parameters directly, building technique understanding through hands-on experience.
Typical specifications:
- Platen sizes: 9" x 12" to 15" x 15"
- Manual opening and closing
- Analog dial or basic digital temperature control
- Manual pressure adjustment
- Time range: 0-999 seconds
Best applications: Learning sublimation, testing business viability, small craft production, schools and education.
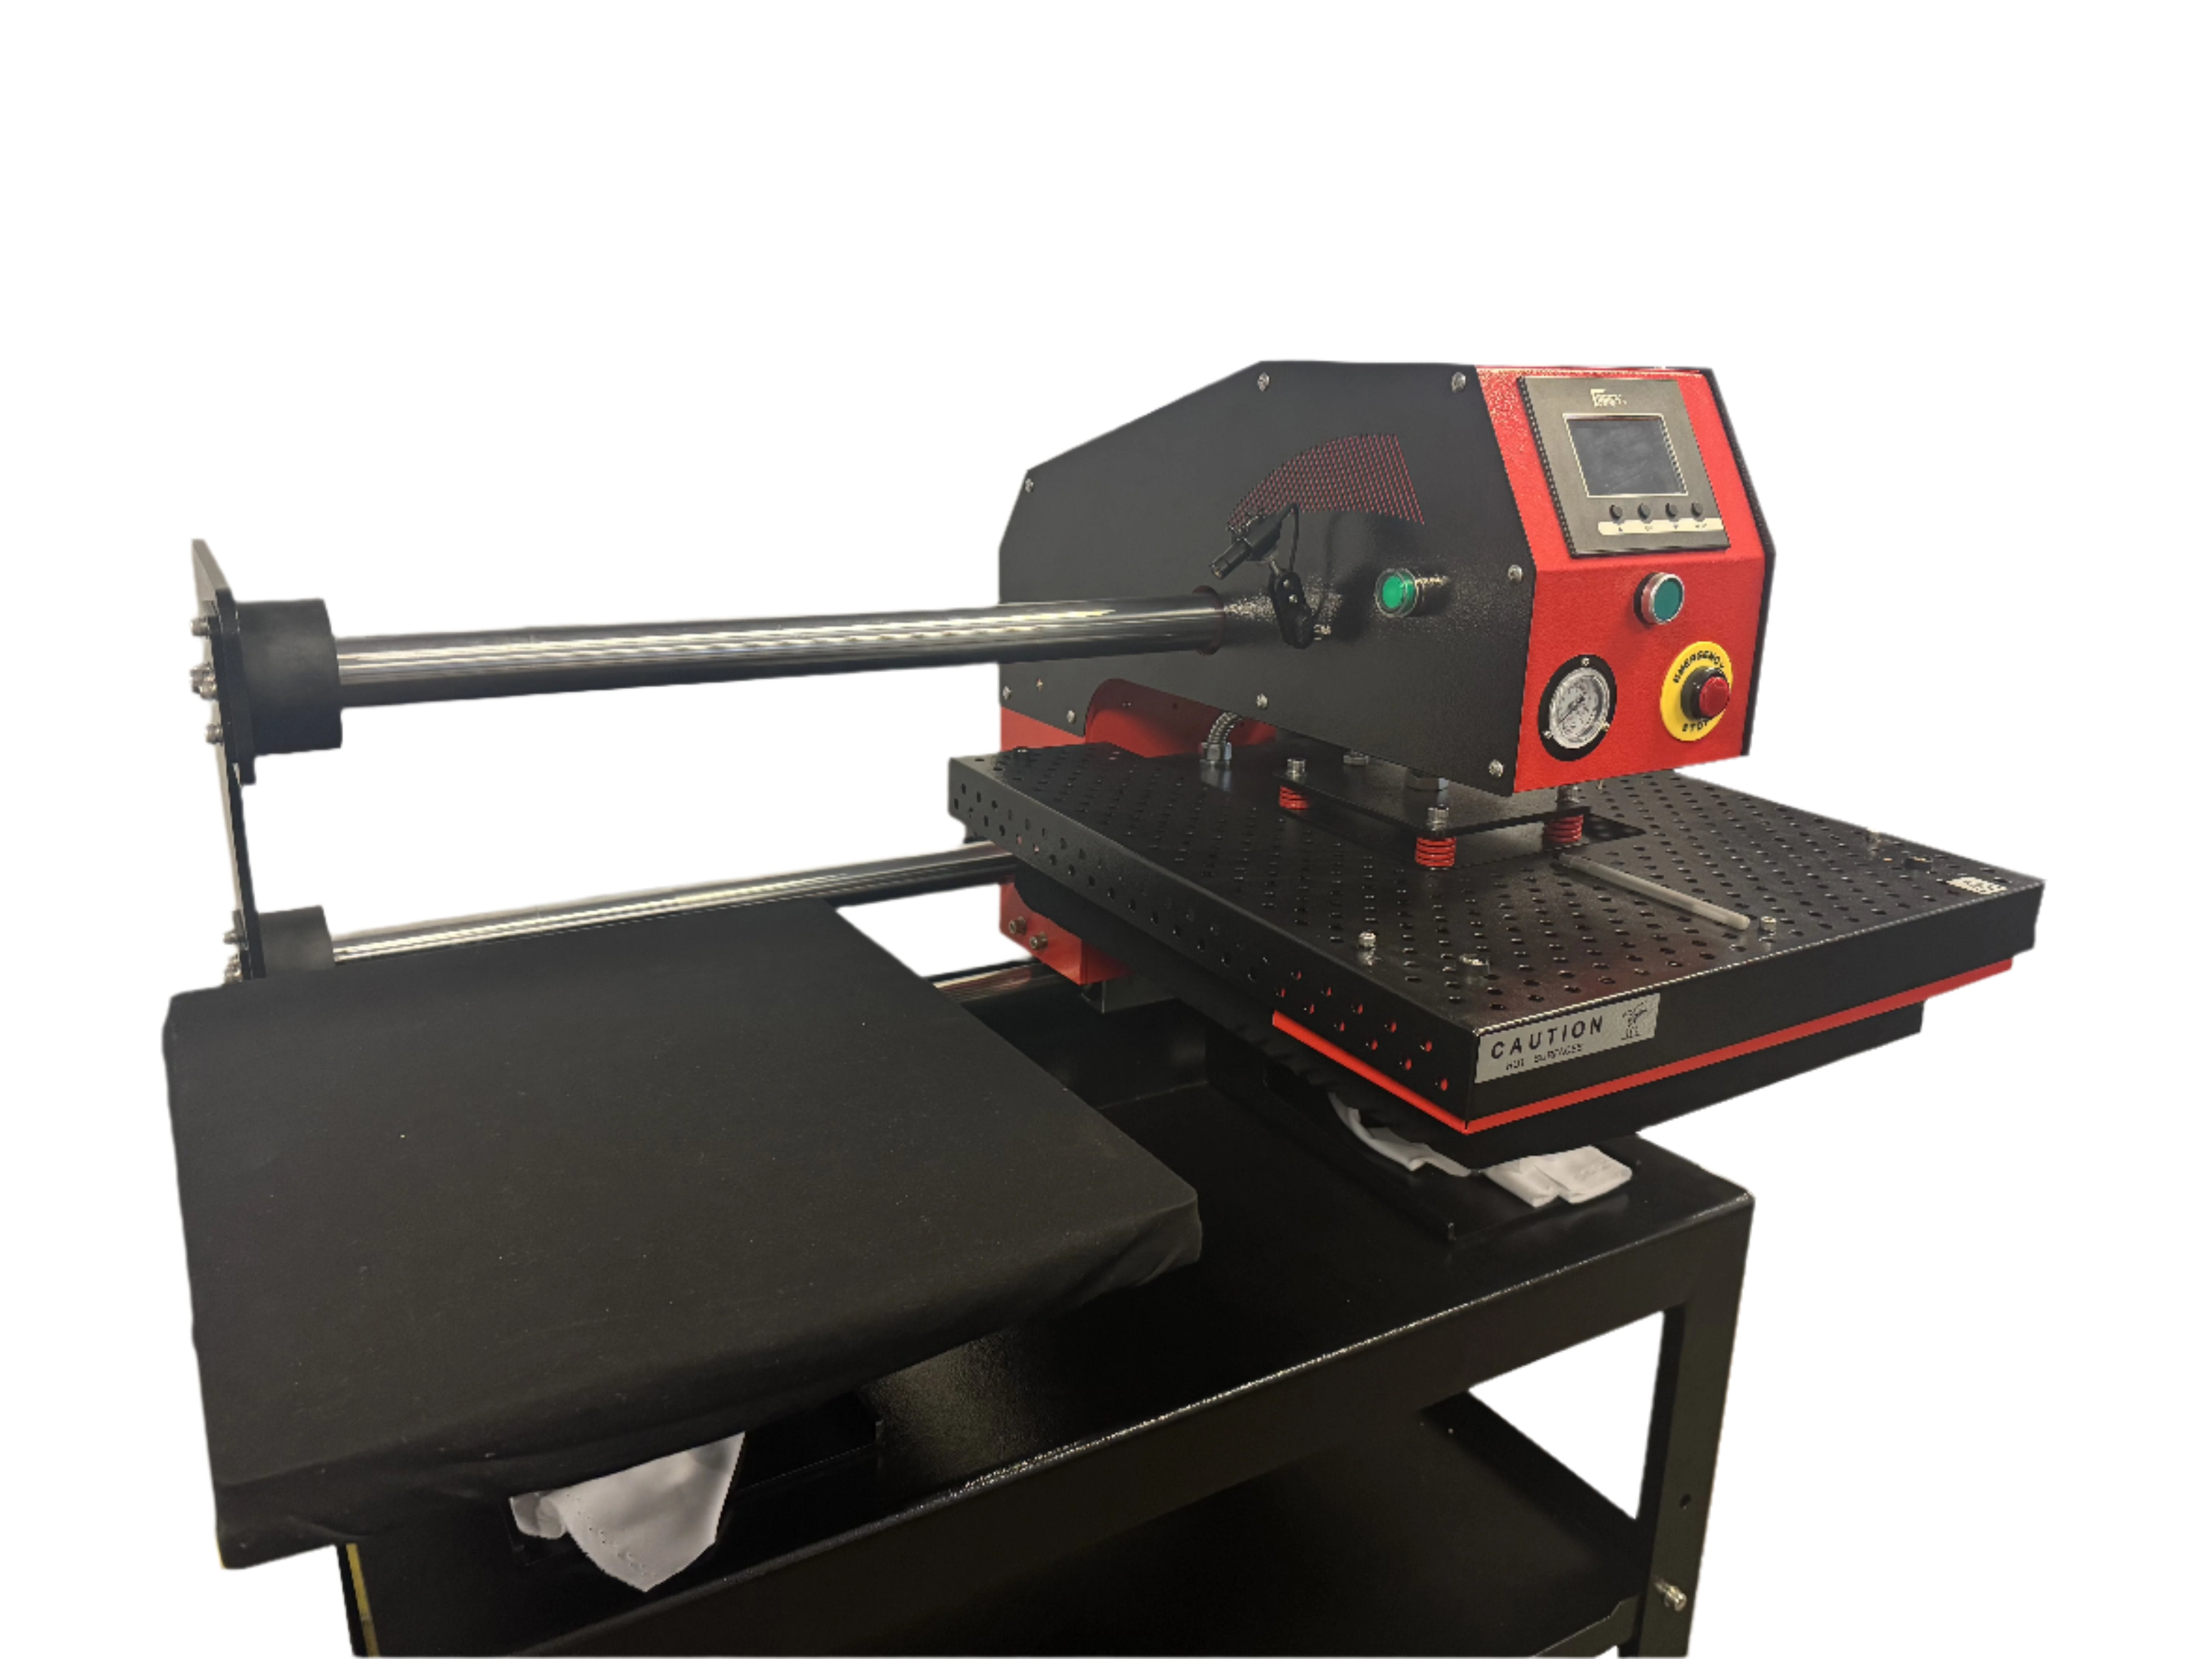
Auto-Release Clamshells for Production
Automatic opening eliminates operator fatigue while maintaining compact footprint. Digital controllers provide precise temperature and time settings. These models handle 30-75 units daily efficiently.
Featured models:
- Joto Auto Release ClamShell Heat Press 15" x 15" - Compact size for youth apparel and small format items
- Joto Auto Release ClamShell Heat Press 16" x 20" - Full-size capacity for adult garments and large format transfers
Typical specifications:
- Platen sizes: 15" x 15" to 16" x 20"
- Spring or pneumatic auto-release
- Digital PID temperature control (±5°F accuracy)
- Calibrated pressure adjustment
- Audible countdown alerts
- Exchangeable lower platens
Best applications: Active hobby production, part-time businesses, school spirit wear, small custom apparel shops.
Drawer-Style Clamshells
Drawer-style designs combine clamshell vertical opening with sliding lower platen. The drawer pulls out for safe substrate positioning away from the heat source, then slides under the upper platen for pressing.
Operational advantages:
- Complete heat separation during substrate loading
- Reduced burn risk compared to standard clamshells
- Compact footprint with improved ergonomics
- Easier positioning of complex garments
Best applications: Workshops with limited ventilation, environments where safety protocols prioritize burn prevention, operations with frequent operator rotation.
Frequently Asked Questions
How long does a clamshell heat press take to heat up?
Quality clamshell presses reach 400°F operating temperature in 8-12 minutes from cold start. Allow an additional 5-8 minutes heat soak after reaching set temperature before pressing production items. This stabilization ensures temperature readings reflect actual platen surface temperature rather than just heating element temperature.
Can I press thick hoodies or items with zippers on a clamshell press?
Clamshells handle hoodies without zippers or dimensional elements effectively. Items with zippers, buttons, or thick seams require careful positioning to avoid damage from direct platen contact. For frequent thick garment pressing, swing-away designs provide safer operation by separating heat from the work area during positioning.
What causes my transfers to look perfect initially but fade after washing?
Weak bonding from insufficient temperature, pressure, or time causes wash-out failures. Verify actual platen temperature with infrared thermometer rather than trusting controller display alone. Increase dwell time by 10-second increments and test wash durability on samples before production runs. Pre-press fabrics to remove moisture that prevents proper adhesion.
How do I know if pressure is set correctly on my clamshell press?
Perform paper contact test by closing the press on plain paper and examining the contact marks. Even pressure shows consistent marking across the entire sheet. Adjust pressure mechanism until contact appears uniform. Light or missing marks indicate insufficient pressure in those areas. Test on scrap substrates before pressing production transfers.
Why do my transfers show darker centers and lighter edges?
Temperature variance across the platen surface or uneven pressure distribution causes this pattern. Measure platen temperature at center, edge, and corner using an infrared thermometer. Variance exceeding ±10°F requires controller calibration or element inspection. Verify even pressure using contact paper testing. Ensure substrates lie completely flat without wrinkles creating high spots.
Is it safe to leave my clamshell heat press plugged in when not in use?
Unplug heat presses when not in use. While modern controllers include auto-shutoff features, unplugging eliminates fire risk from controller failure or power surges. This also prevents accidental activation if buttons are pressed during cleaning or maintenance.
Can I use one clamshell press for both sublimation and heat transfer vinyl?
Yes, but maintain separate setting documentation for each application. Sublimation requires 385-400°F for 45-60 seconds. HTV needs 310-330°F for 10-15 seconds. Clean the platen thoroughly between material types to prevent cross-contamination. Never apply sublimation temperatures to vinyl or vice versa without resetting parameters.
Conclusion: Mastering Clamshell Operation
Clamshell heat press mastery requires understanding the interaction between temperature, pressure, and time variables. These parameters function as a system where improper setting of any single element compromises results regardless of the others being correct.
Success depends on systematic workflow that eliminates variables between presses. Set temperature, verify with instrument readings, calibrate pressure using objective tests, and follow manufacturer timing specifications. Document successful parameters for different substrate and transfer combinations to build repeatable processes.
The compact footprint and straightforward operation that makes clamshells ideal for space-limited workshops also requires attention to safe practices. Heat platen positioning directly over the work surface demands deliberate hand placement and awareness of burn hazards during substrate loading.
For US operations, verify equipment operates within 120V electrical specifications. Maintain dedicated circuits for heat press power to prevent breaker trips during production runs.
Regular maintenance including daily cleaning, weekly calibration checks, and monthly temperature verification prevents quality degradation over time. Equipment that produces consistent results on day one should maintain that performance through thousands of pressing cycles with proper care.
Master these fundamentals and clamshell heat presses deliver professional transfer results across sublimation, vinyl, and inkjet applications efficiently and reliably.